Microsoft Word Addon (for Windows)
In the context of this documentation “Valispace“ will be called “Requirements and Systems Portal“.
The Microsoft Word Addon lets you insert Valis with values, budget tables, requirements, analyses (tables and images), and charts from your Requirements and Systems Portal into your document as a field and lets you refresh them with the newest values at any time.
ValispaceWordPluginSetup v2.0.20.zip
Sidebar Panel
Once you log in to the Word plugin, you can choose the project in the models. In the sidebar, you can look for Blocks, Valis, Analyses, and Requirements in the tabs and add them to the document by clicking on Add to Document. Once the user adds a Vali or requirements, it is possible to add additional fields. For example, when a user adds a Vali, the available additional information are unique names, values, formulas, etc.
With Refresh project in the top ribbon, all values from the currently selected project are refreshed with the newest values from the Requirements and Systems Portal. In case the document is using information from different projects, you can use Refresh all to update all your values within the document.

When you give your Word document to another person who does not have the plugin or access to your Requirements and Systems Portal, all values will still be available in the document.
The plugin is compatible with:
Word 2010 [Windows - Desktop]
Word 2013 [Windows - Desktop]
Word 2016 [Windows - Desktop]
Word 2019 [Windows - Desktop]
Word 365 [Windows - Desktop]
Valis/System Design Module
In the System Design Module, you can import the Valis from your database to the Word document. You can simply select the “Vali” and click “Add to the document”. In case you would like to add additional information such as name and formula, you can click the Vali (1) on the Word page to get the settings sidebar of the Vali (2).
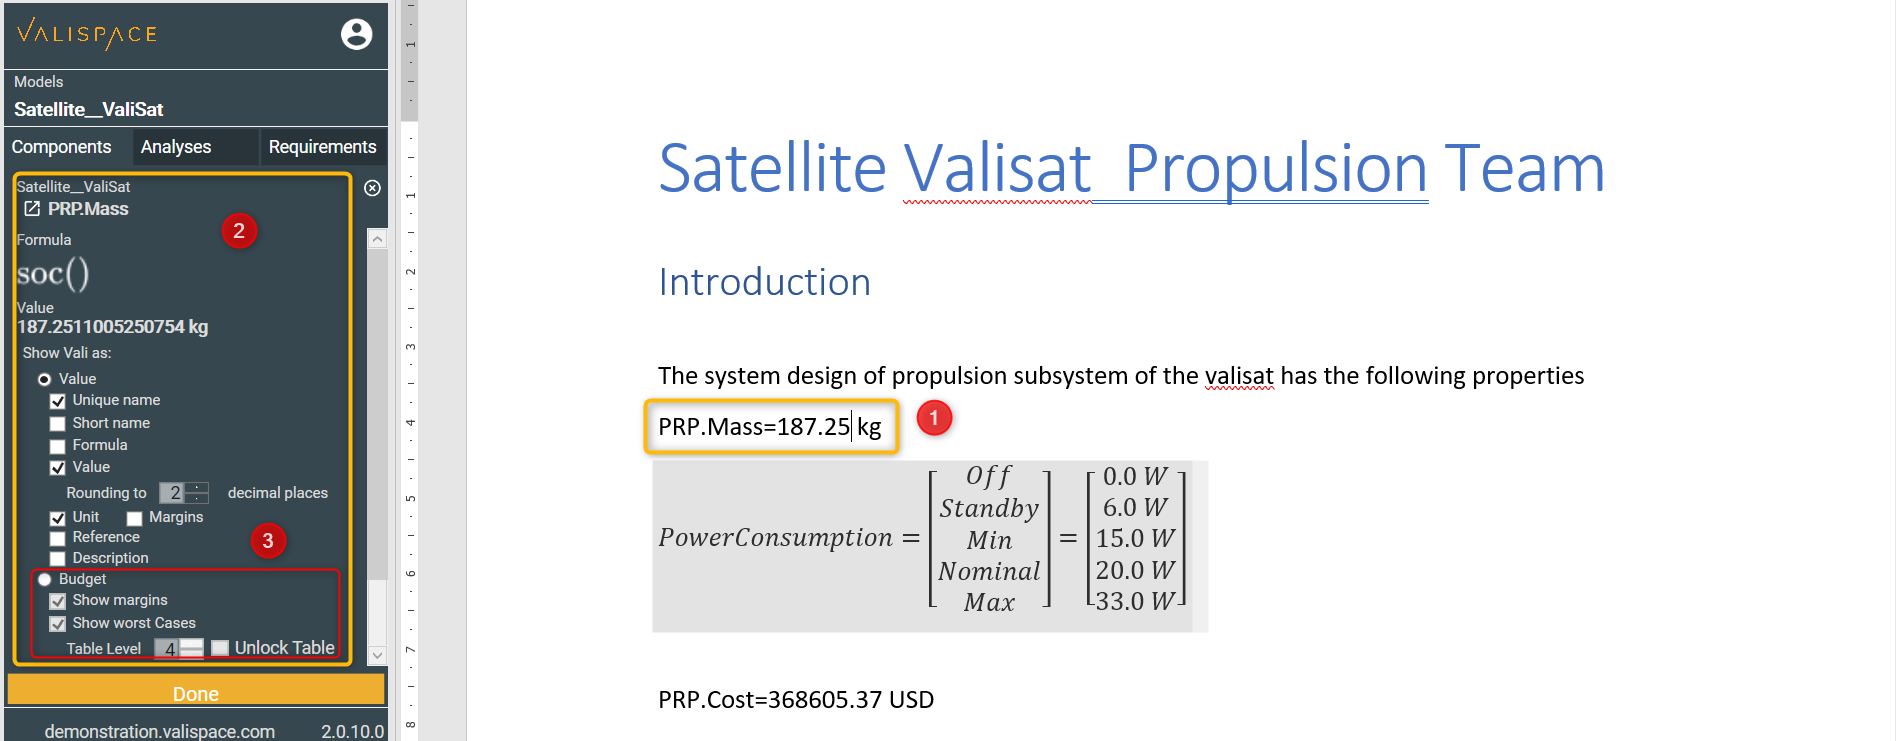
The user can import the budget table of the soc() function valis by clicking on the budget (3). Also they can choose what values should be added to the table. Eg. Margins or worst case values. Additionally, they can choose the table level as well.
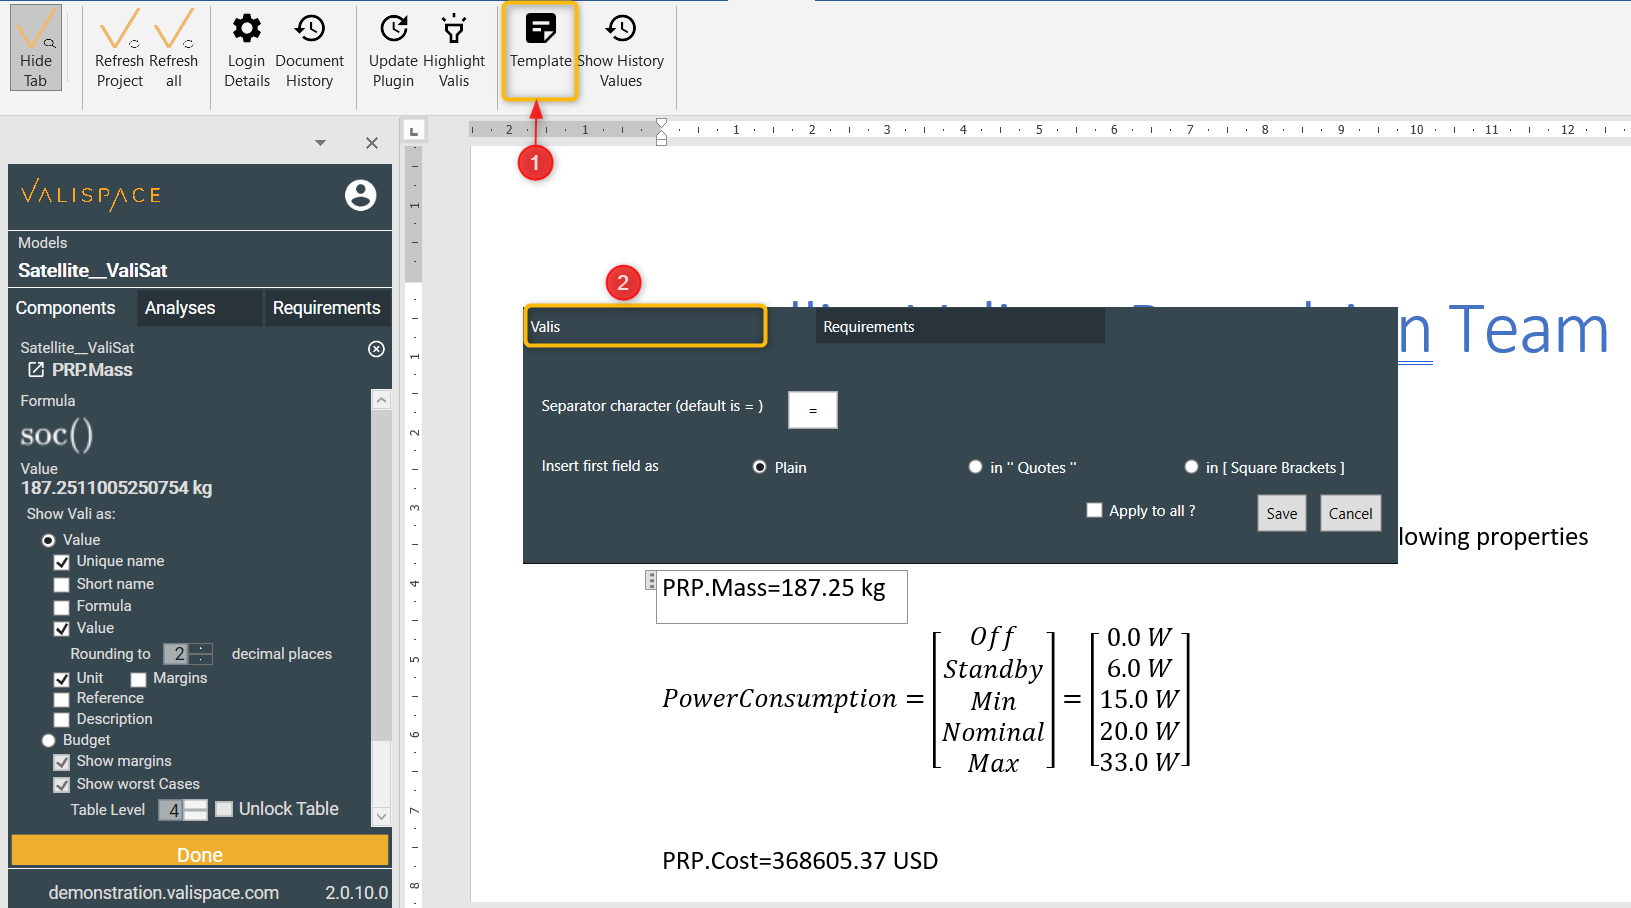
While importing the values and if the user wants to have some sort of separator between the properties of Valis, they can add separators in the template. To add the default separator to your document, follow the steps mentioned below
Click “template” on the side panel of the word document (1).
Select “Valis” on the popup (2).
Enter the separator character and save the template.
Analyses
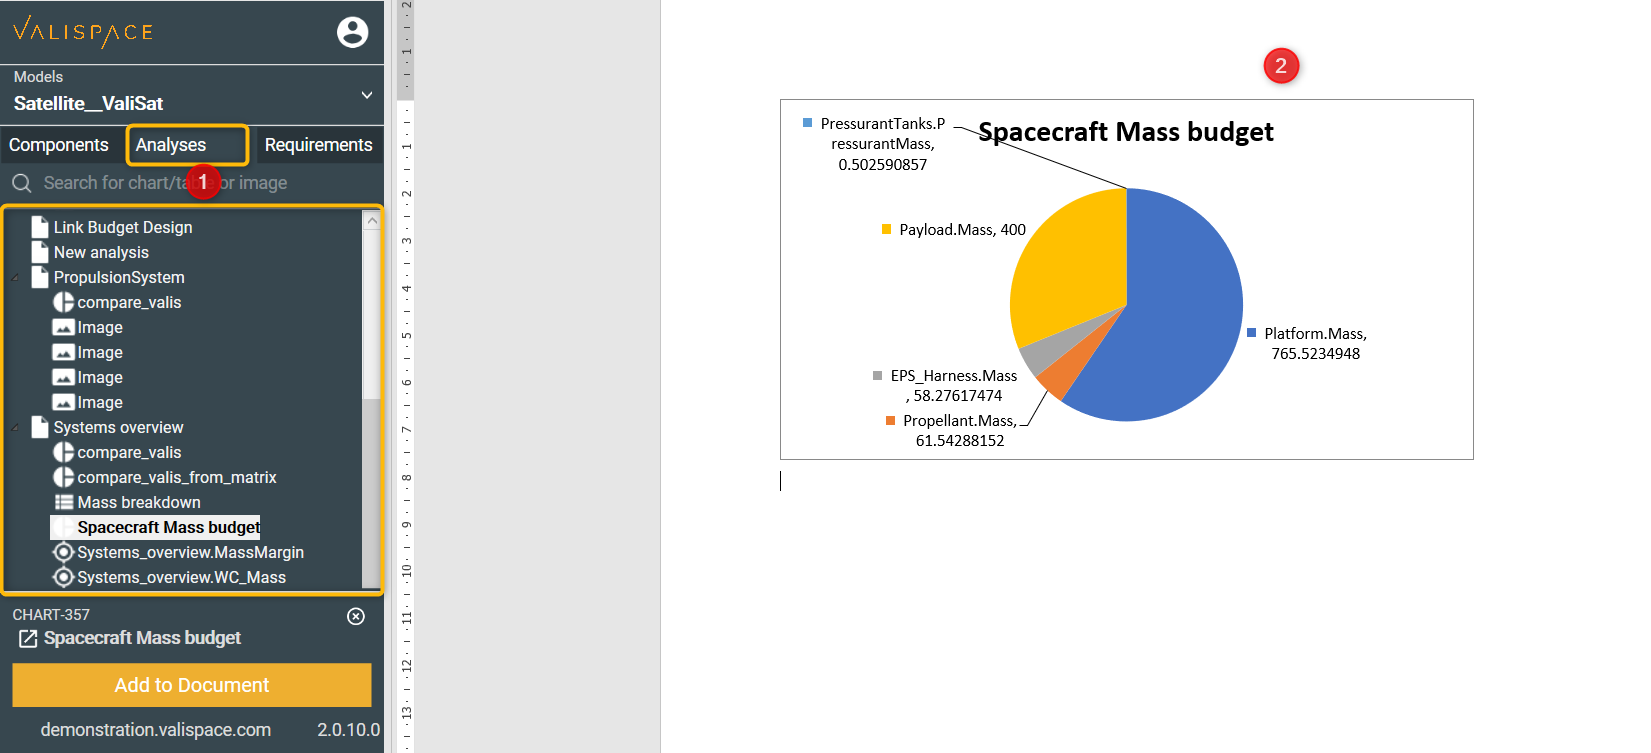
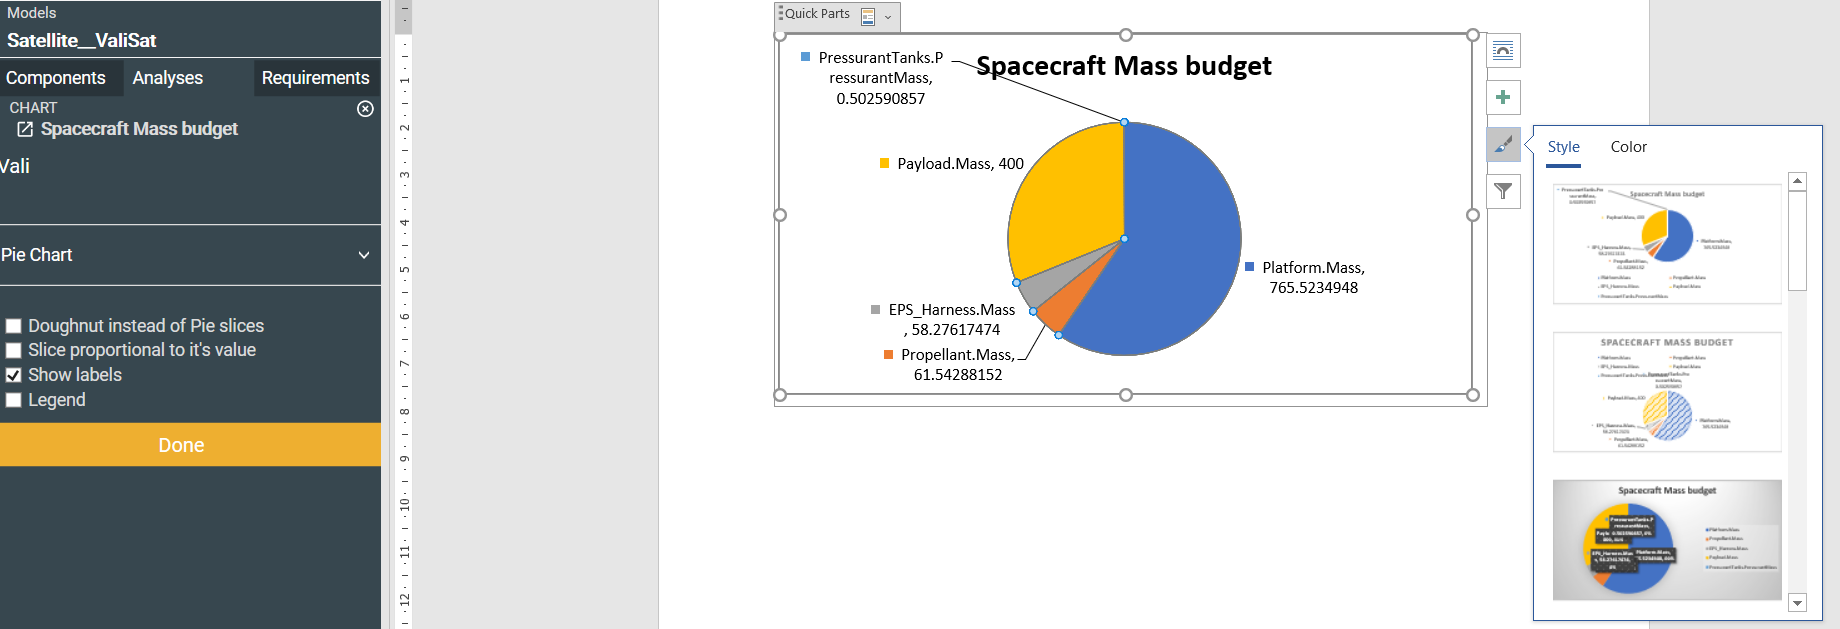
It is possible to import the budget tables, graphs, and images within your Analyses Module directly into the Word document. For example, the below image shows the available tables/graphs/images on the Satellite_Valisat project (1) and the imported spacecraft mass budget on the word document (2).
When a graph is imported into the Word document, the user can modify the legend, colour, font, and other properties by clicking on the imported graph as shown below:
Requirements
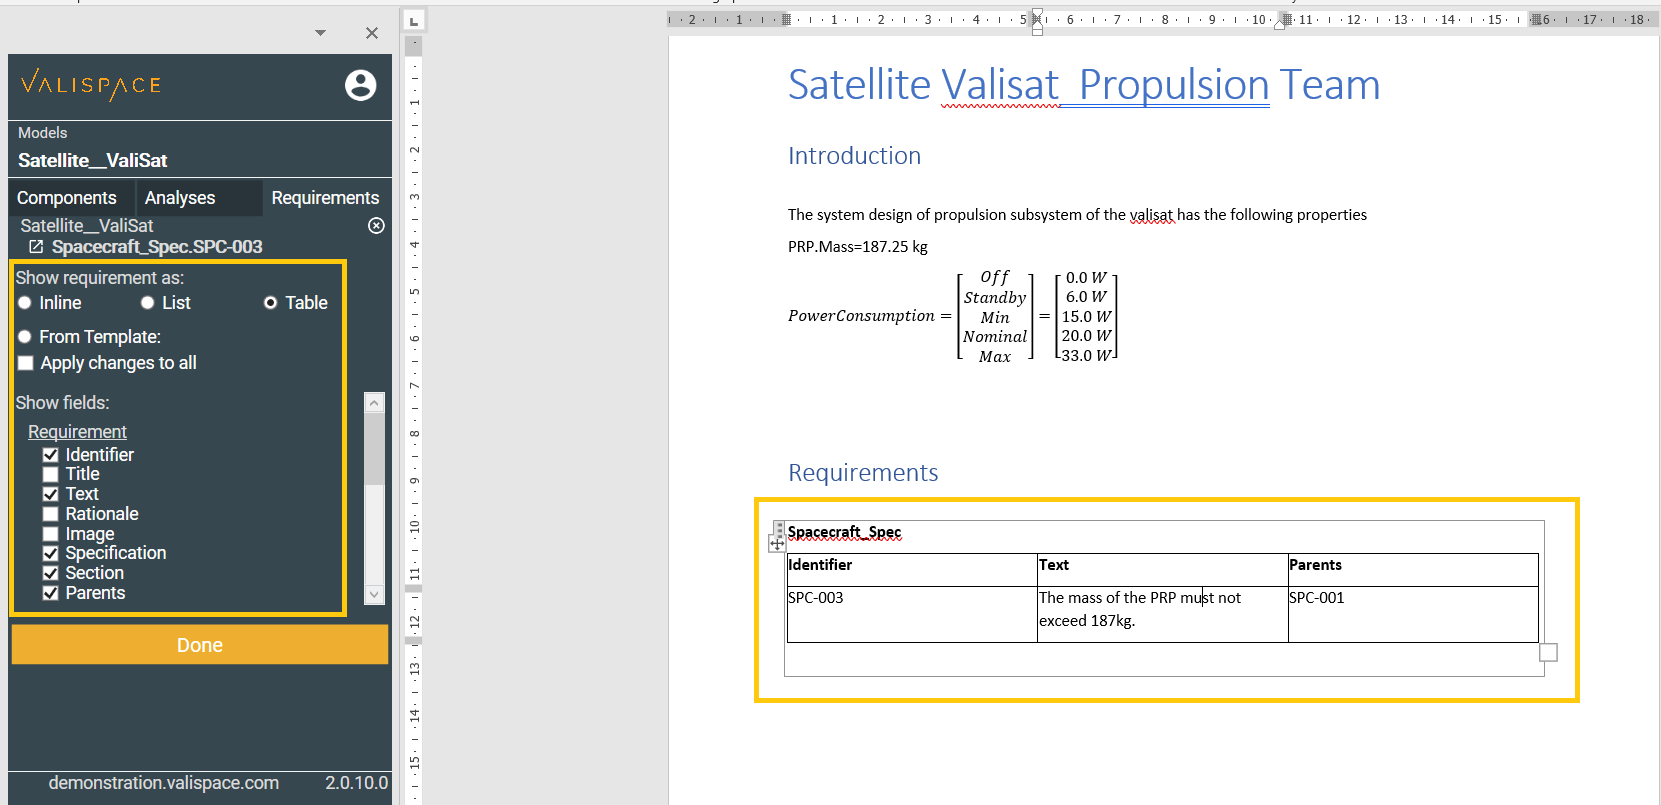
In the requirements section of the Word Plugin, it is possible to insert a single requirement, a specification or section as an inline in the text, as a list, as a table, or formatted from a custom template.
When the specification, section, or requirement is inserted as an inline or list or table, the Word plugin adds only the Identifier and the text columns. In case the user wants additional fields, the user should click the imported requirements to get the settings screen. Within the settings screen, you can tick/untick the columns fields that you would like to be imported.
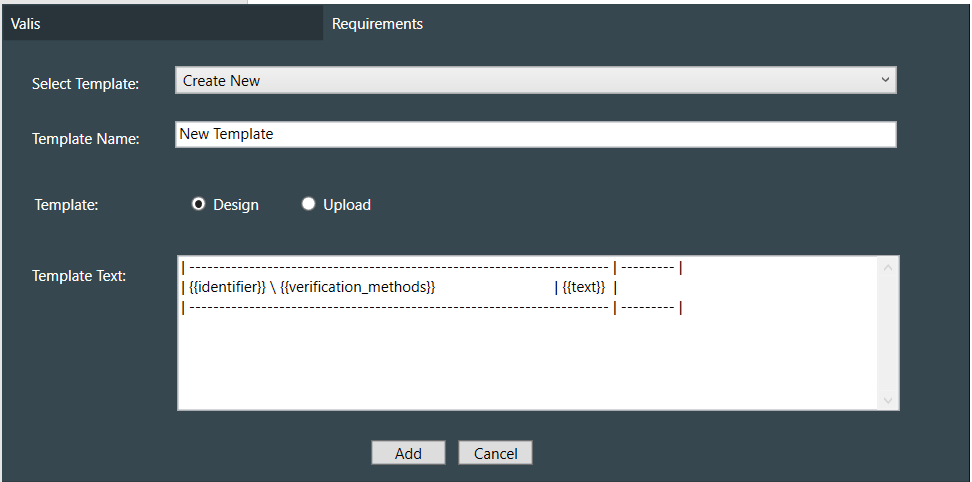
In the custom templates, which you can access on the top ribbon, you can write and create new templates based on your needs, or also you can upload a Word document with your template. For example, you can create a table with a design template like this:
You can create your requirement table template using upload. In case you are uploading the Word document template, please follow the following guidelines. The template’s example can be downloaded below, along with the plugin’s latest version.
Make your template in a single table element on the first line of the document. The first row should contain column identifiers/headers and on the second row, any allowed fields can be added.
You can add as many columns for the template as you want, as long as you keep it in one single table.
Tip: you can format the tables (with or without borders) and the fonts, size, and colour as per your documentation process.
Some samples of the template are as follows:
ID | Requirement Text | Parents | Children |
{{identifier}} | {{text}} | {{parents}} | {{children}} |
Parent Req | ID | Requirement Text and Rationale | Tags |
{{parents}} | {{identifier}} | Text: {{text}} Rationale: {{comments}} | {{tags}} |
The fields that are currently available that can be inserted into a template are:
{{identifier}} - Requirement Identifier
{{title}} - Requirement Tittle
{{text}} - Requirement Text
{{rationale}} – The Rationale associated to this Requirement
{{image}} – The images attached to this requirement
{{specification}} - Specification that contains this requirement
{{section}} - Section that contains this requirement
{{parents}} - Requirements’ Parents IDs
{{children}} - Requirements’ Children IDs
{{tags}} - Requirements’ Tags
{{created}} - Creation Date
{{updated}} - Last Update Date
{{verification_methods}} - Requirements’ Verification Methods
{{verification_methods_abbreviations}} - Requirements’ Verification Methods Abbreviations
{{component}} - Requirements’ Verification Methods Components
{{closeout_reference}}
{{status}} - Requirements’ Verification Methods
{{verification_comments}} - Requirements’ Verification Methods
{{compliance}} - Requirements’ compliance statement(s)
{{compliance_comment}} - Requirements’ Verification Methods
Plugin Version
Current plugin version: 2.0.20 - this version is tested with v1.48 and it is compatible with lower versions as well. If you are using an older version of the Requirements and Systems Portal please download the previous version of the Word plugin.
Download and installation
Requirements Table Template (4) (2).docx v2.0.19 (2).zip
Install it by clicking the setup.exe file and following the instruction.
Windows might warn you that the setup file is not secure. It is however safe to run the installation anyway, by clicking "More Information" and then proceed with the setup.
Next time you open Word, you will see a dedicated tab at the top of your document. Fill in your user credentials in the Settings tab and log in to see your Blocks and Valis.
In case you would like to implement a Word plugin and some features that are required for your documentation process are missing or you think it would be useful to everyone, please feel free to send us your difficulties/suggestions/improvements to the Altium Support Page.