Adding Images to Requirements from URL and Files
Oftentimes, you may need to add an image to a requirement to better illustrate the requirement text. The Requirements and Systems Portal allows you to add images to individual requirements either by URL or by uploading a file.
Adding an image to a Requirement
The user can upload images in two different ways.
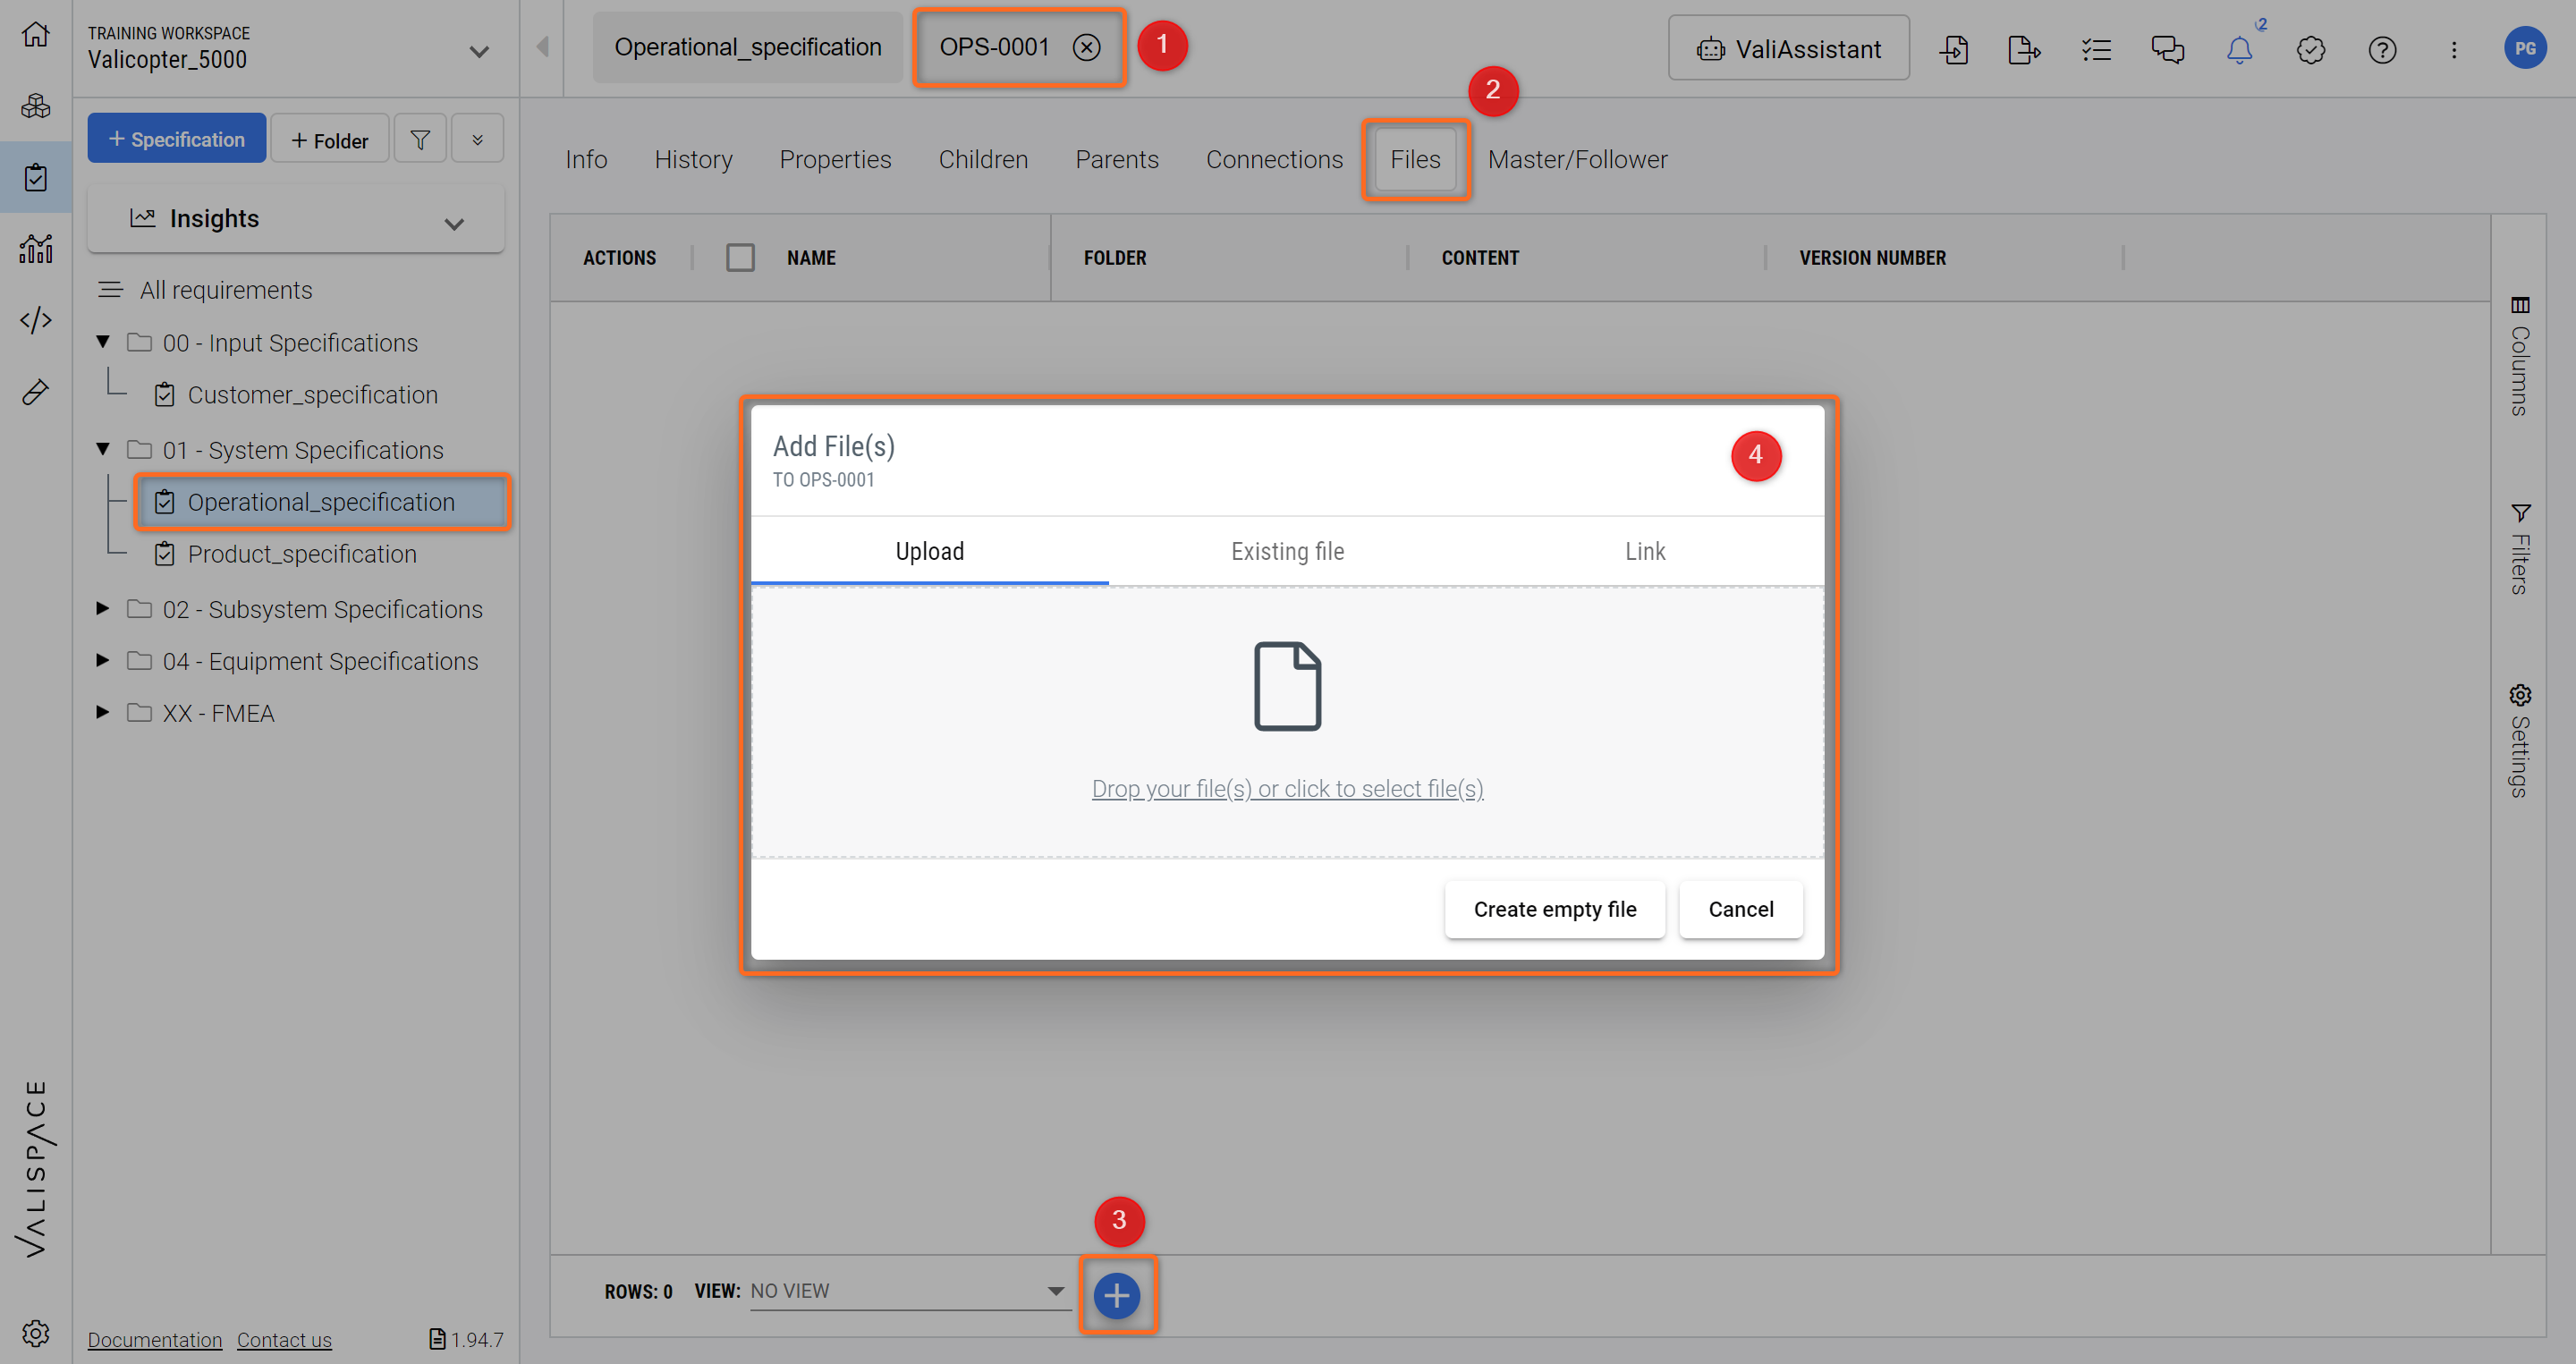
The easiest way to add images to your Requirements is by clicking on the requirement identifier in the Requirements table, which brings you into the details section of the requirement (1). Within this tab, click on the “Files” section (2), and afterwards on the “+“ icon (3), opening a popup window where you can add images or documents by drag and drop (4). Multiple images or Files can be added to one single Requirement.
Any Images or Files added to your Requirements or anywhere in the Requirements and Systems Portal will be stored in the File Management System under Settings (lower left-hand corner).
The Requirements and Systems Portal allows users to add different versions of files to one single Requirement. To do so, you can select the three dots of a File/Image (1) and click on “Upload New Version” (2) to upload an updated version:
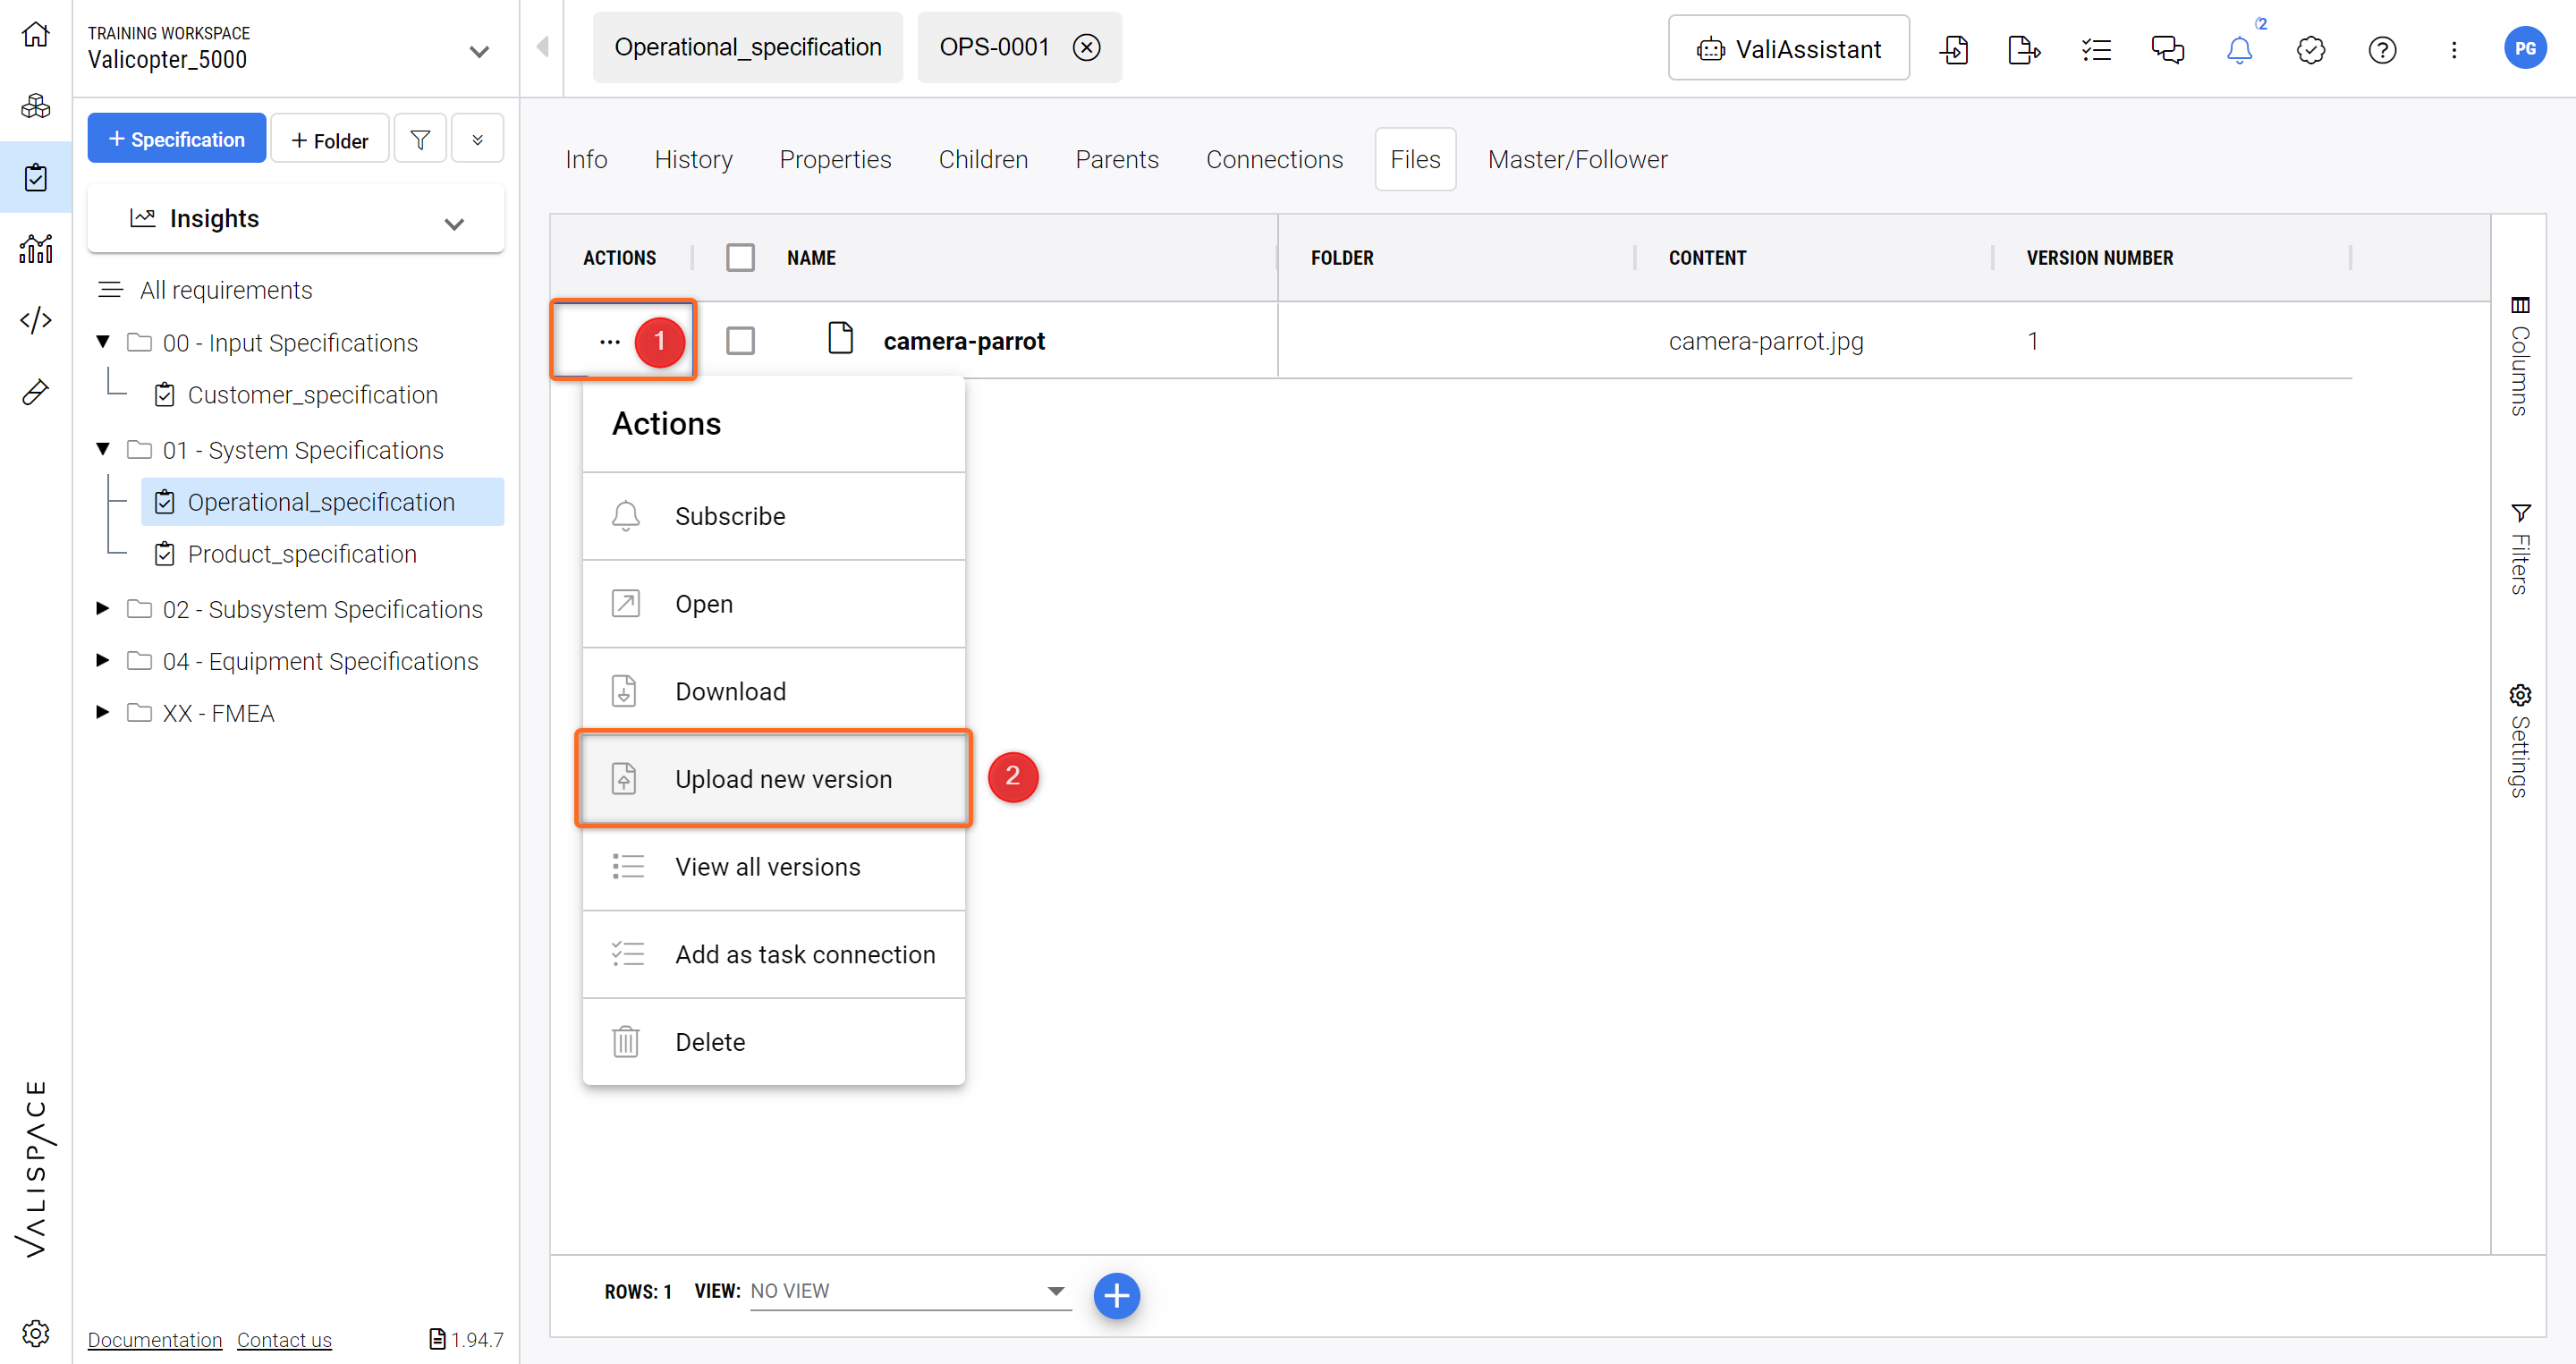
Versioning of Images/Files - Different Versions can be uploaded to the same Requirement.
Note that the files of the previous version will be saved as well in the files management system.
Another and more convenient method of adding images to a requirement is by enabling the “Image” column in the “Columns” and double-clicking into the cell will open up a pop-up box where the user can view and upload new images.
Adding Images - Adding Images to Requirements through the Image Column.