Adding Nodes to the Time Sequence
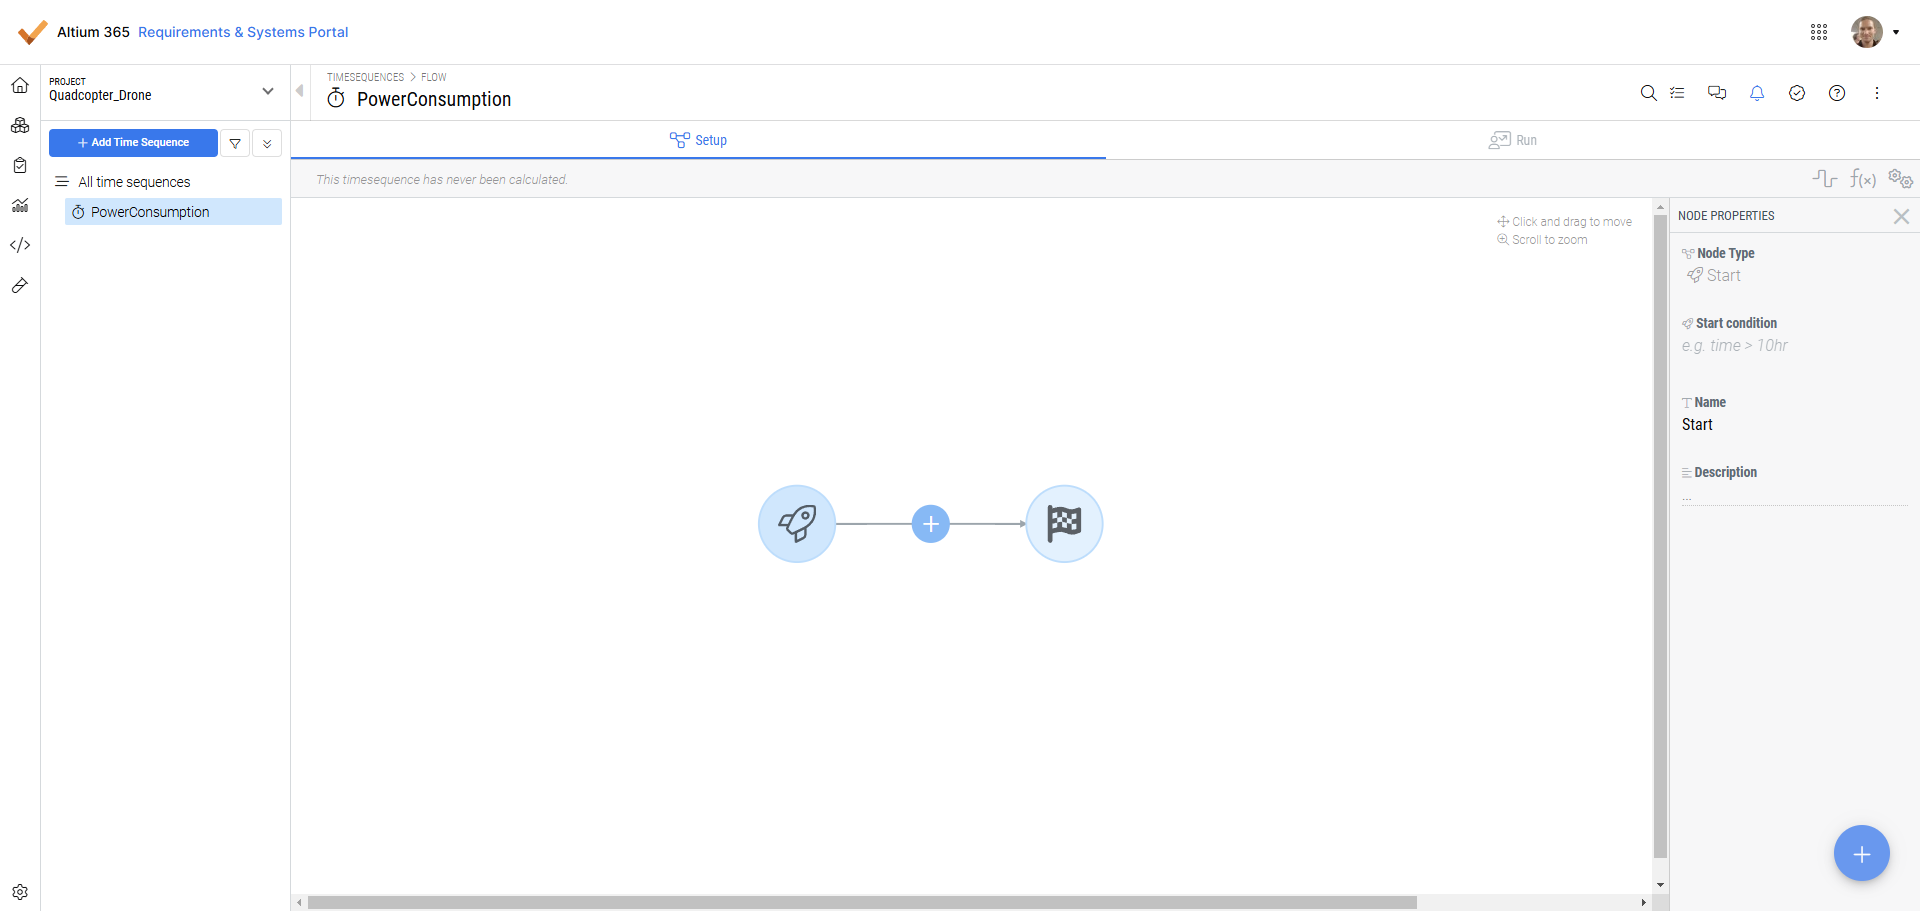
Once the modelists are added to the time sequence setup, the start and finish step of the time sequence is automatically created on the setup page as shown below:

Start and End nodes with properties tab
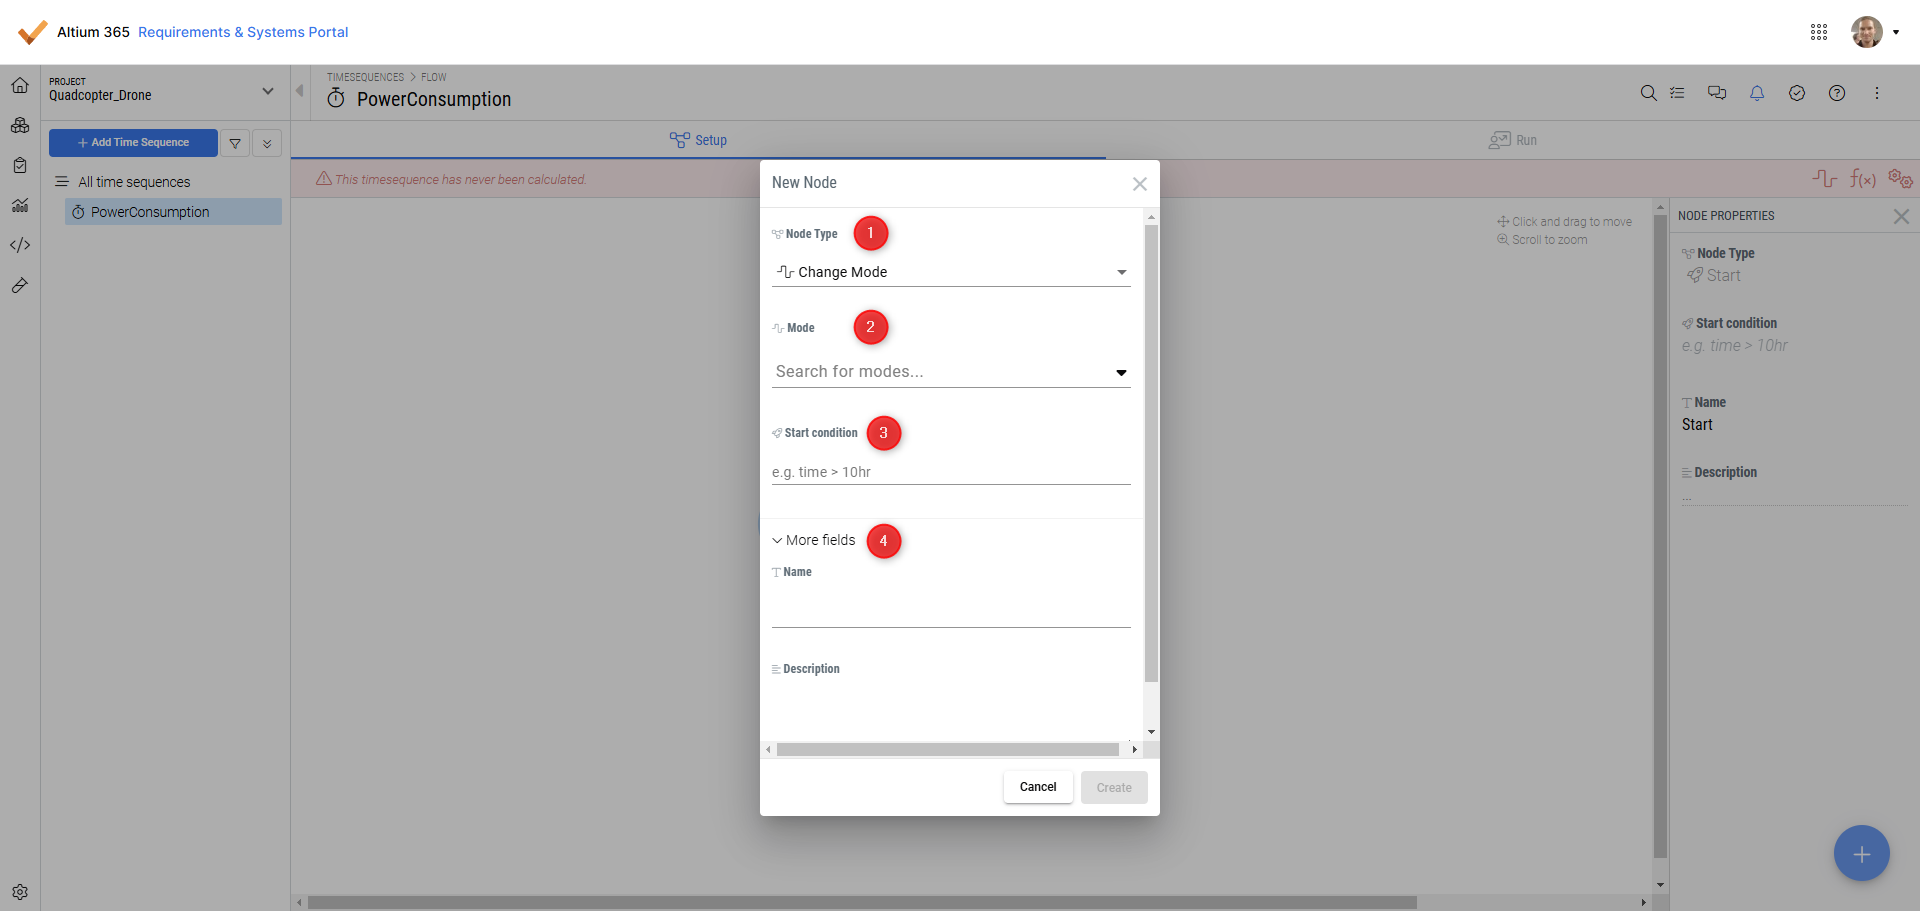
The blocks are called nodes within the Requirements and Systems Portal. The nodes can be a mode with time conditions, delays or formulas. Note that the start node is the initial mode that the user added while creating the modelists and the time condition starts from 0. The user can add nodes to the time sequence by clicking “+”. Once the “+” symbol is clicked, a new dialogue box opens up.

The first option to be available in the pop-up is “Node Type” (1). Within the node type, the user can change the method they want their node to change. Currently, we have the three following options:
Node Type | Explanation |
|---|---|
Change mode | Used when the user wants to change from one mode to another. In this case, the user needs to provide a time condition at which the modes are going to change. |
Formula | In this node type, the user can create a time sequence variable and provide a mathematical formula along with the time condition. |
Delay | When the user adds the delay function, the change of mode will have a delay in their time. In this case, the subsequent change mode doesn't need to have a time condition. |
The second option is to relate the mode which is changing to (2)
Users have to provide the start condition (3)
Users can add a custom name to a node and add a description to the node (4)
In this way, the user can create the scenario for the time sequence by creating multiple nodes. Note that currently in the Requirements and Systems Portal we can create the only sequence by events one by one. The parallel sequence of events is not available at the moment in the Requirements and Systems Portal.
.png)