Files and Pictures
The Requirements and Systems Portal provides you with an option to add files and pictures which allows you to add more detail to your project. Let’s go through them one by one.
Adding an Image to your Blocks
In Figure Adding an Image
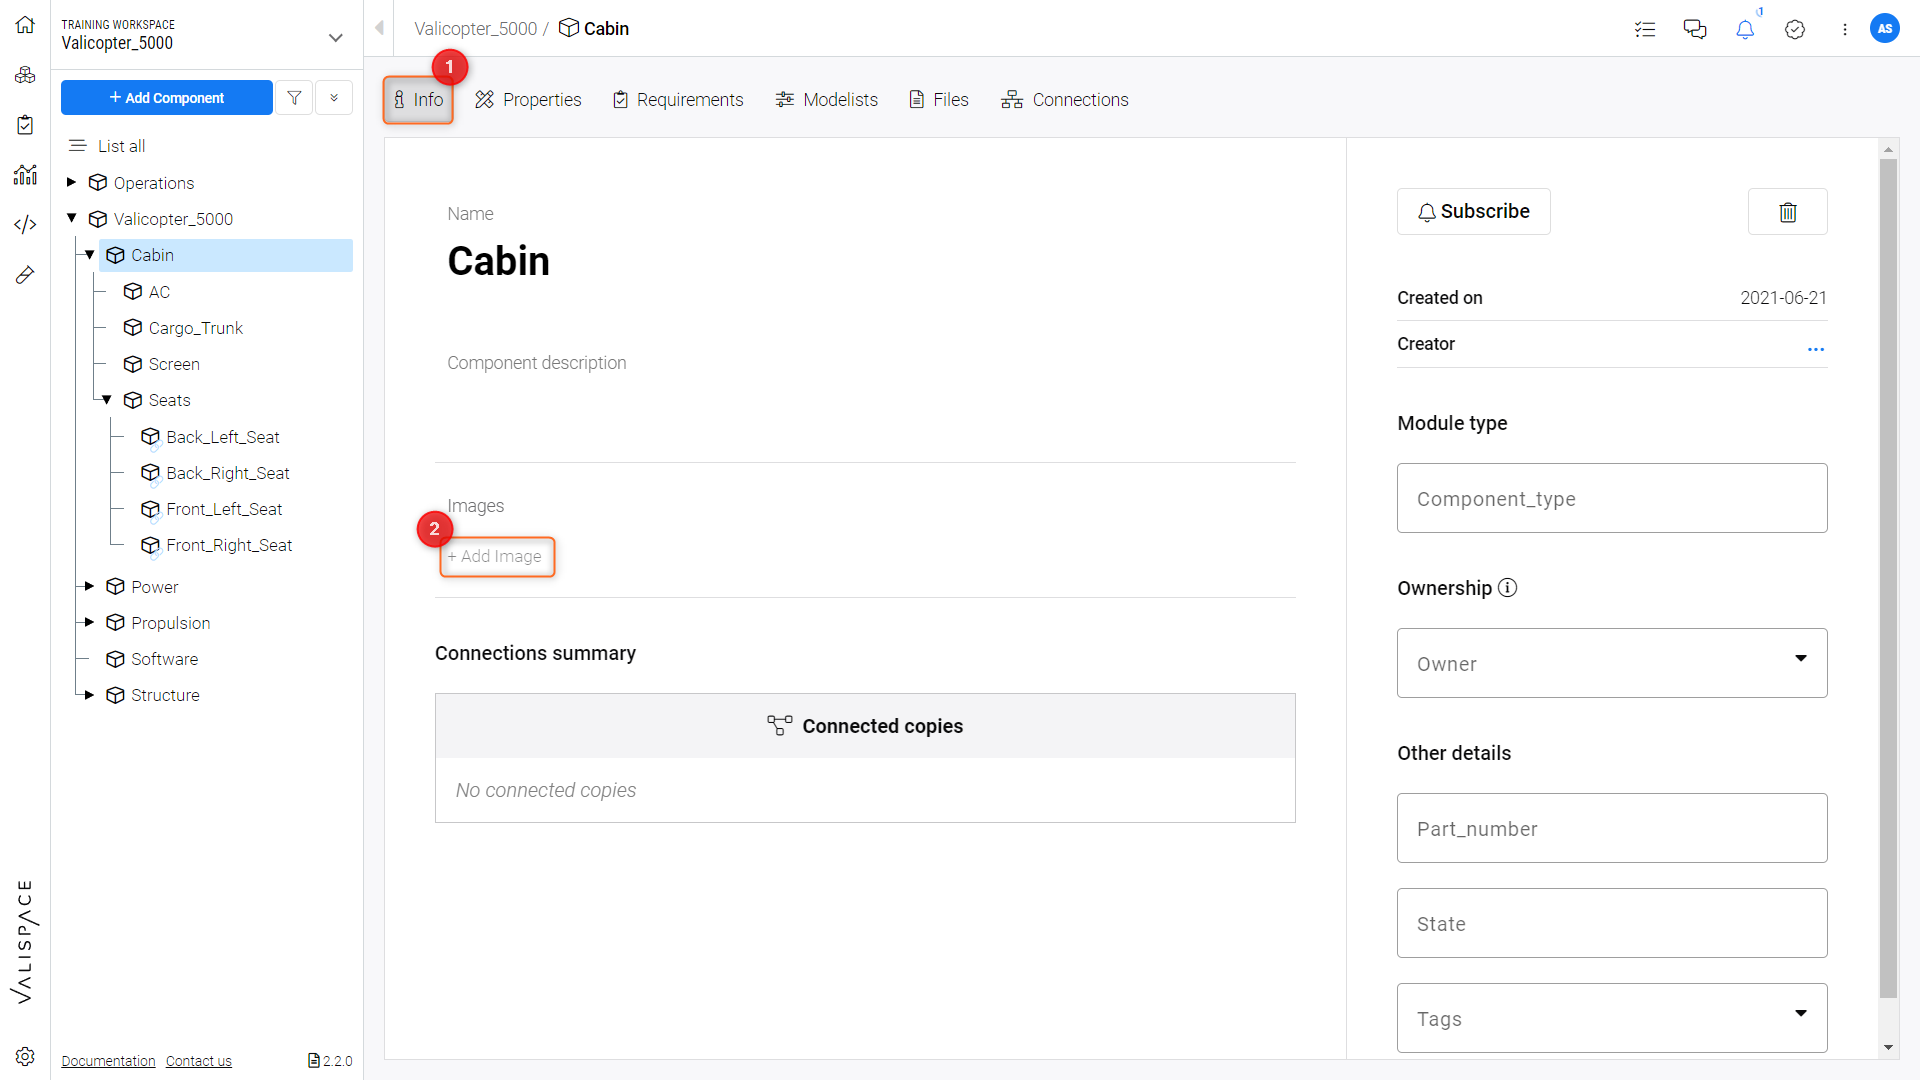
Select the Block that you wish to add a file to and go to the "Info" Tab (1)
Then click on the "Add Image" block (2) to upload a new picture
Adding an Image
You can then choose to drage and drop the file to the upload box or click on it to select it from your file explorer as in Figure Image Upload Box.
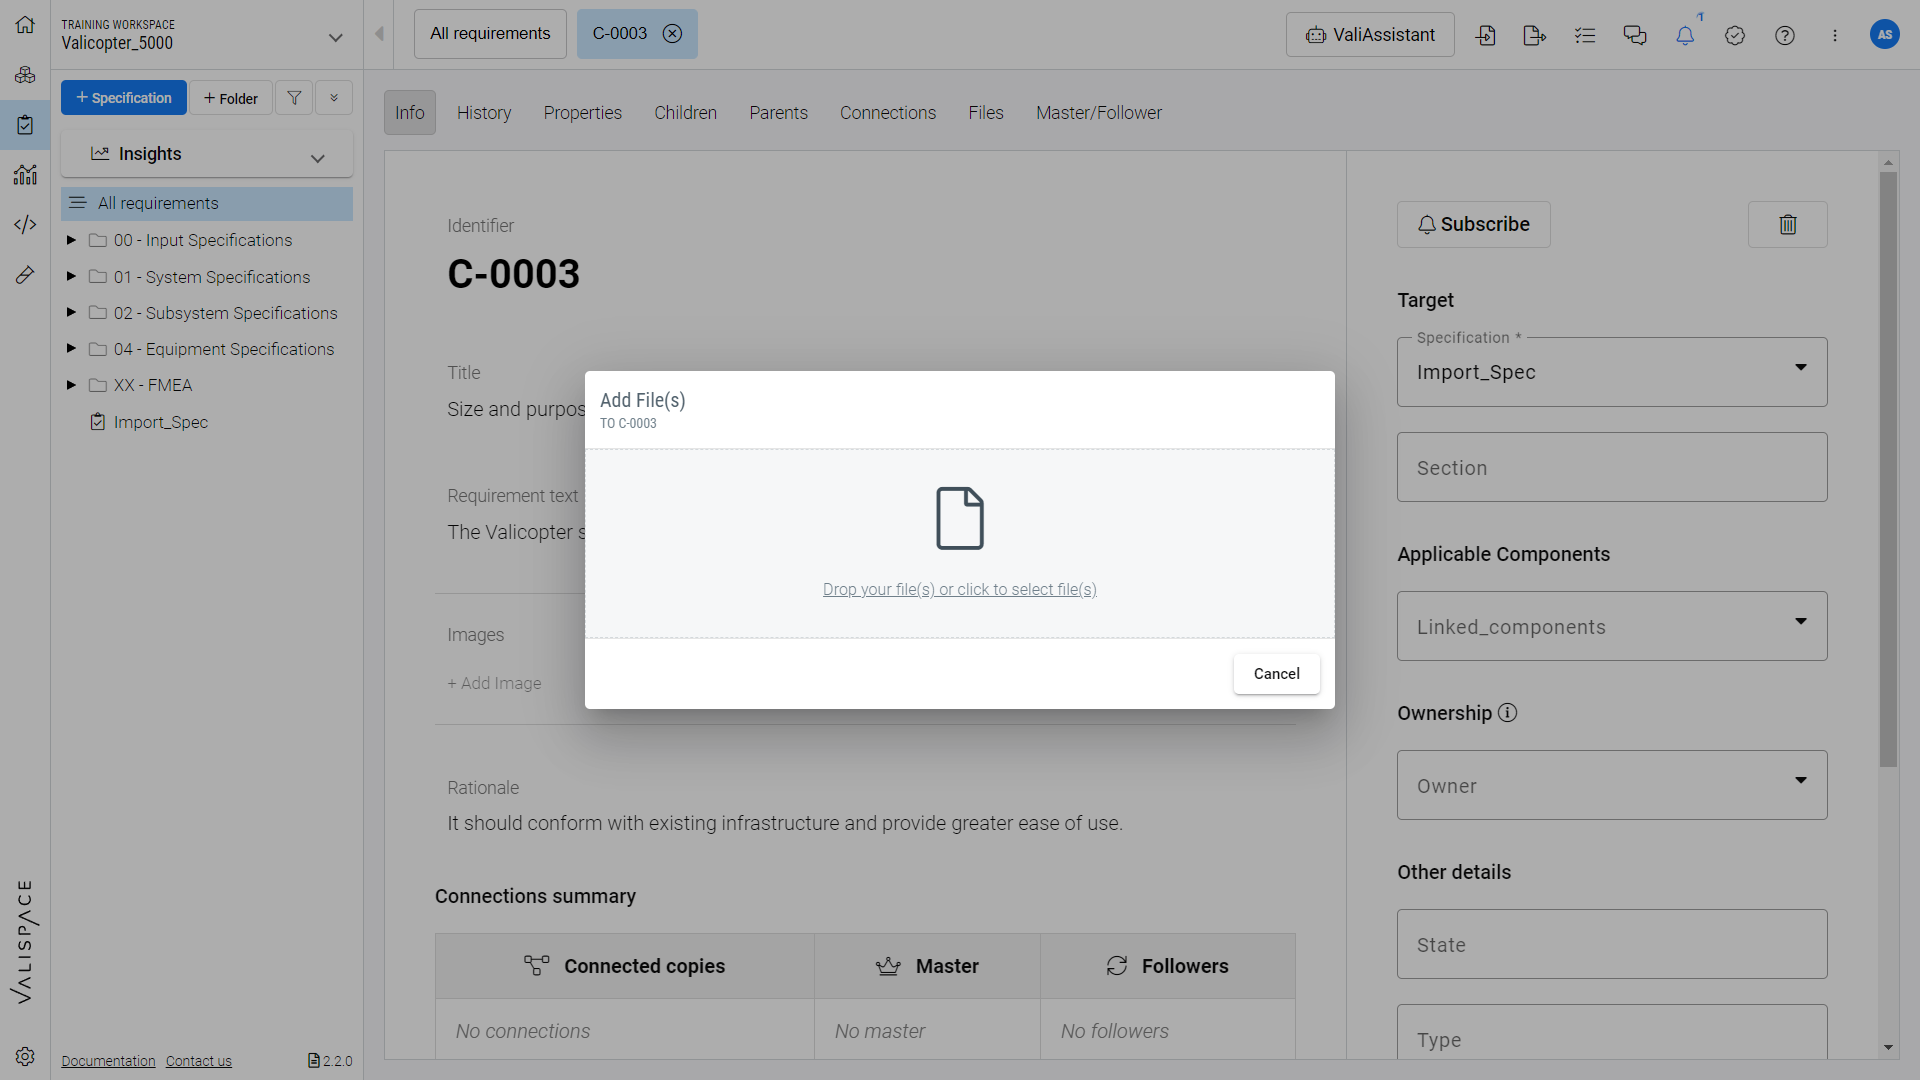
Image Upload Box
To edit or delete the picture, or add a new one to the image carousel, click on the buttons in the bottom-right corner of the image. Hover over the image to find these options as in Figure Image Carousel Options.
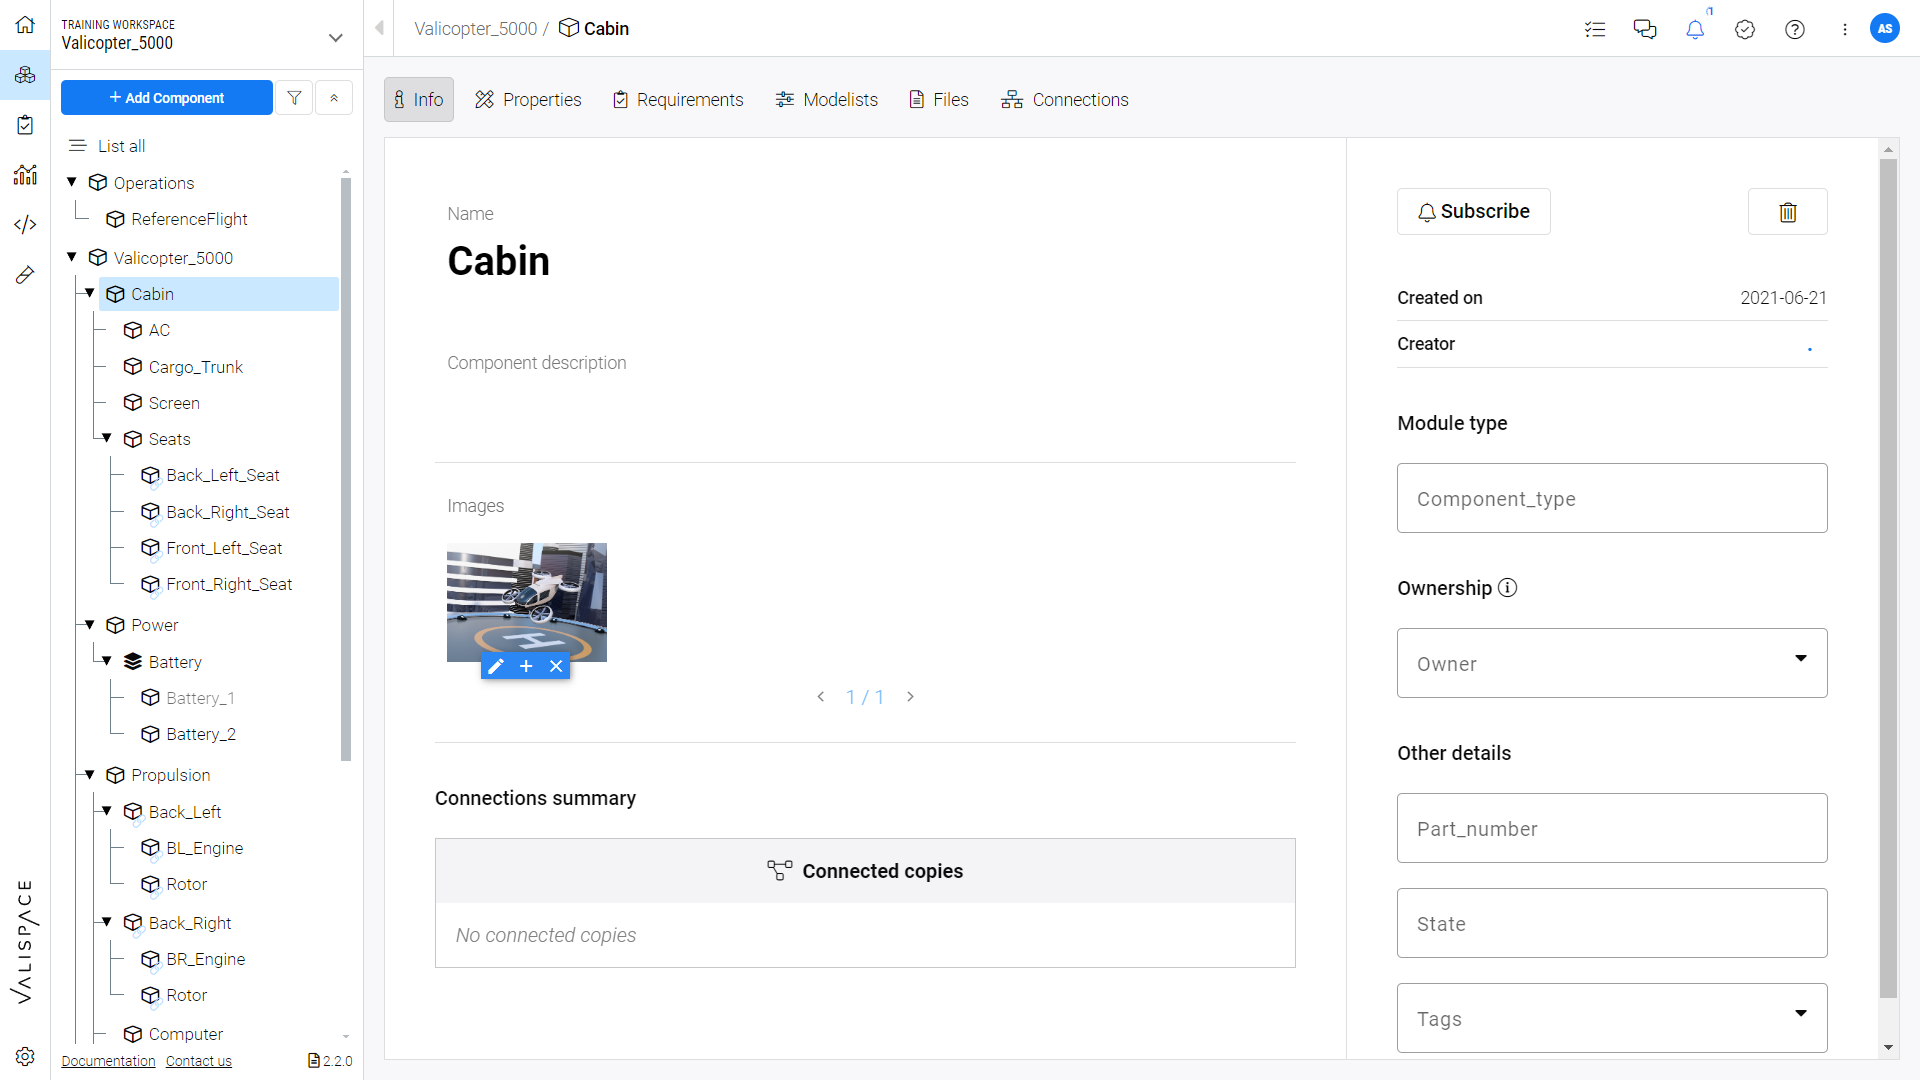
Image Carousel Options
Add a file to your Block
As in Figure Adding a File Attachment:
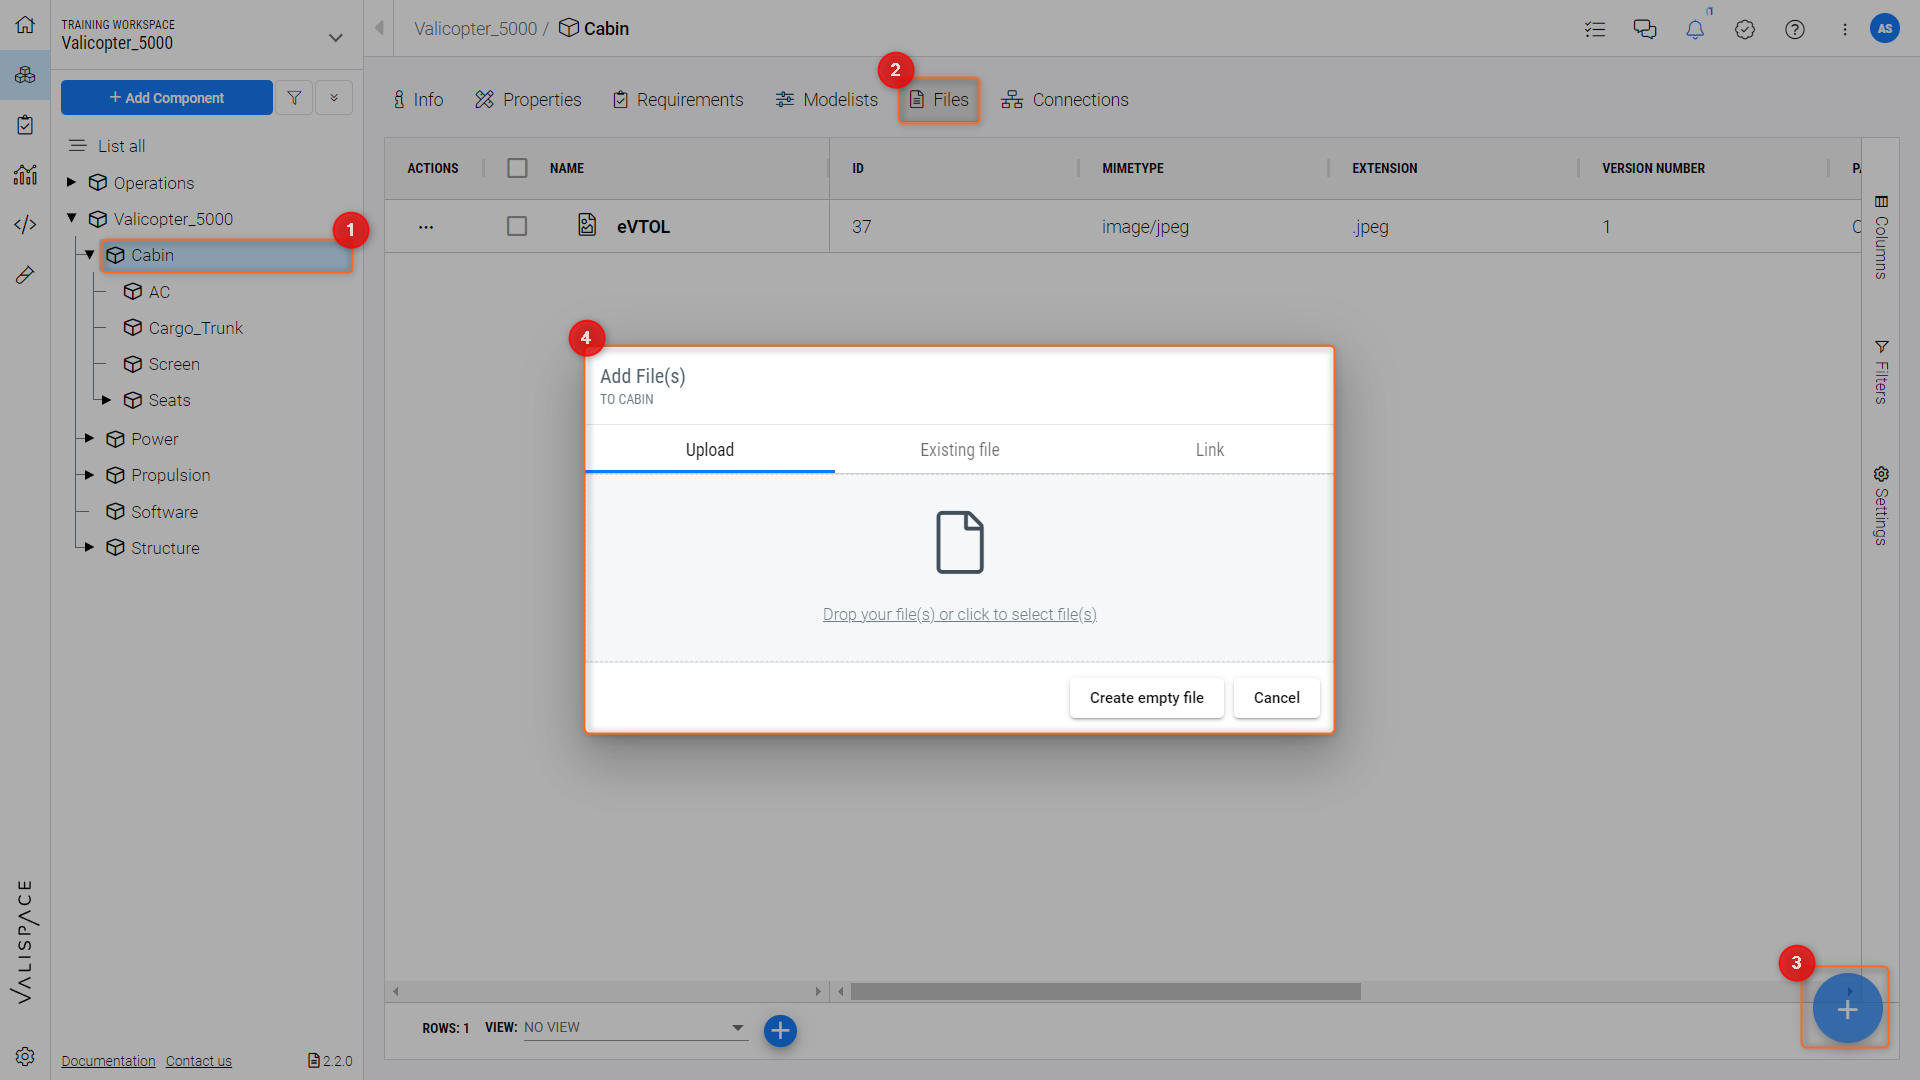
Select the Block (1) that you wish to add a file to and go to the "Files" Tab (2).
Then click on the "+” Upload File symbol (3) to add a new file.
Adding a File Attachment
Drag-and-Drop your file to the pop-up or click on it to select it from your native OS file explorer. You may upload pictures, PDFs, spreadsheets, and other file types. You can also choose to attach an previously uploaded/created file or create a symbolic file that links to a web address.
As you can see in the Figure Adding a File Attachment, our previous image upload to the carousel also shows up as a file attachment in this section.
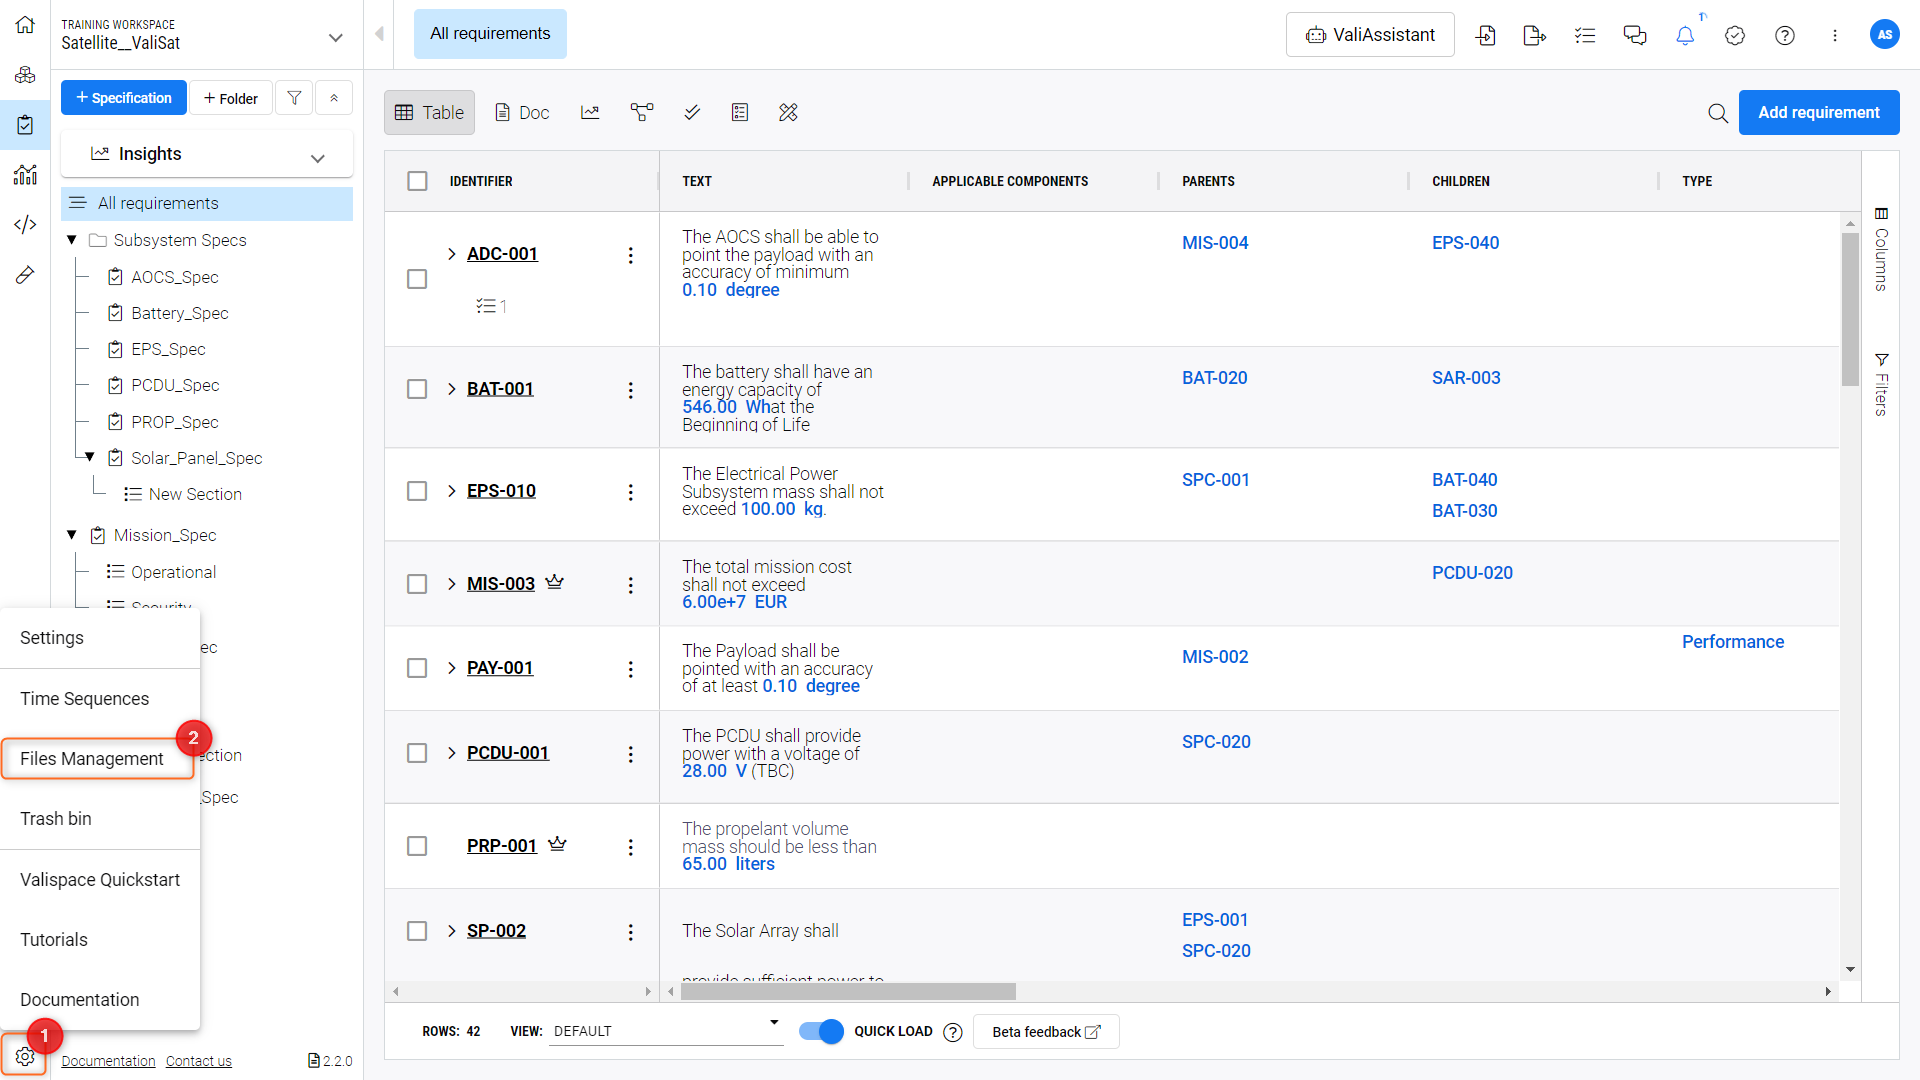
Files Management
All uploaded files to a project (with the exception of files uploaded to Analysis Documents) can be found in the Files Management feature (2) accessible through the gear icon (1) at the bottom left of the screen, as in Figure Files Management.
Files Management
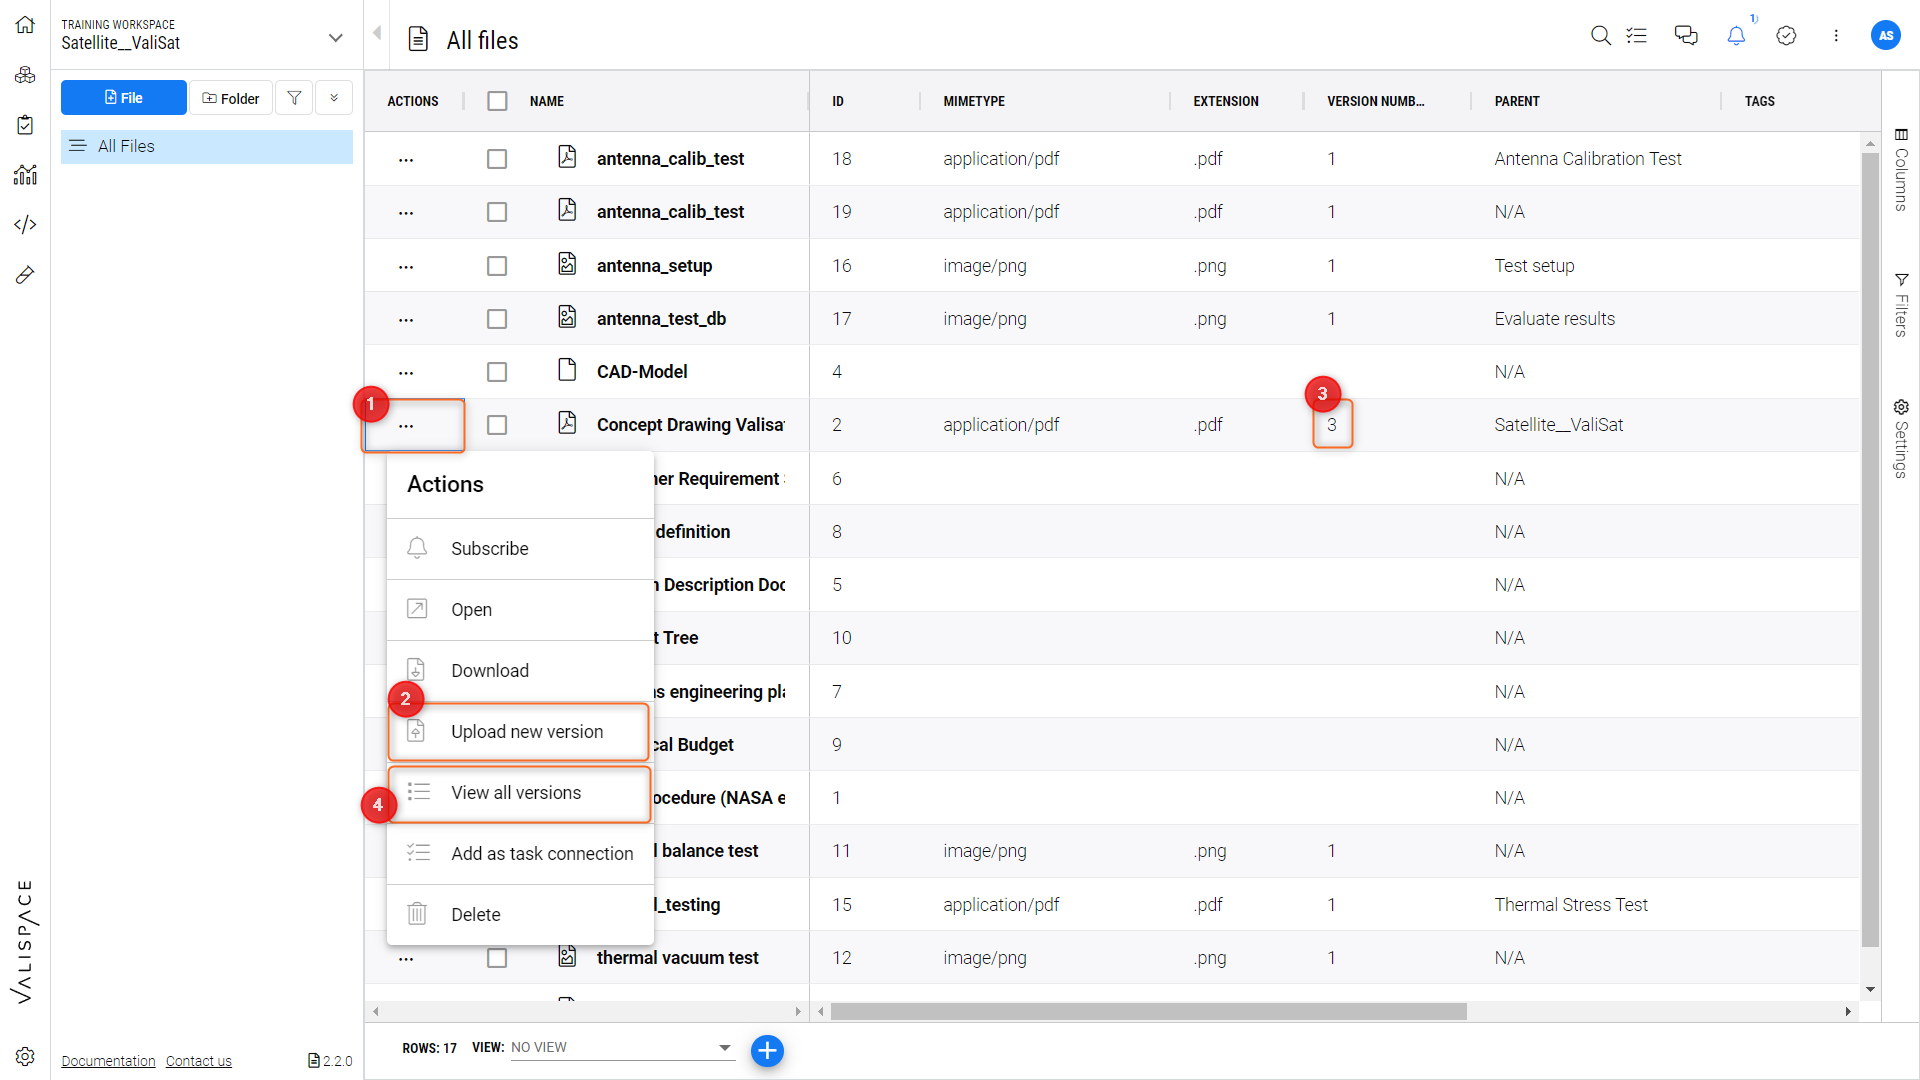
File Versioning
The Requirements and Systems Portal allows you to upload different versions of the same file. By uploading a new version to the same file, users not only have version control but will automatically update any reference to that file in the deployment.
As in Figure Updating File Version, Just click on the three dots on the right-hand side of the document (1) and then click on upload new version (2).
You can also see the current version under the column named “Version number” (3).
Updating File Version
All previous files versions can be cosulted by clickin on “View all versions” (4) and choosing which version to dowload as in Figure Manage File Versions.
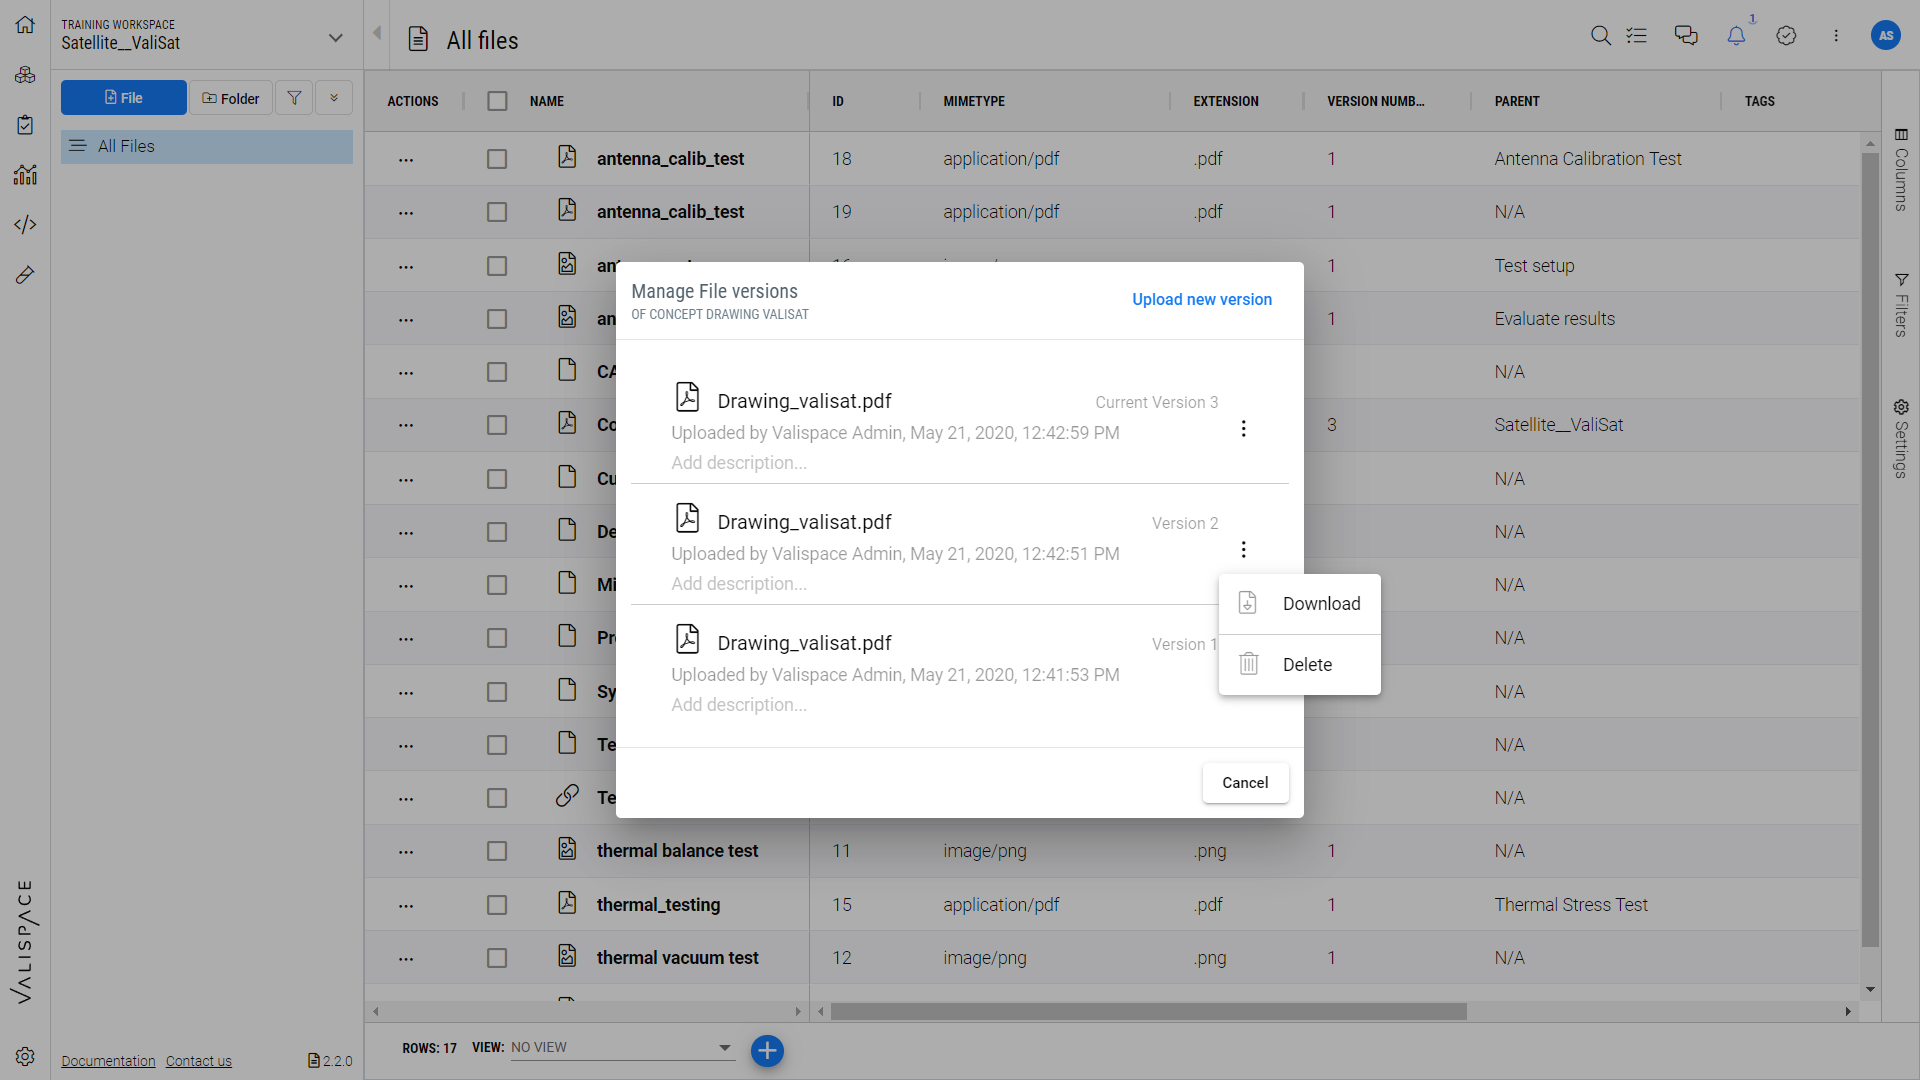
Manage File Versions