Filtering Requirements
Within the Requirements Module, you can filter for specific requirements with conditions and also choose which columns to see in the table.
To change and add columns to your requirements table, you have two possibilities. The first and easy method is to click on the “Columns” (1) on the right bar to show the list of columns available in the Requirements Module. In the popup box (2), tick/untick the columns that you would like to be visible in the requirement table. You can also drag and drop the columns to the desired position.
Another quick method to add/remove columns is through three vertical dots (3) on any header of a column of the table as highlighted in the image below. The three vertical dots are invisible on the layout but appear when you hover over the column header. Once selected, choose the right-most “table symbol” (4) to tick/untick columns.
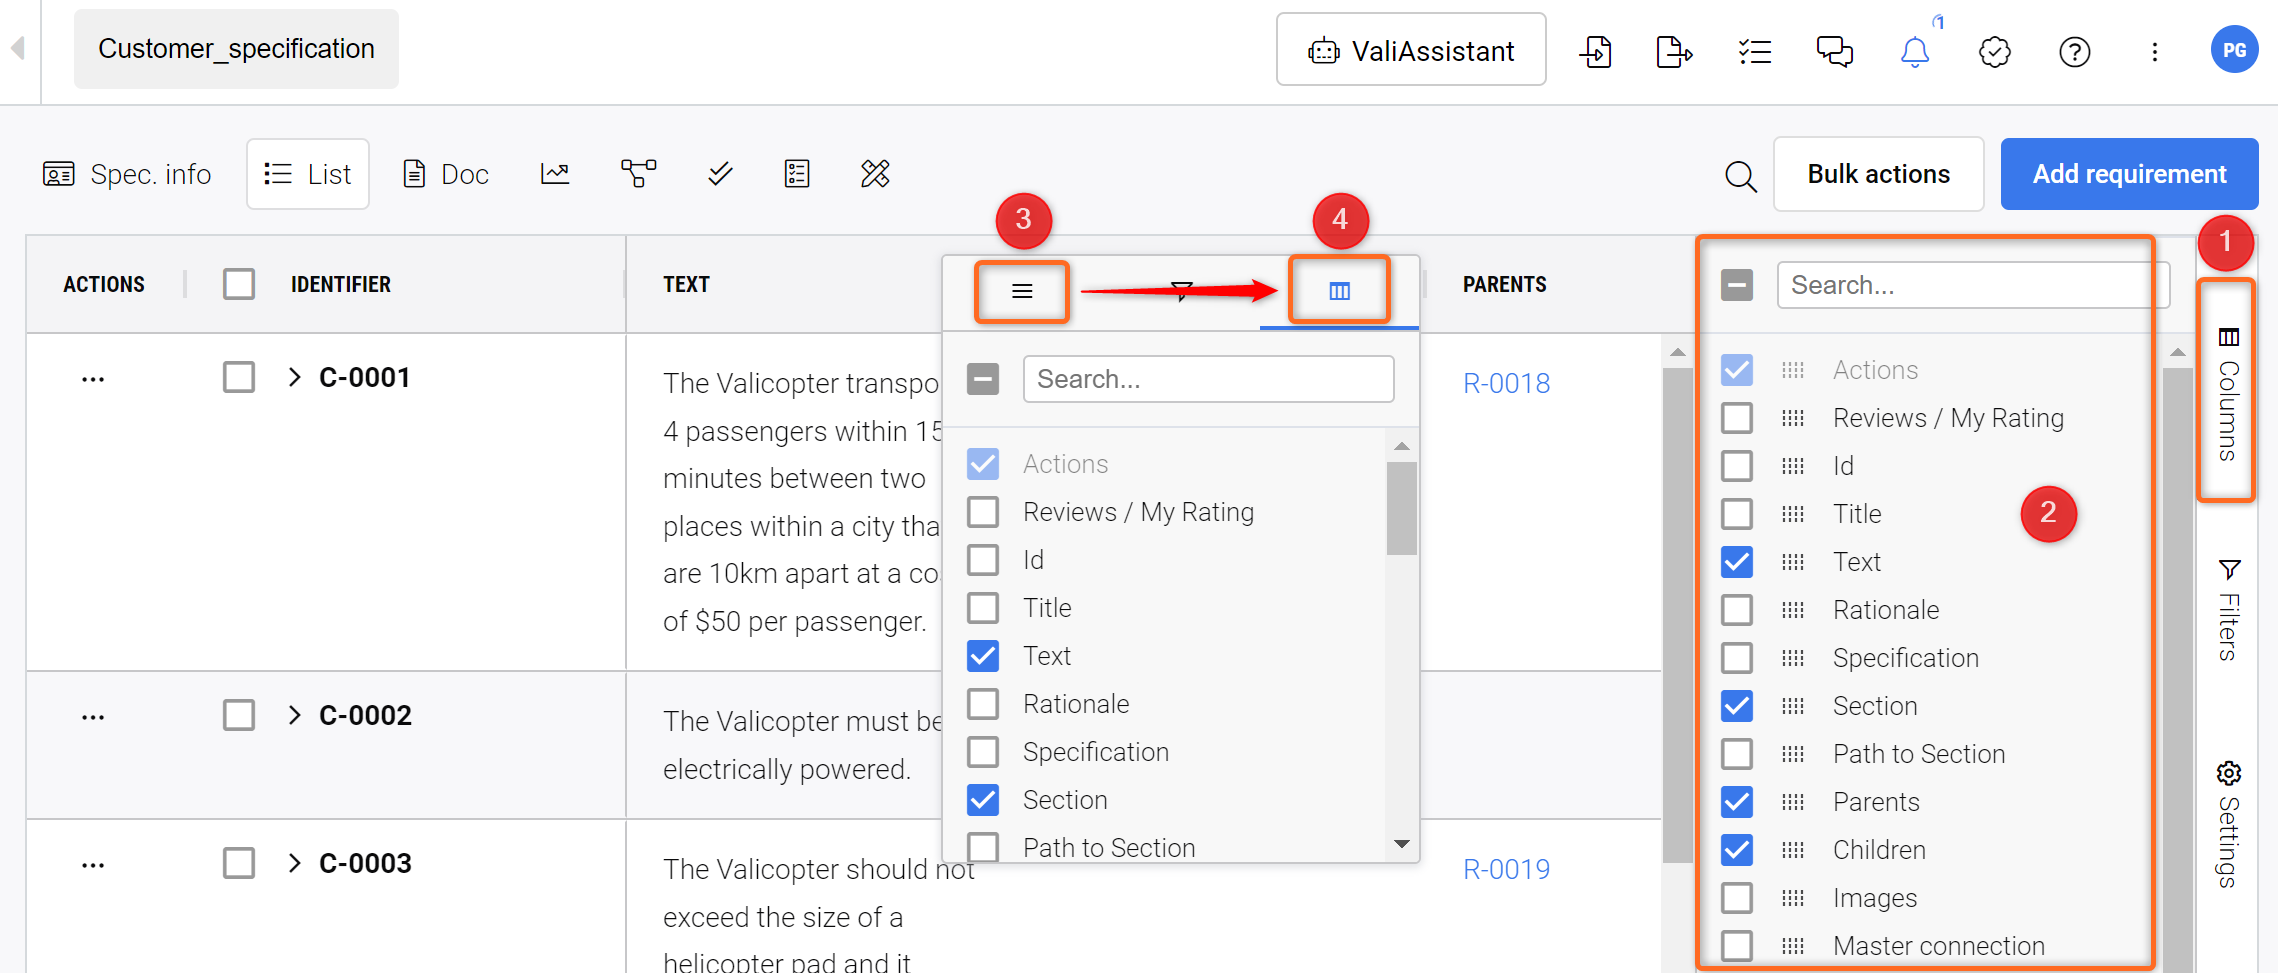
Enabling/Disabling Columns - You can enable or disable the columns of interest and also drag and drop them to the desired position.
To filter requirements, three horizontal dots appear when you hover over the column header that you would like to filter. Upon clicking the horizontal dots (1), a popup box appears. Select the second symbol (2) to have a normal filtering or conditional filtering. You can filter by specific words or ticking/unticking selections in the search option (3). In case the user needs to perform advanced conditional filtering, the user can select any conditions from the list (4).
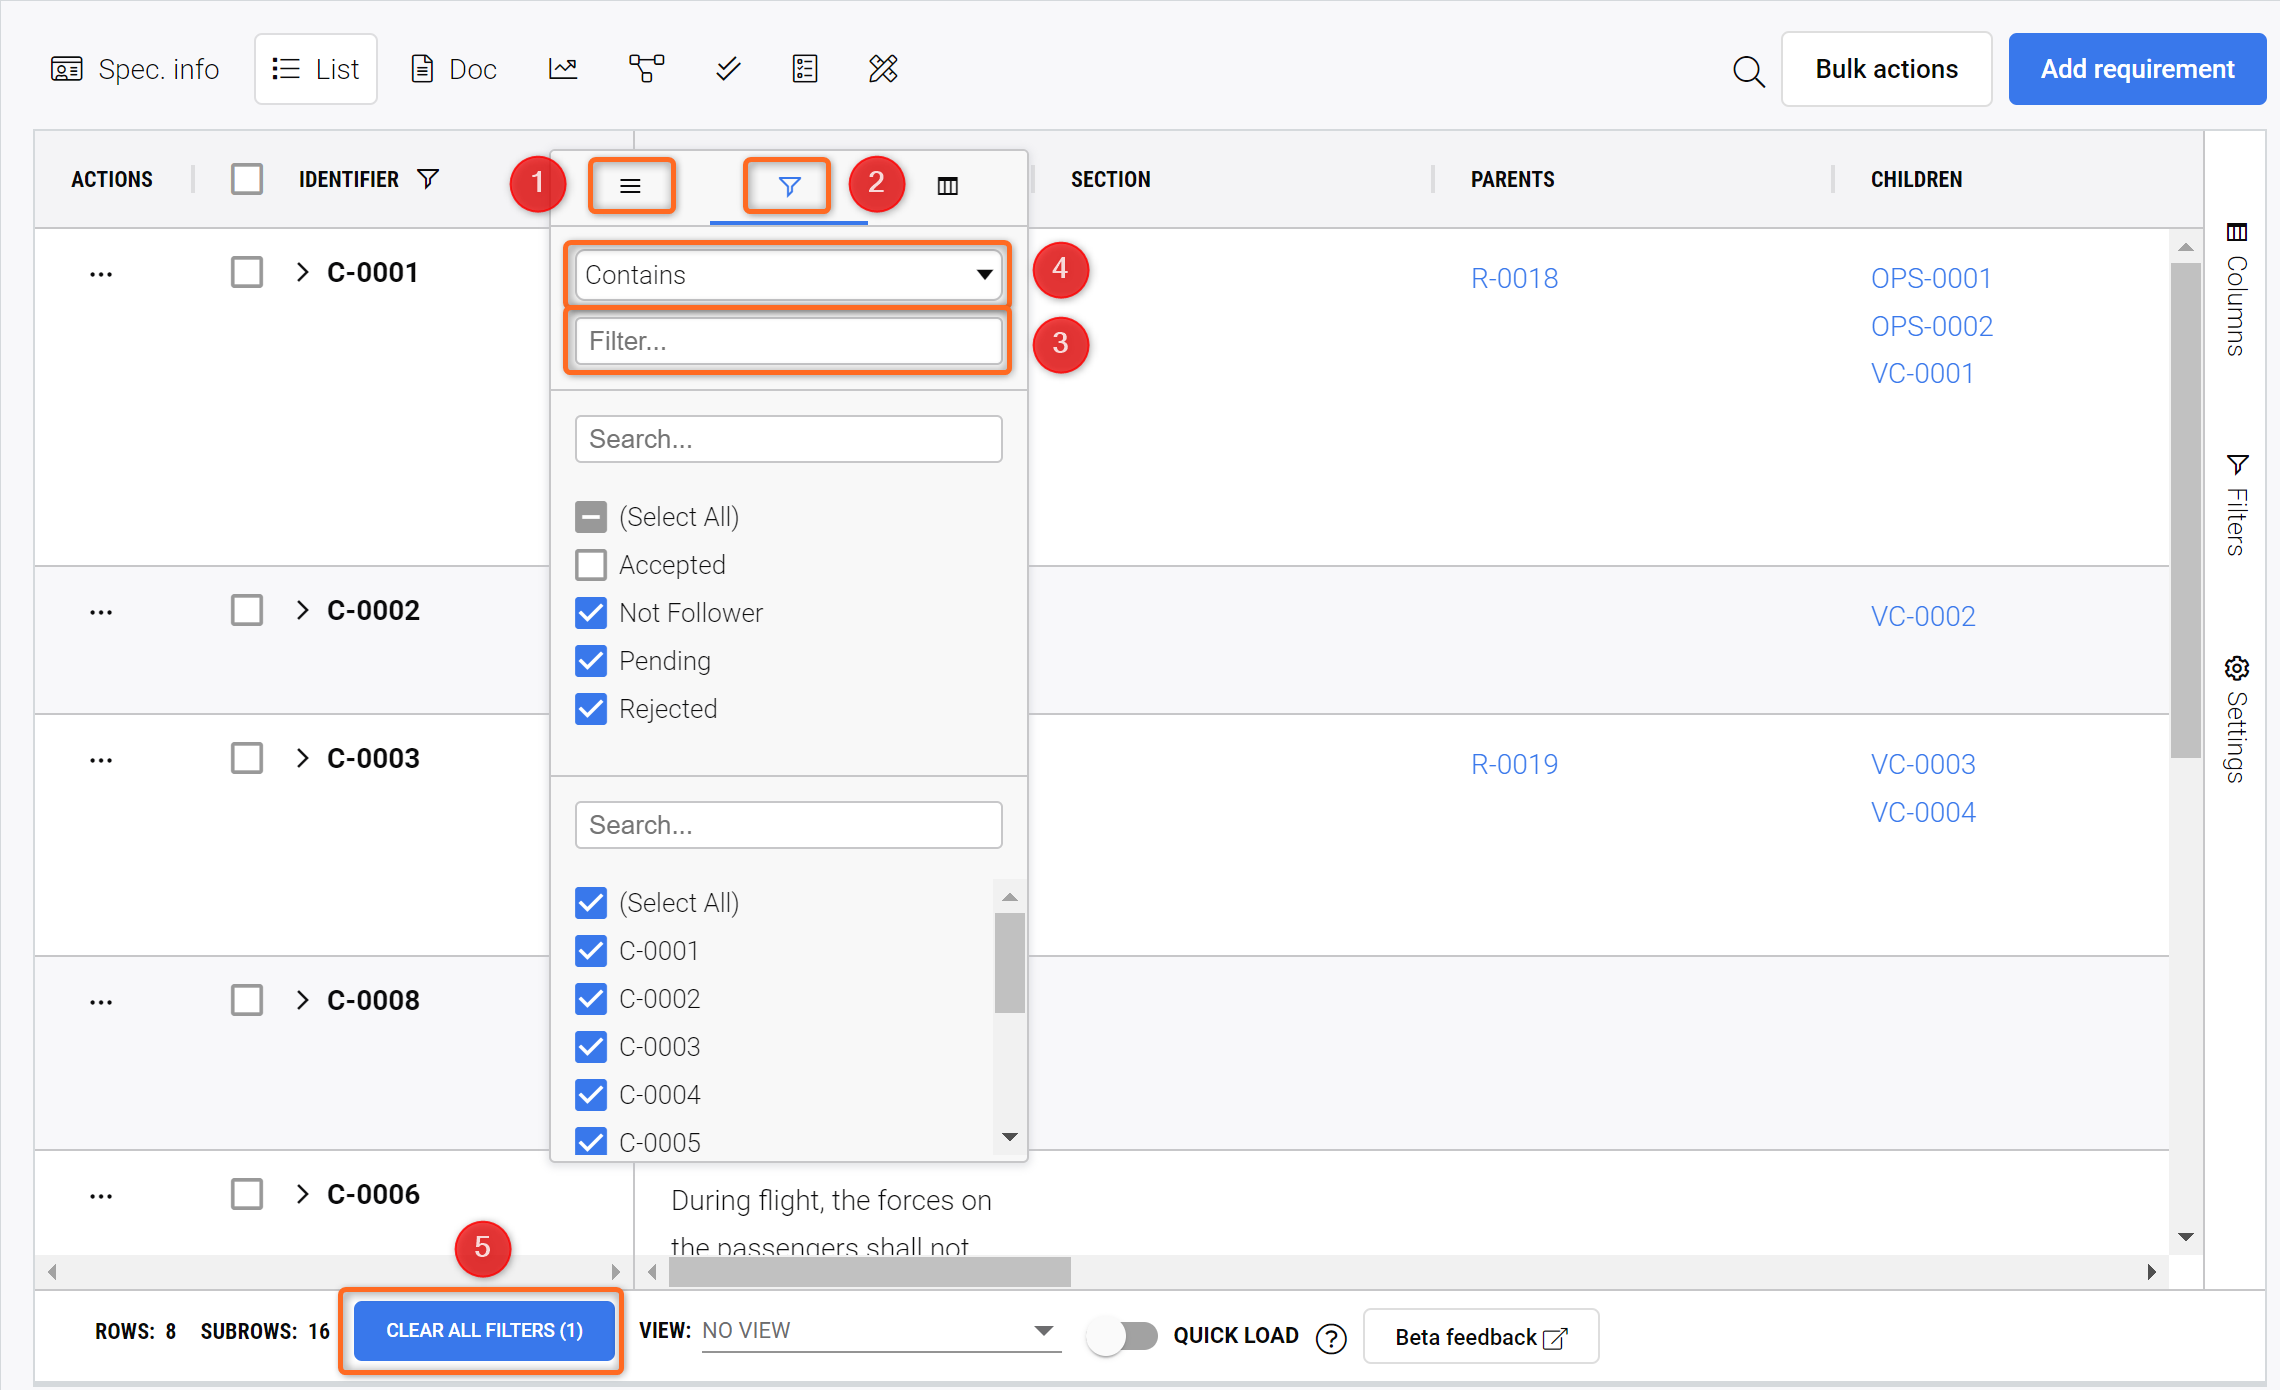
Applying Filters - Filters can be applied on each column and are compounding. For example you can filter for all Requirements in “Draft“ State of Type “Functional“.
Once the user completes the filter and wants to revert to the original requirement view, he/she can select “CLEAR ALL FILTERS” (5).