Running a Time Sequence
Once the node definition is completed in the time sequence setup, the user can go to the run page (1) and click on “Run” (2).
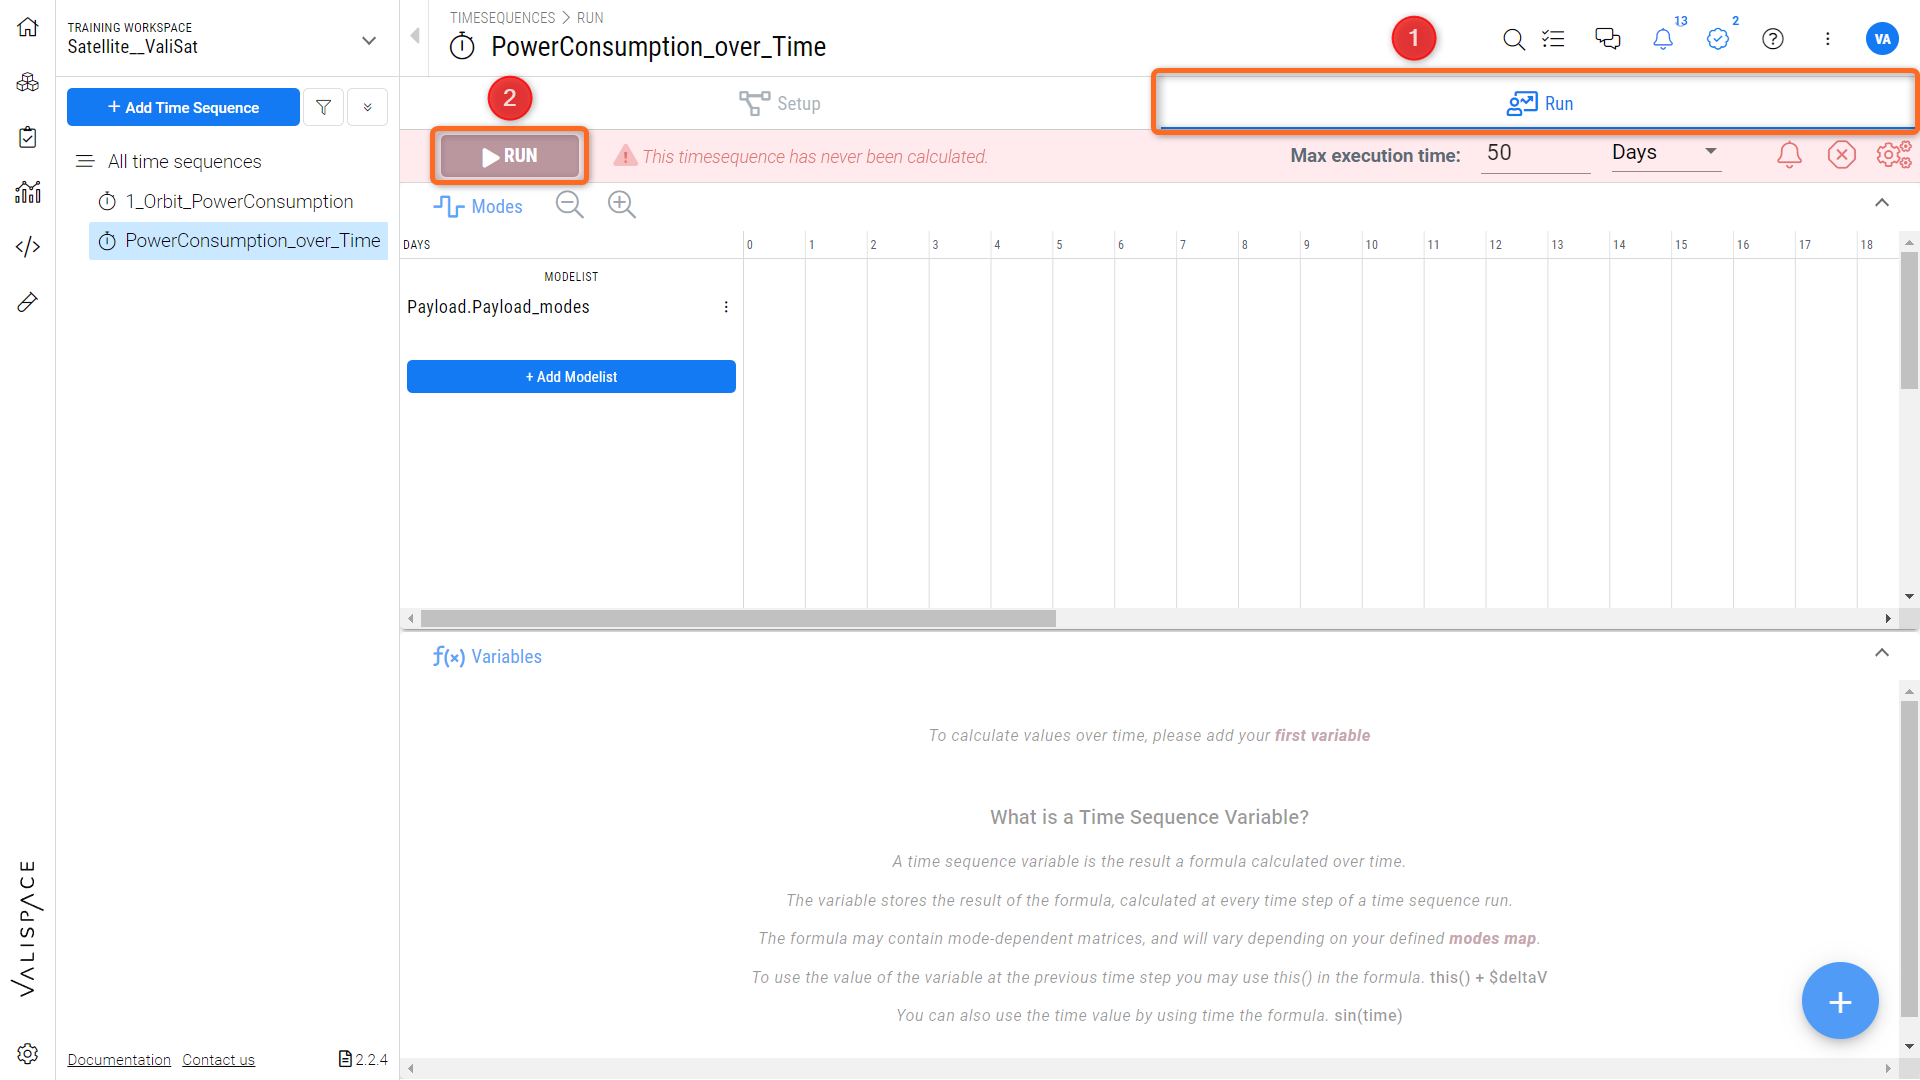
Executing the timesequence
Once the user runs the time sequences, the Requirements and Systems Portal translates the node transitions from the setup page to the run the page in the form of a colourful graphical overview where the axis is in time (days is the default). For example, in the below image, we have set up a simple time-sequence scenario in which the system changes from one mode to another:


Once the “run” is executed, a graph is available on the run page as shown in the image changing the settings:
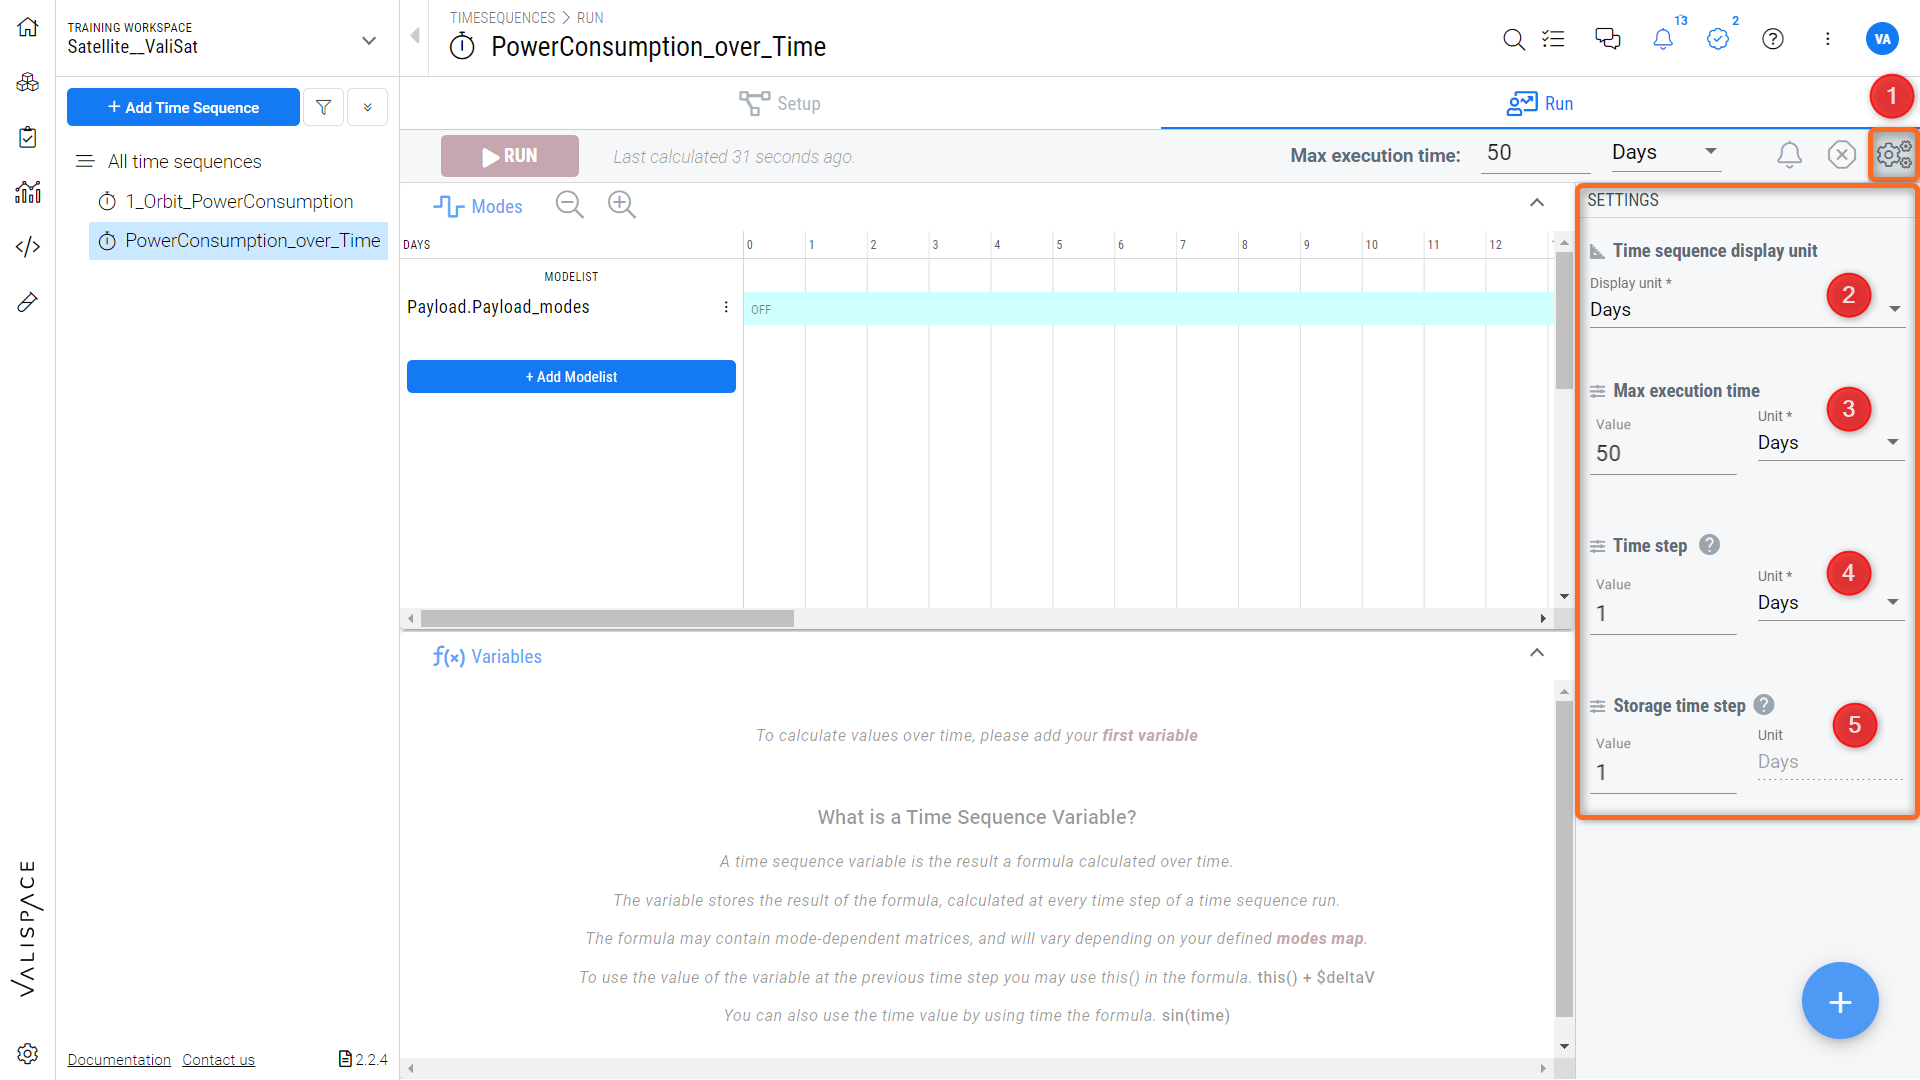
Changing the settings
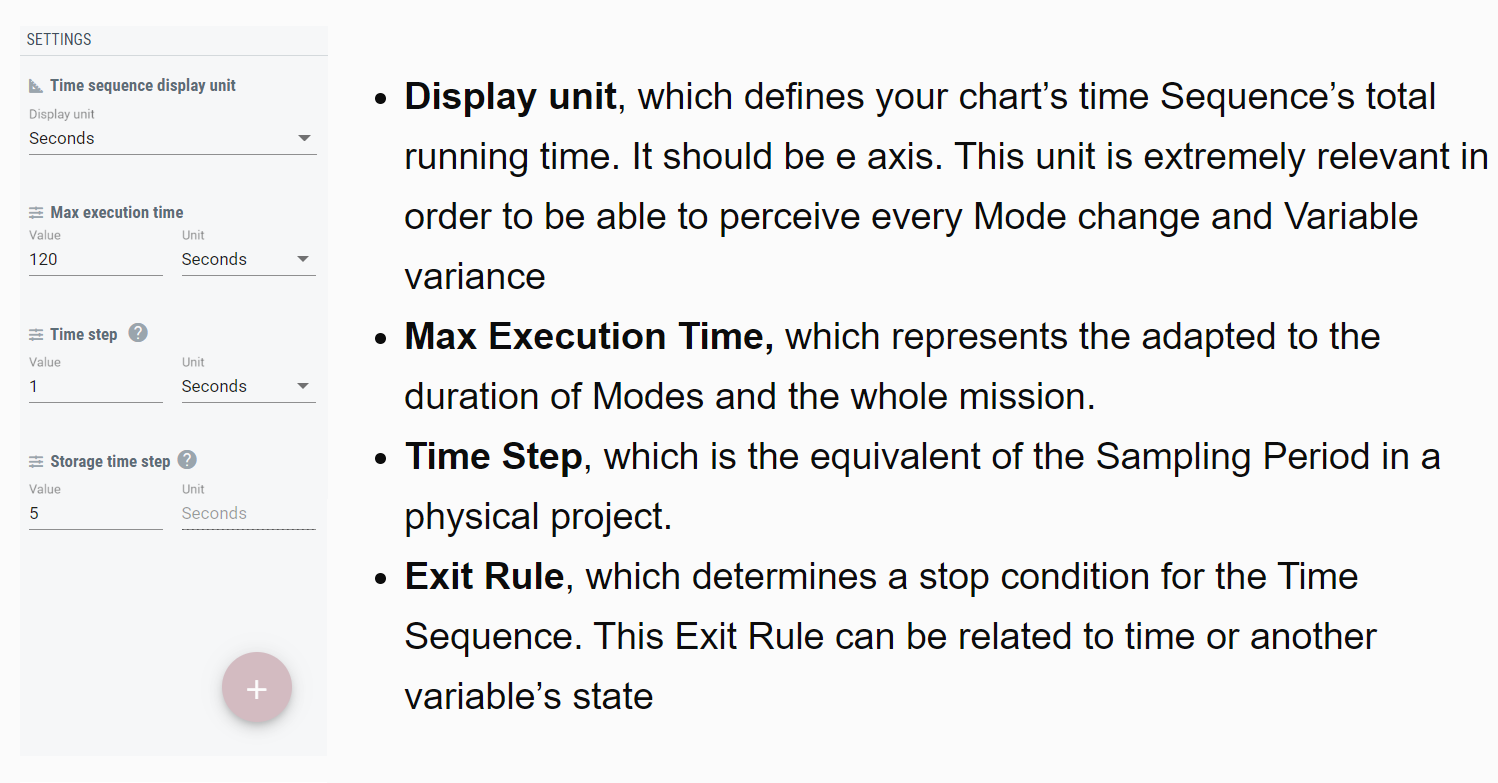
The graph shows that the default display unit is days. This can be changed using the settings menu (1), and the user can also change the max execution time, time step, and storage time step.
For our example, when the settings are changed according to our units and our needs for execution time, the user has to re-run the time sequence to update the graph. The image below shows the updated graph. Note that the user can add the child modes of the parent mode to see how it changes (e.g., propulsion mode, the child mode of the Valicopter is added to parent mode flight modes).
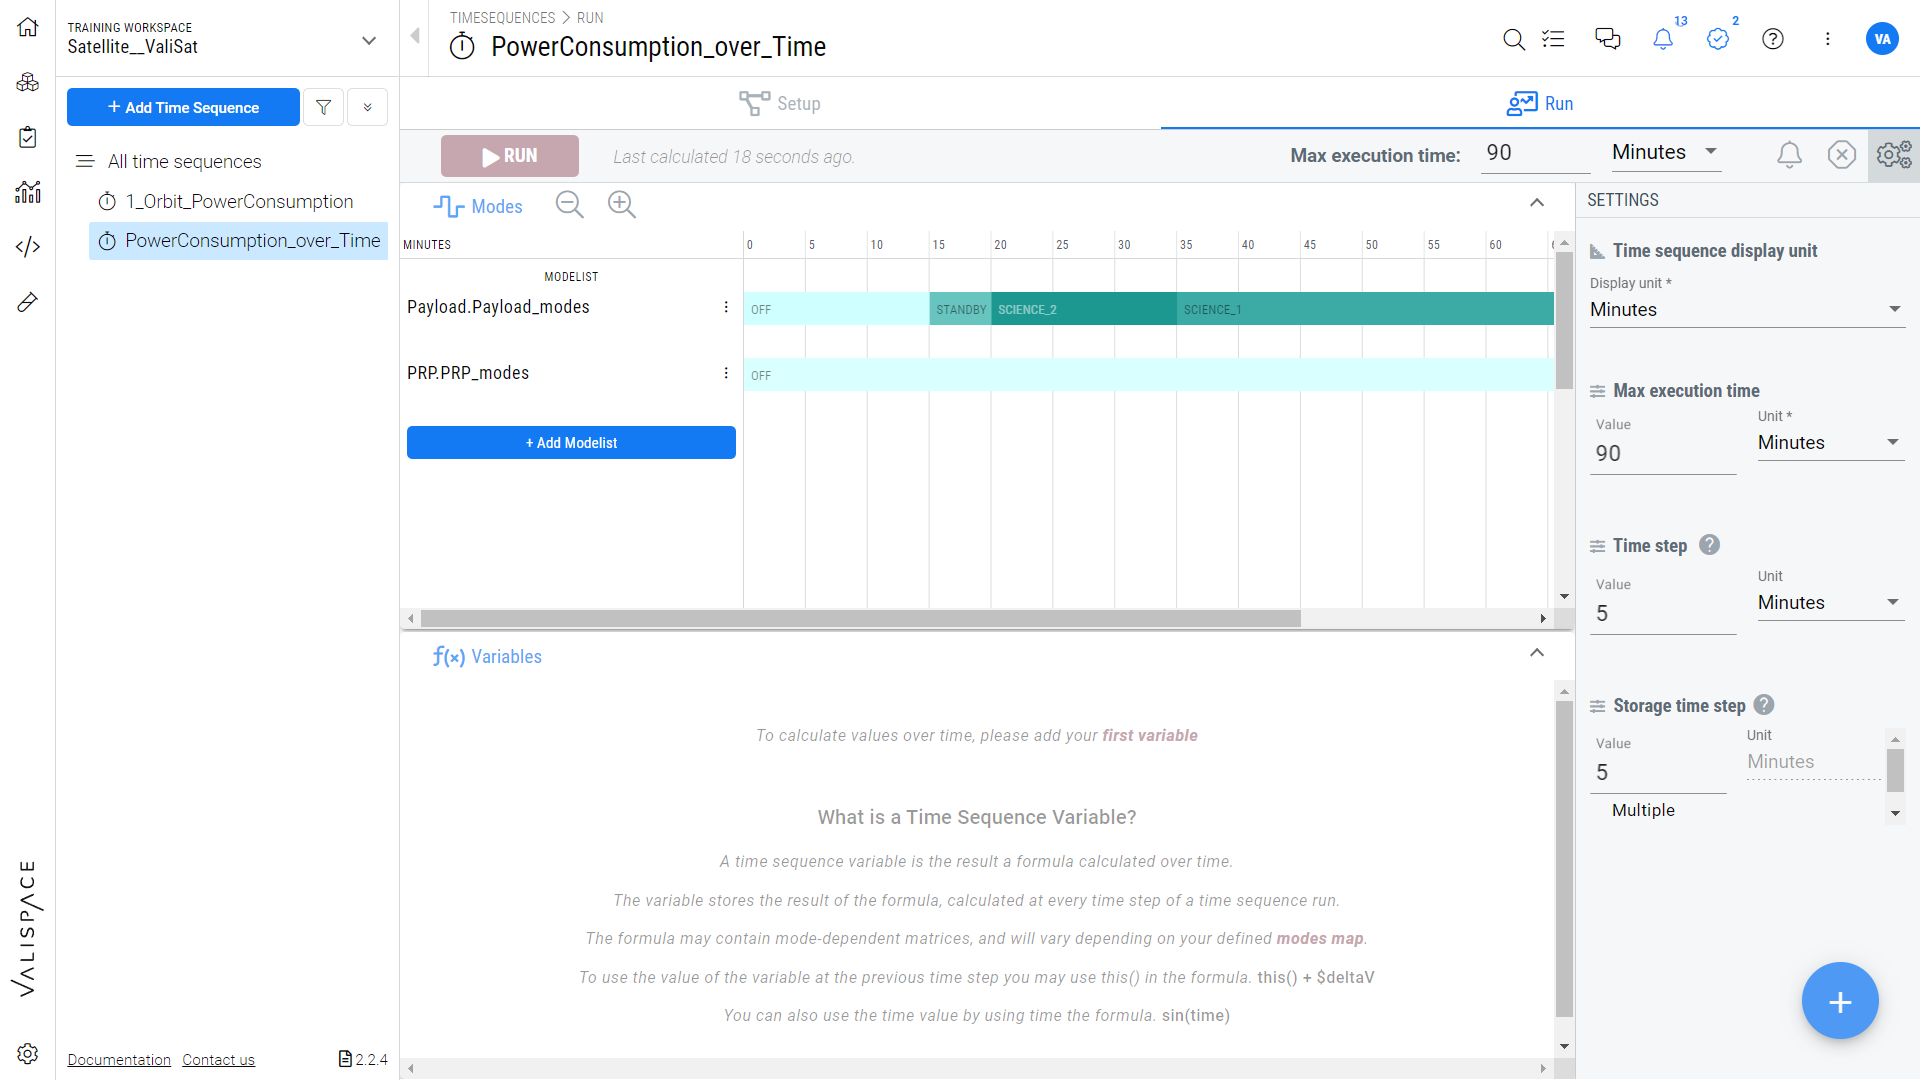
Furthermore, if the user wants to force a change of mode, the user can add a node in the setup which forces a change in child mode. For example, this can be done when you have the flight mode off but you want your child mode propulsion mode to be on standby.