Setting up a Time Sequence
Creating a Time sequence
Time Sequences can be accessed within the settings menu. The user can create a time sequence by clicking on the setting icon, selecting “Time Sequences,” and clicking on “+ Add Time Sequence.” Upon clicking, a small popup window opens where the user can input the desired name for the time sequences and then click “Create.” The steps are defined in the video below.
Once a time sequence is created, the working space has two sections namely Setup and Run.
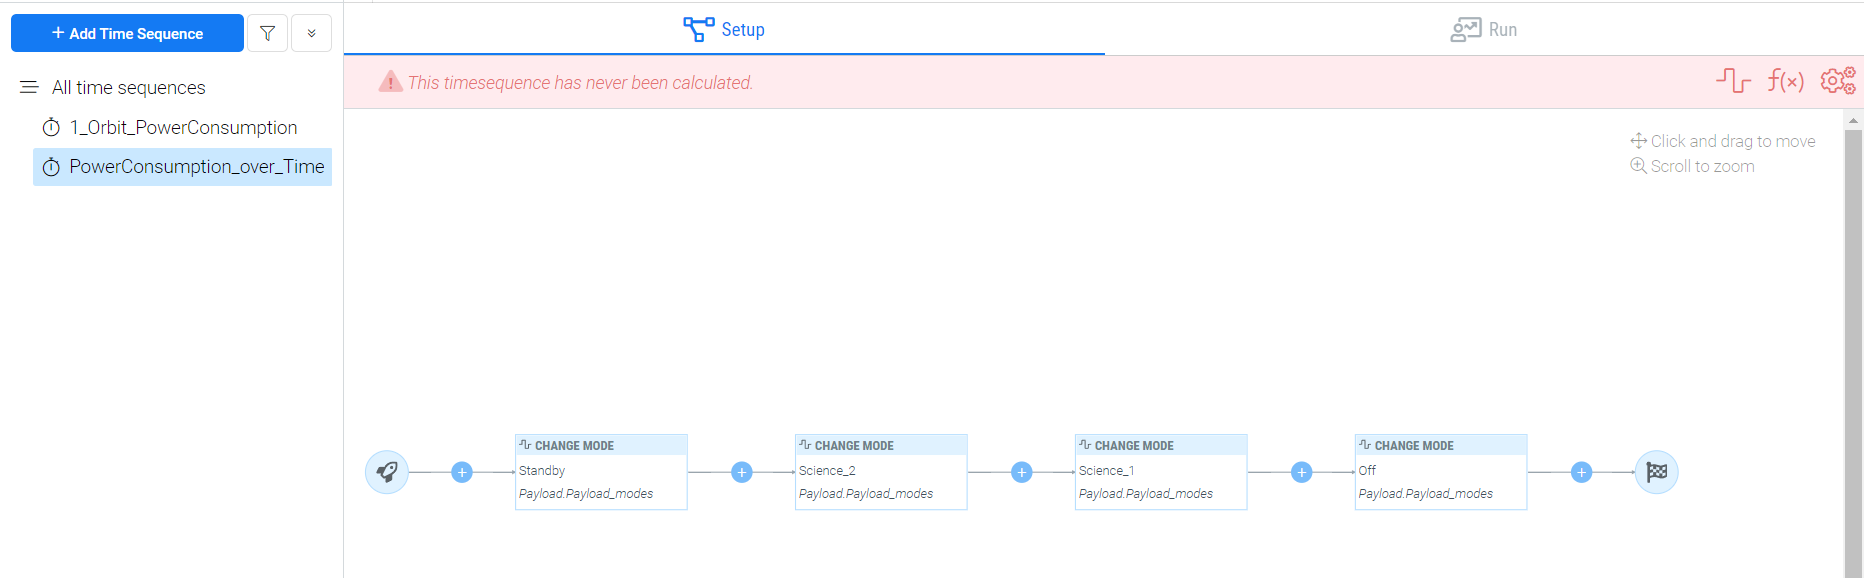
In the Setup section, you will be able to create your system’s flow. It works like block programming, in which you grow your program by adding more and more blocks. For example, in the image below, we have created a small scenario in which our power consumption of the flight modes changes from one mode to another mode with time conditions.
Adding modelists to the Time Sequence
The blocks are called nodes within the Requirements and Systems Portal. The nodes can be a mode with time conditions, delays or formulas. This is explained in the next section which is related mostly to the modes. The modelists is the list containing the modes that will be used within the time sequences scenario. The first step in the time sequence is to add the associated modes of the scenarios. The user can add the modes in two different ways.
The first method to add the modelists is available within the setup tab:
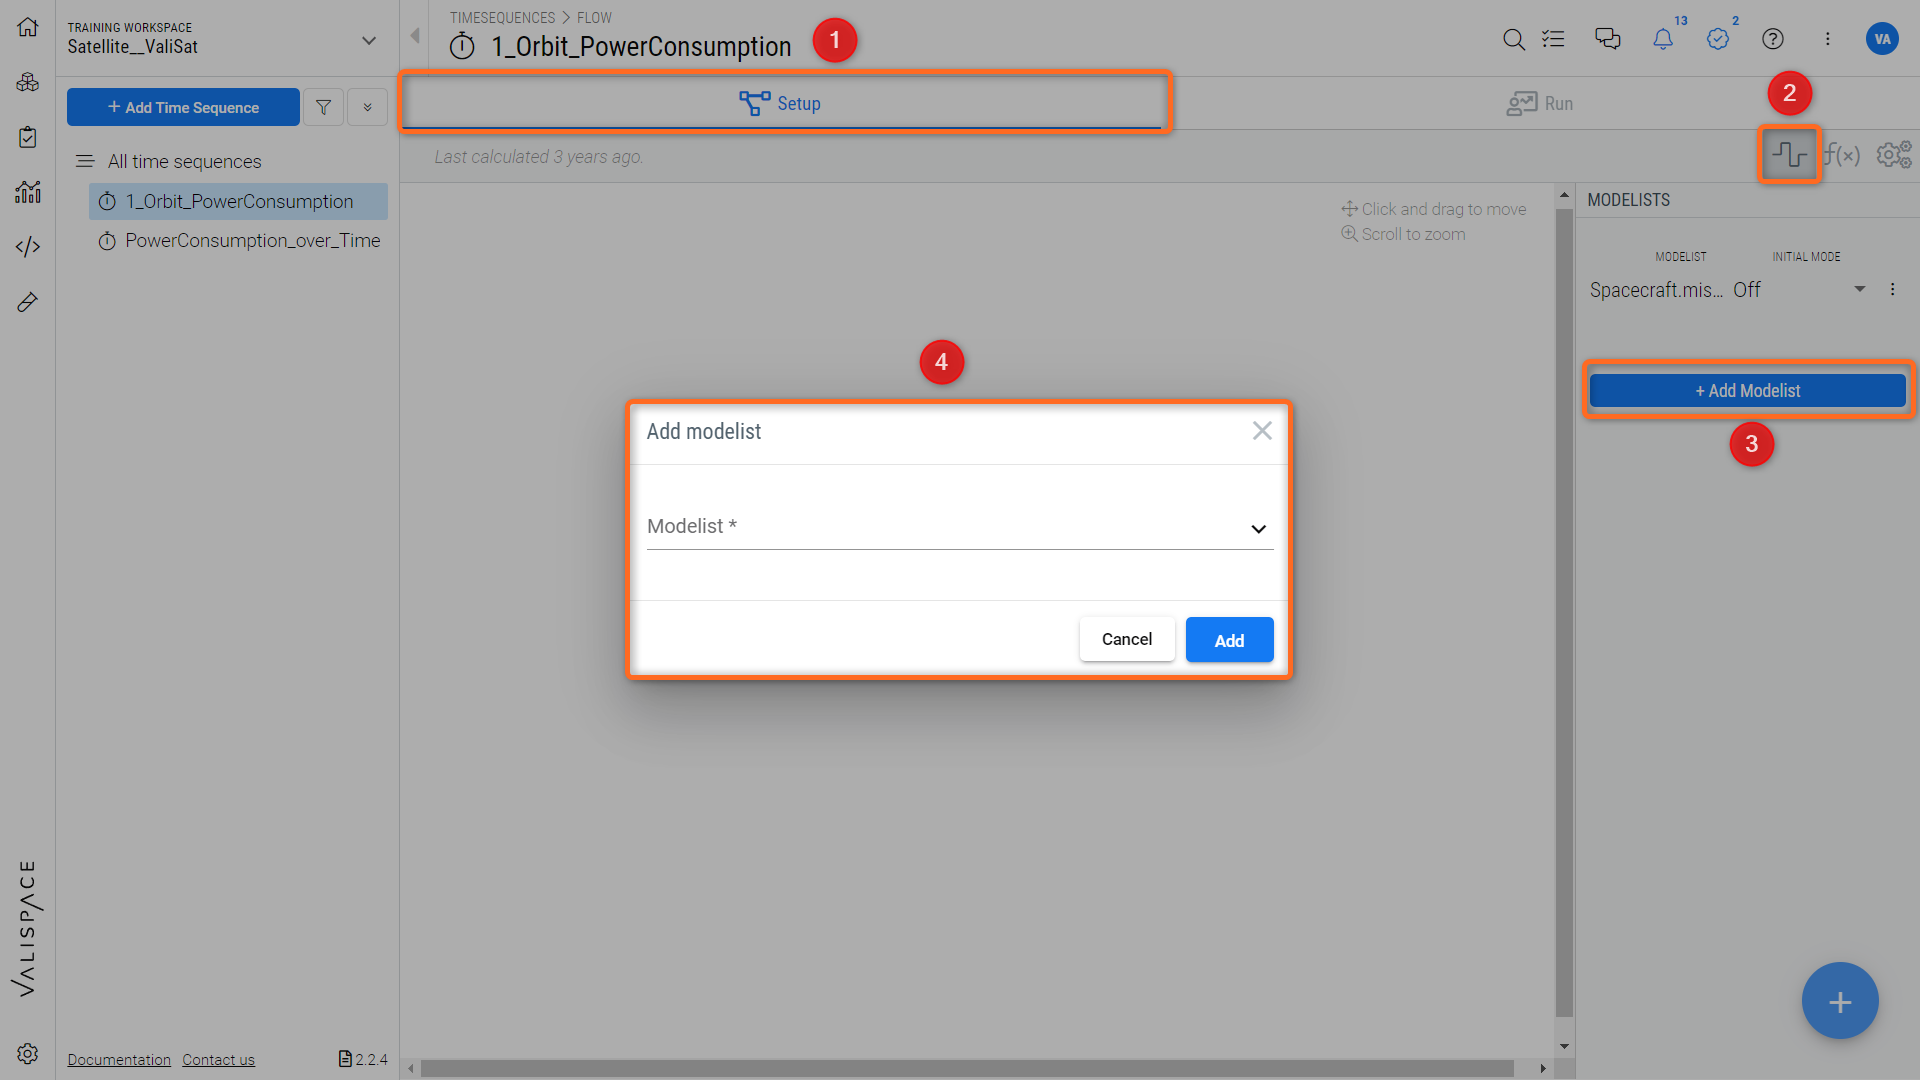
Adding modelist to the timesequences - The first method to add modelist to the time sequence
Within the Setup (1), towards the right side, click on the icon “modes” (2)
Upon clicking the modes symbol, a dialogue box opens on the right side. Click on the “+ Add Modelist” (3)
On clicking a new dialogue box pops up where the user can add the modes related to the time sequence. Users can add multiple modes to the time sequences
The second method to add the modelists is available in the run section:
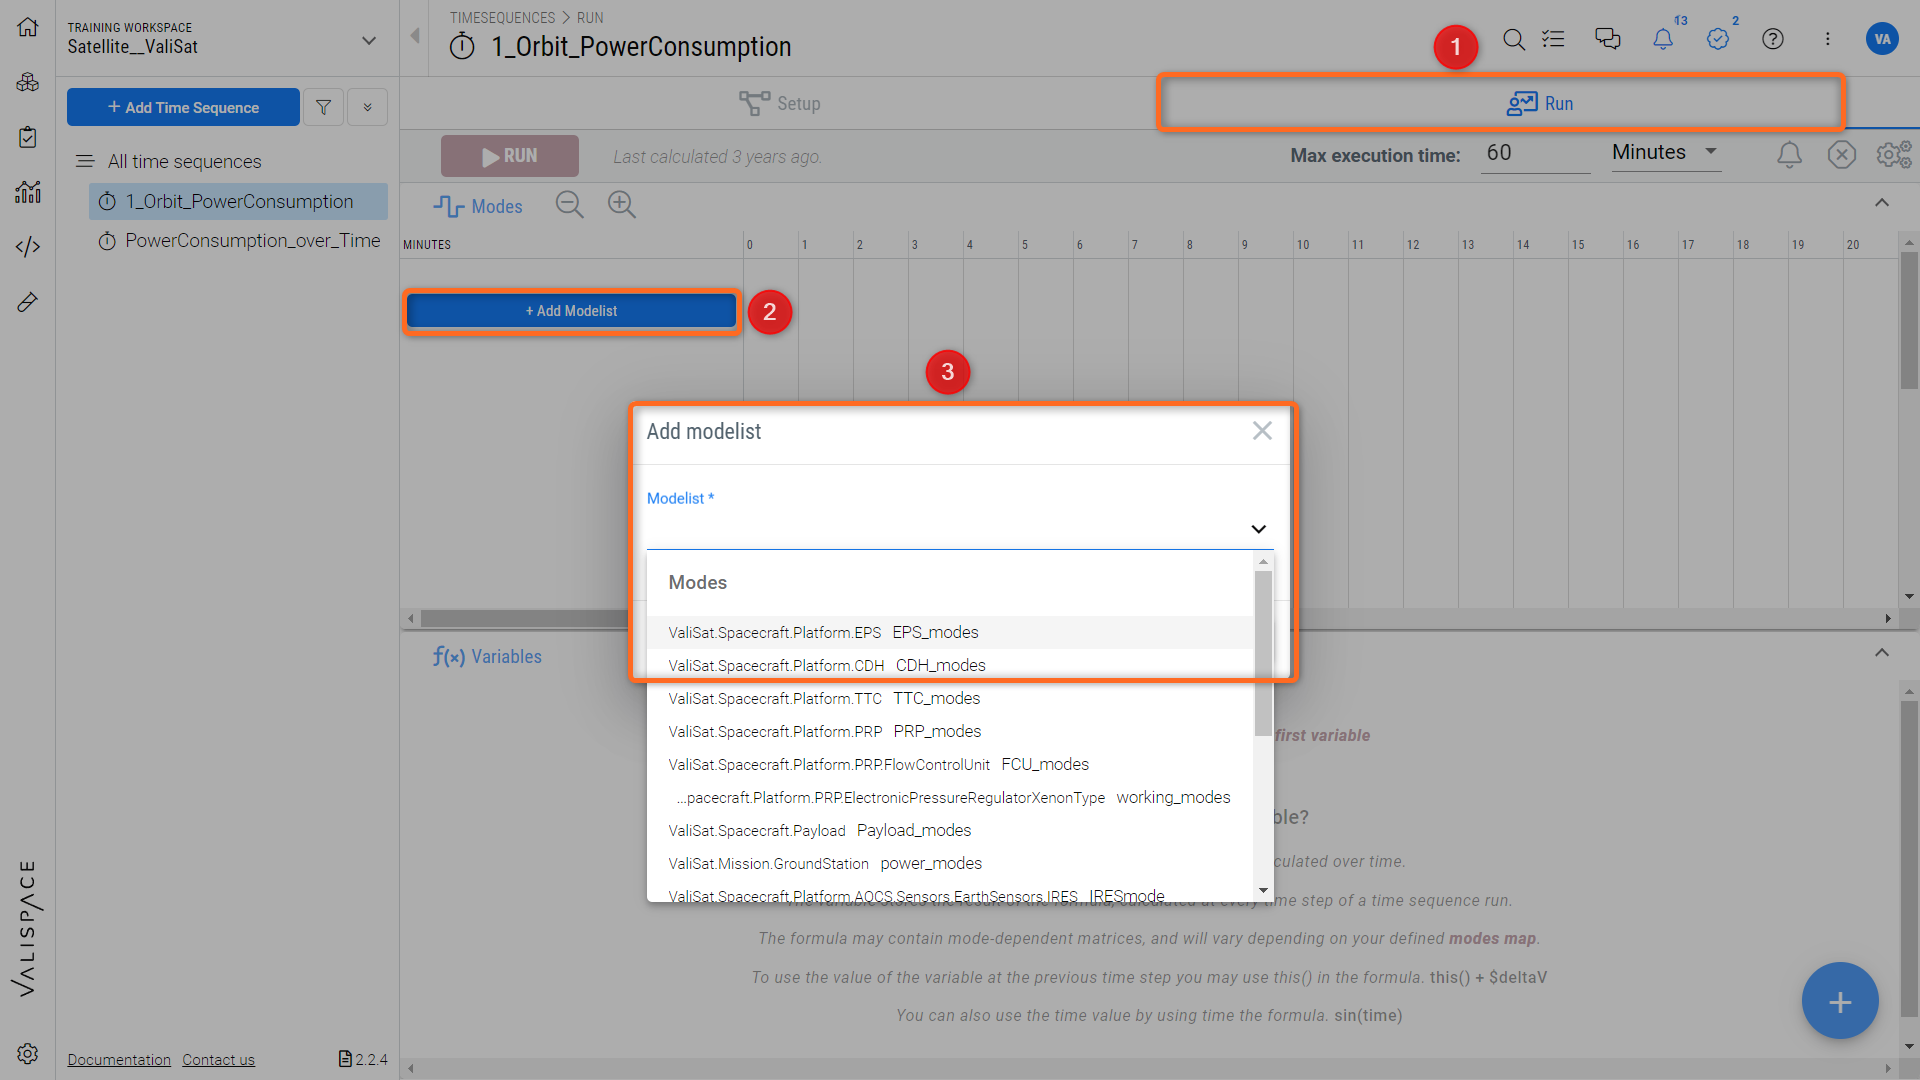
The second method to add the modelist to the time sequences
Select the “Run” (1) menu
Within the Run menu, click on the “+Add modelist” (2)
On clicking a new dialogue box pops up where the user can add the modes related to the time sequence. Users can add multiple modes to the time sequences (3)
Once the user adds the modes to the modelist, a popup opens up with a few settings. For example, in the image below, we have selected the “Payload_modes” mode for the satellite valisat. Once you select the mode, the Requirements and Systems Portal automatically selects the first mode of the Vali as “Initial Mode” (1). Users can change the initial mode to any other mode by using the drop-down menu. Also, note that the Requirements and Systems Portal automatically allocates a colour code (2) to each mode. The user can change the colour according to their needs by clicking the colour box that needs to be changed.
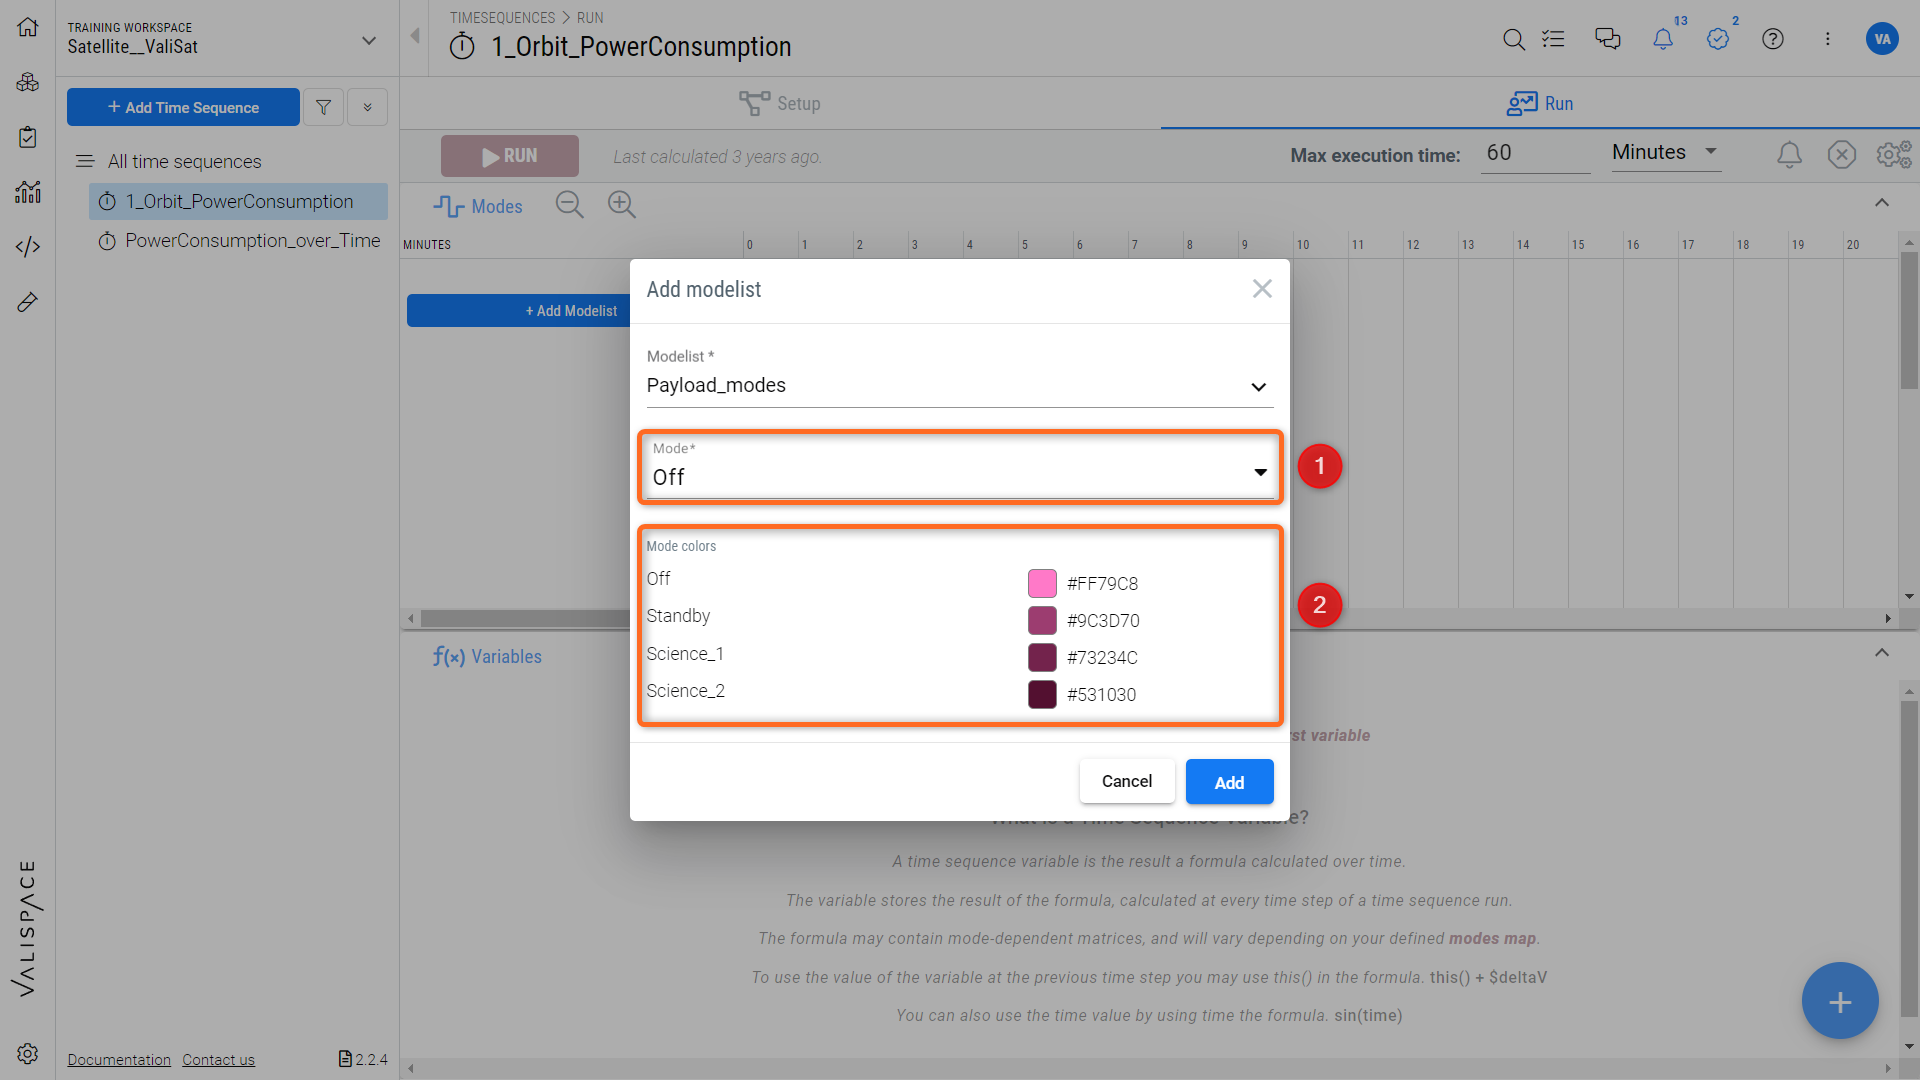
Adding modes to the time sequence and setting up the initial mode for the timesequence
Things to know:
If the user is using the parent mode for the time sequence, he/she can add the child modes to the modelists to see how the child modes change/interact when the parent mode changes in the scenario.
Users can force a change in the child mode irrespective of the linked modes in the parent block.