Table view
Table Views Introduction
Table Views in the Requirements and Systems Portal are a versatile feature that allows users to organize and display data related to various project Blocks/Requirements in a tabular format that can be exported easily. This view facilitates a clear overview of data points and enables users to manage complex information systematically.
2. How to Create a Table View
To create a new Table View refer to the description and the Figure Creation of Table View
Navigate to the “Analysis” section of the workspace.
Click on the “ + Document” button (1).
In the pop-up, enter the Document Name (2)
Choose “Table View” as the Document Type (3)
Select where you want to create a table of Blocks or Requirements (4)
Select whether you want an Empty Table or a Populated table (5)
Click “Create” to set up the new table view.
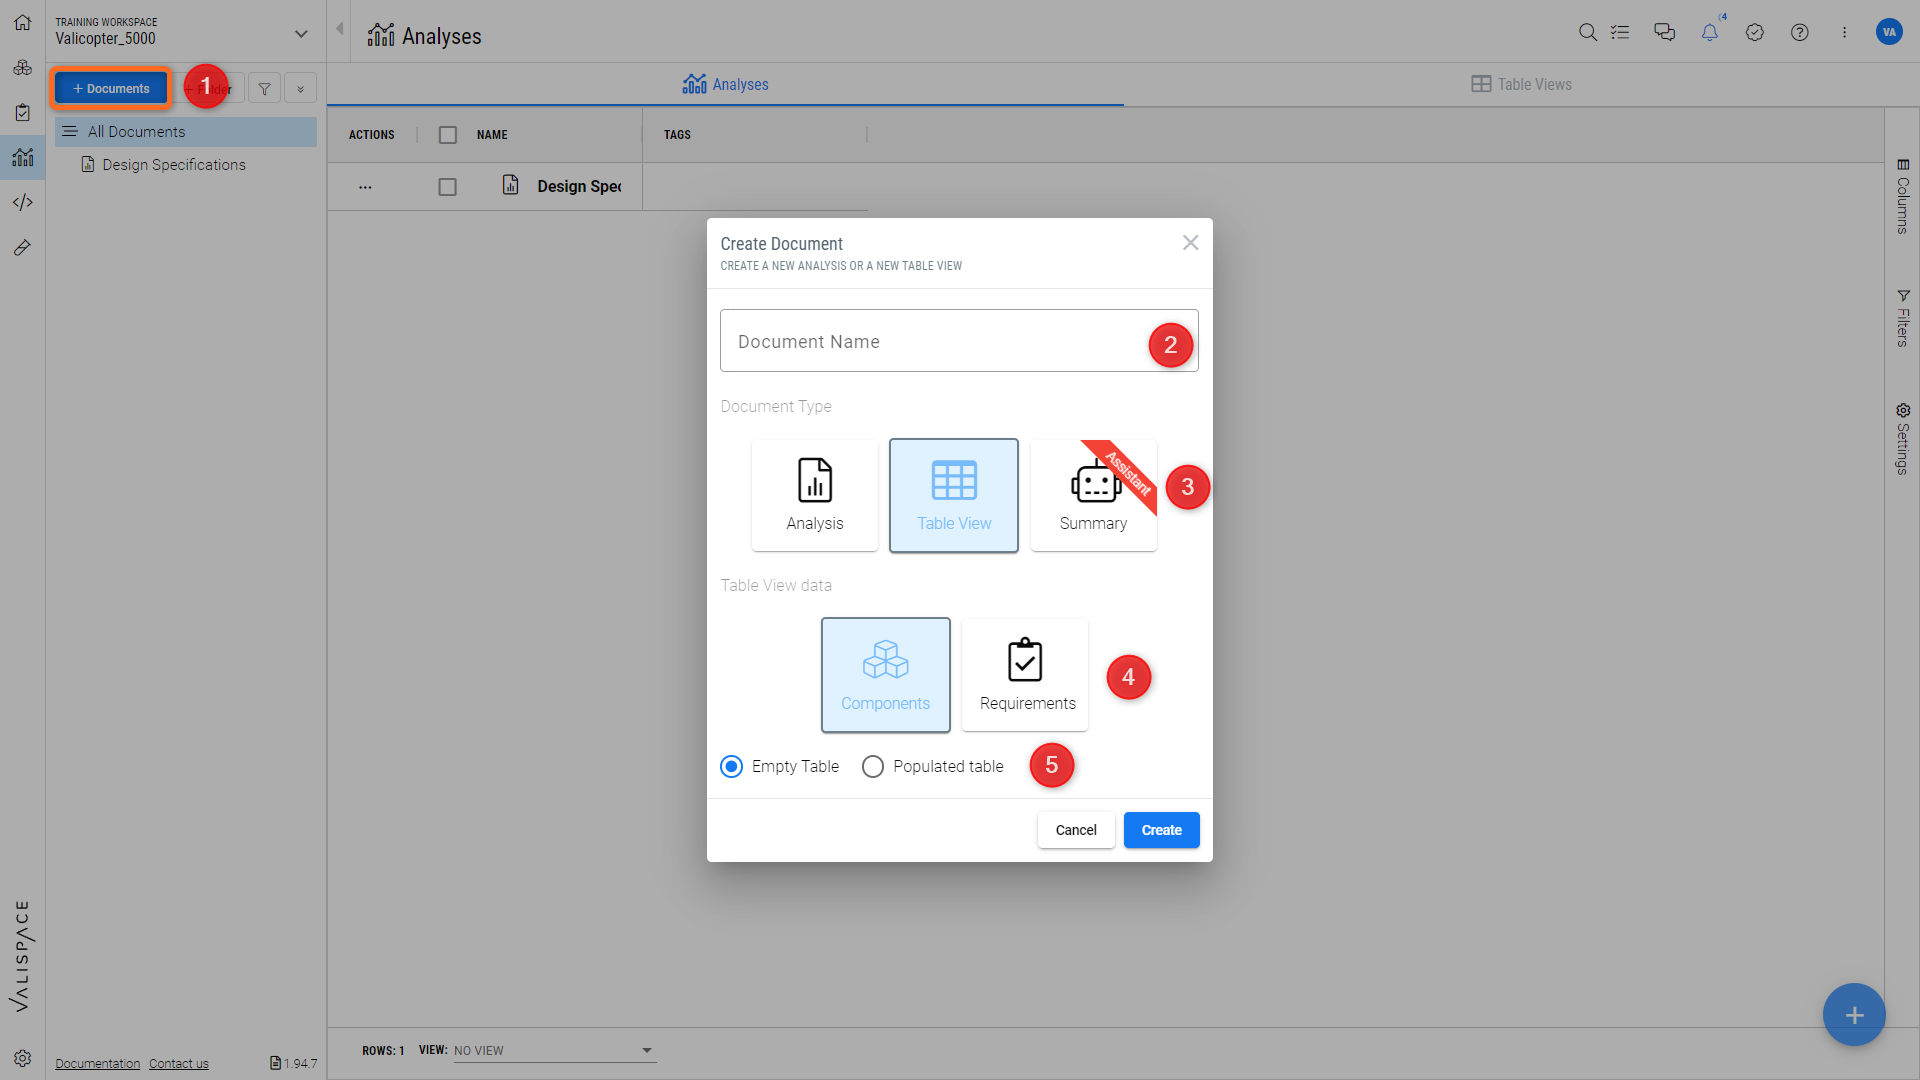
Creation of Table View - Step by step process to create a new table view
3. Setup a New Column
If you choose to use the Populated table for Blocks, the tables will be created automatically in hierarchical order with a list of the Blocks. The user can then add the desired property to be displayed. By default, a single column is created alongside the populated table.
To illustrate this, we will demonstrate the creation of a mass budget for the "Valicopter". Please refer to the video below for further details.
Setting up a New column - Adding the vali and the property to the tables
To “set up a new column” in a table view, such as "Mass Budget":
Click on the three horizontal lines icon on the existing column header to open the context menu.
Select “Set up column” from the drop-down options.
Search for the property that you would like to add. In this case, select Mass and then select the property “value”
Once configured, the new column will display the “value” of the mass property for each component in the table view.
The users can choose the “set up column” by right clicking on the columns as well.
The value column only shows the value and not the unit. If you want to add units to the table, the user have to add a new column with the property unit.
4. Add More Columns to the Table View
To add additional columns to your table view:
Right-click on an existing column to bring up the context menu.
To add a column to the left, select “Add column to the left”.
To add a column to the right, choose “Add column to the right”.
The new column will be inserted immediately to the left or right of the selected column, respectively.
Adding new columns - The users can add new columns left or right and then add new properties to the Blocks
5. Exporting the Table Views
The Export option allows for easy exportation of table views. Simply right-click on the table, select "Export" and choose the file extension of your preference.
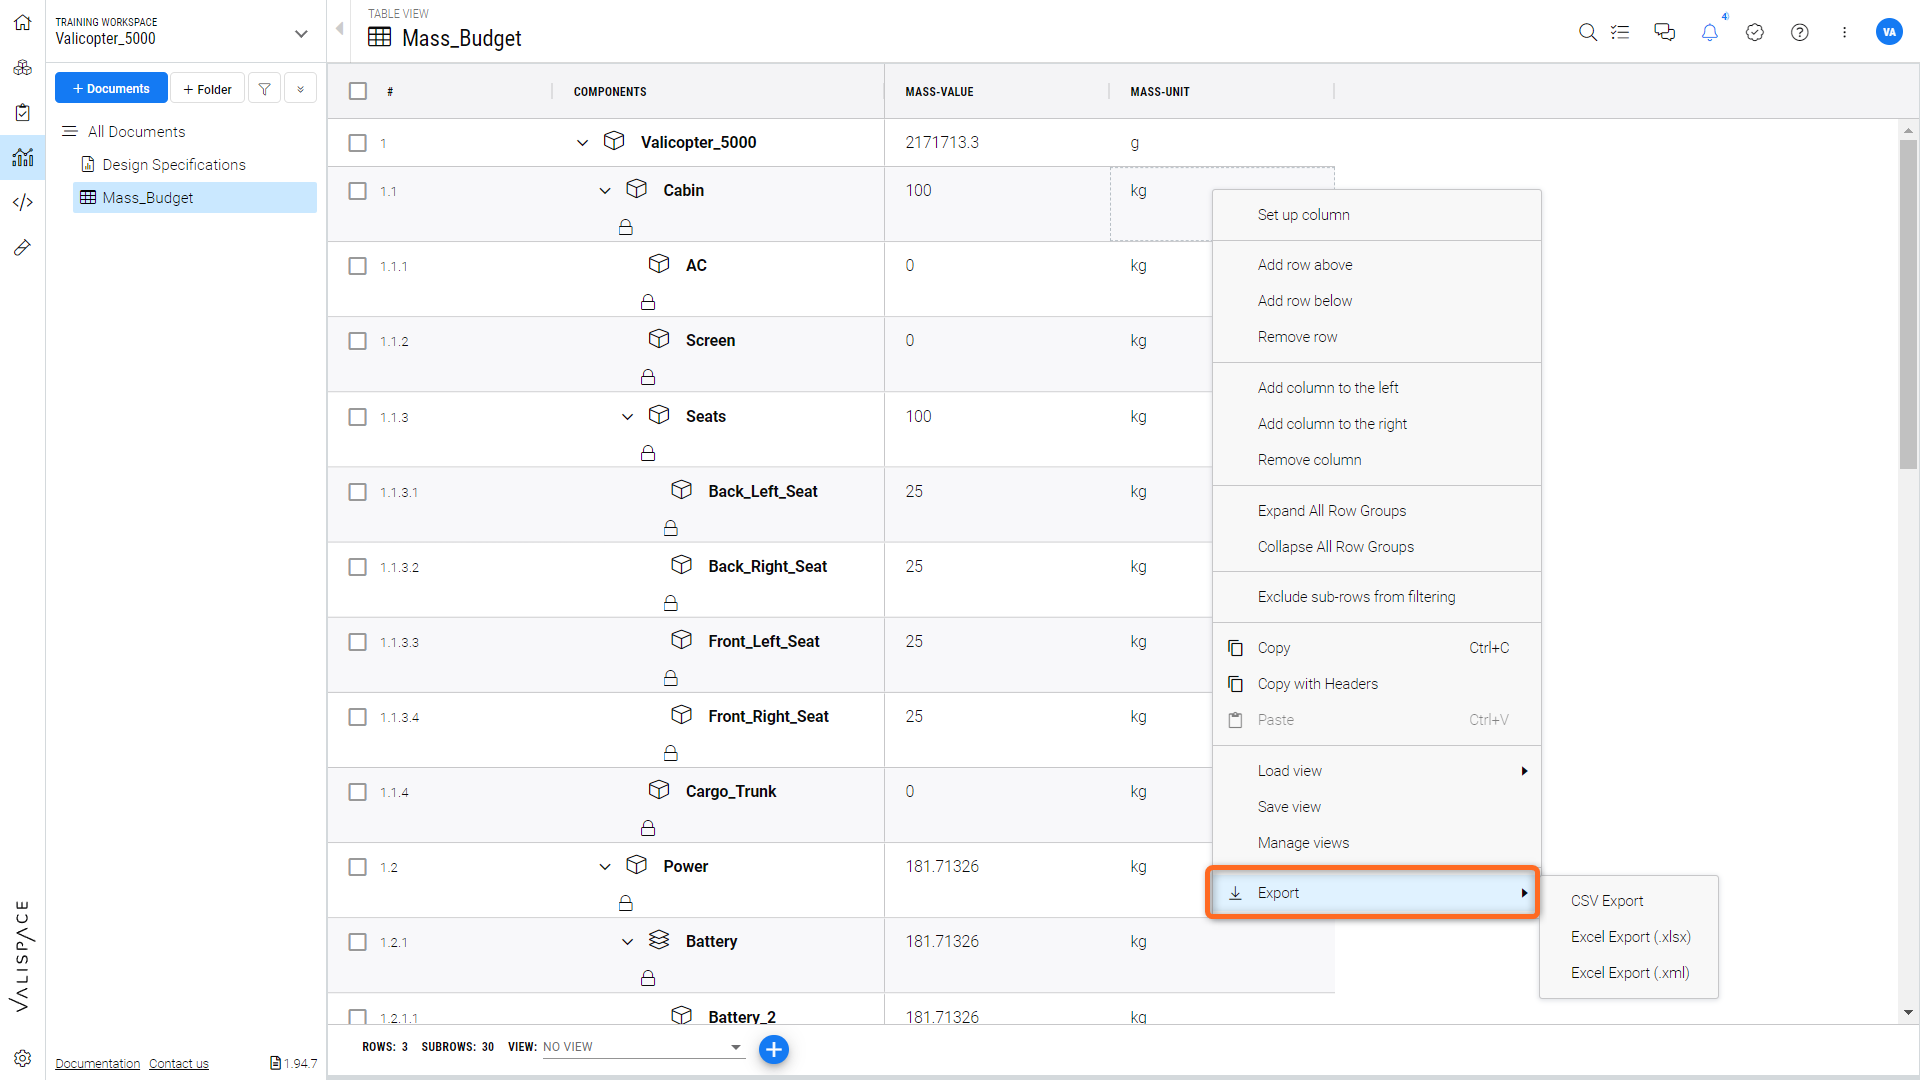
Exporting Table Views- the image illustrates how to export the table view data to XLSX or CSV file