Tasks and Timeline
Within the Project Module, the tasks and timeline allow you to efficiently manage your project's tasks and its schedule. By creating dependencies between individual tasks, you can create a complete Gantt chart for your project. This gives you the overall view of your project workflow. The timeline functionality allows you to link tasks to milestones/deliverables/test runs, as well as assign tasks to team members within a project. The Requirements and Systems Portal will then automatically identify critical activities and will create a critical path to allow users to monitor project progress.
Overview of the Timeline
Start Date
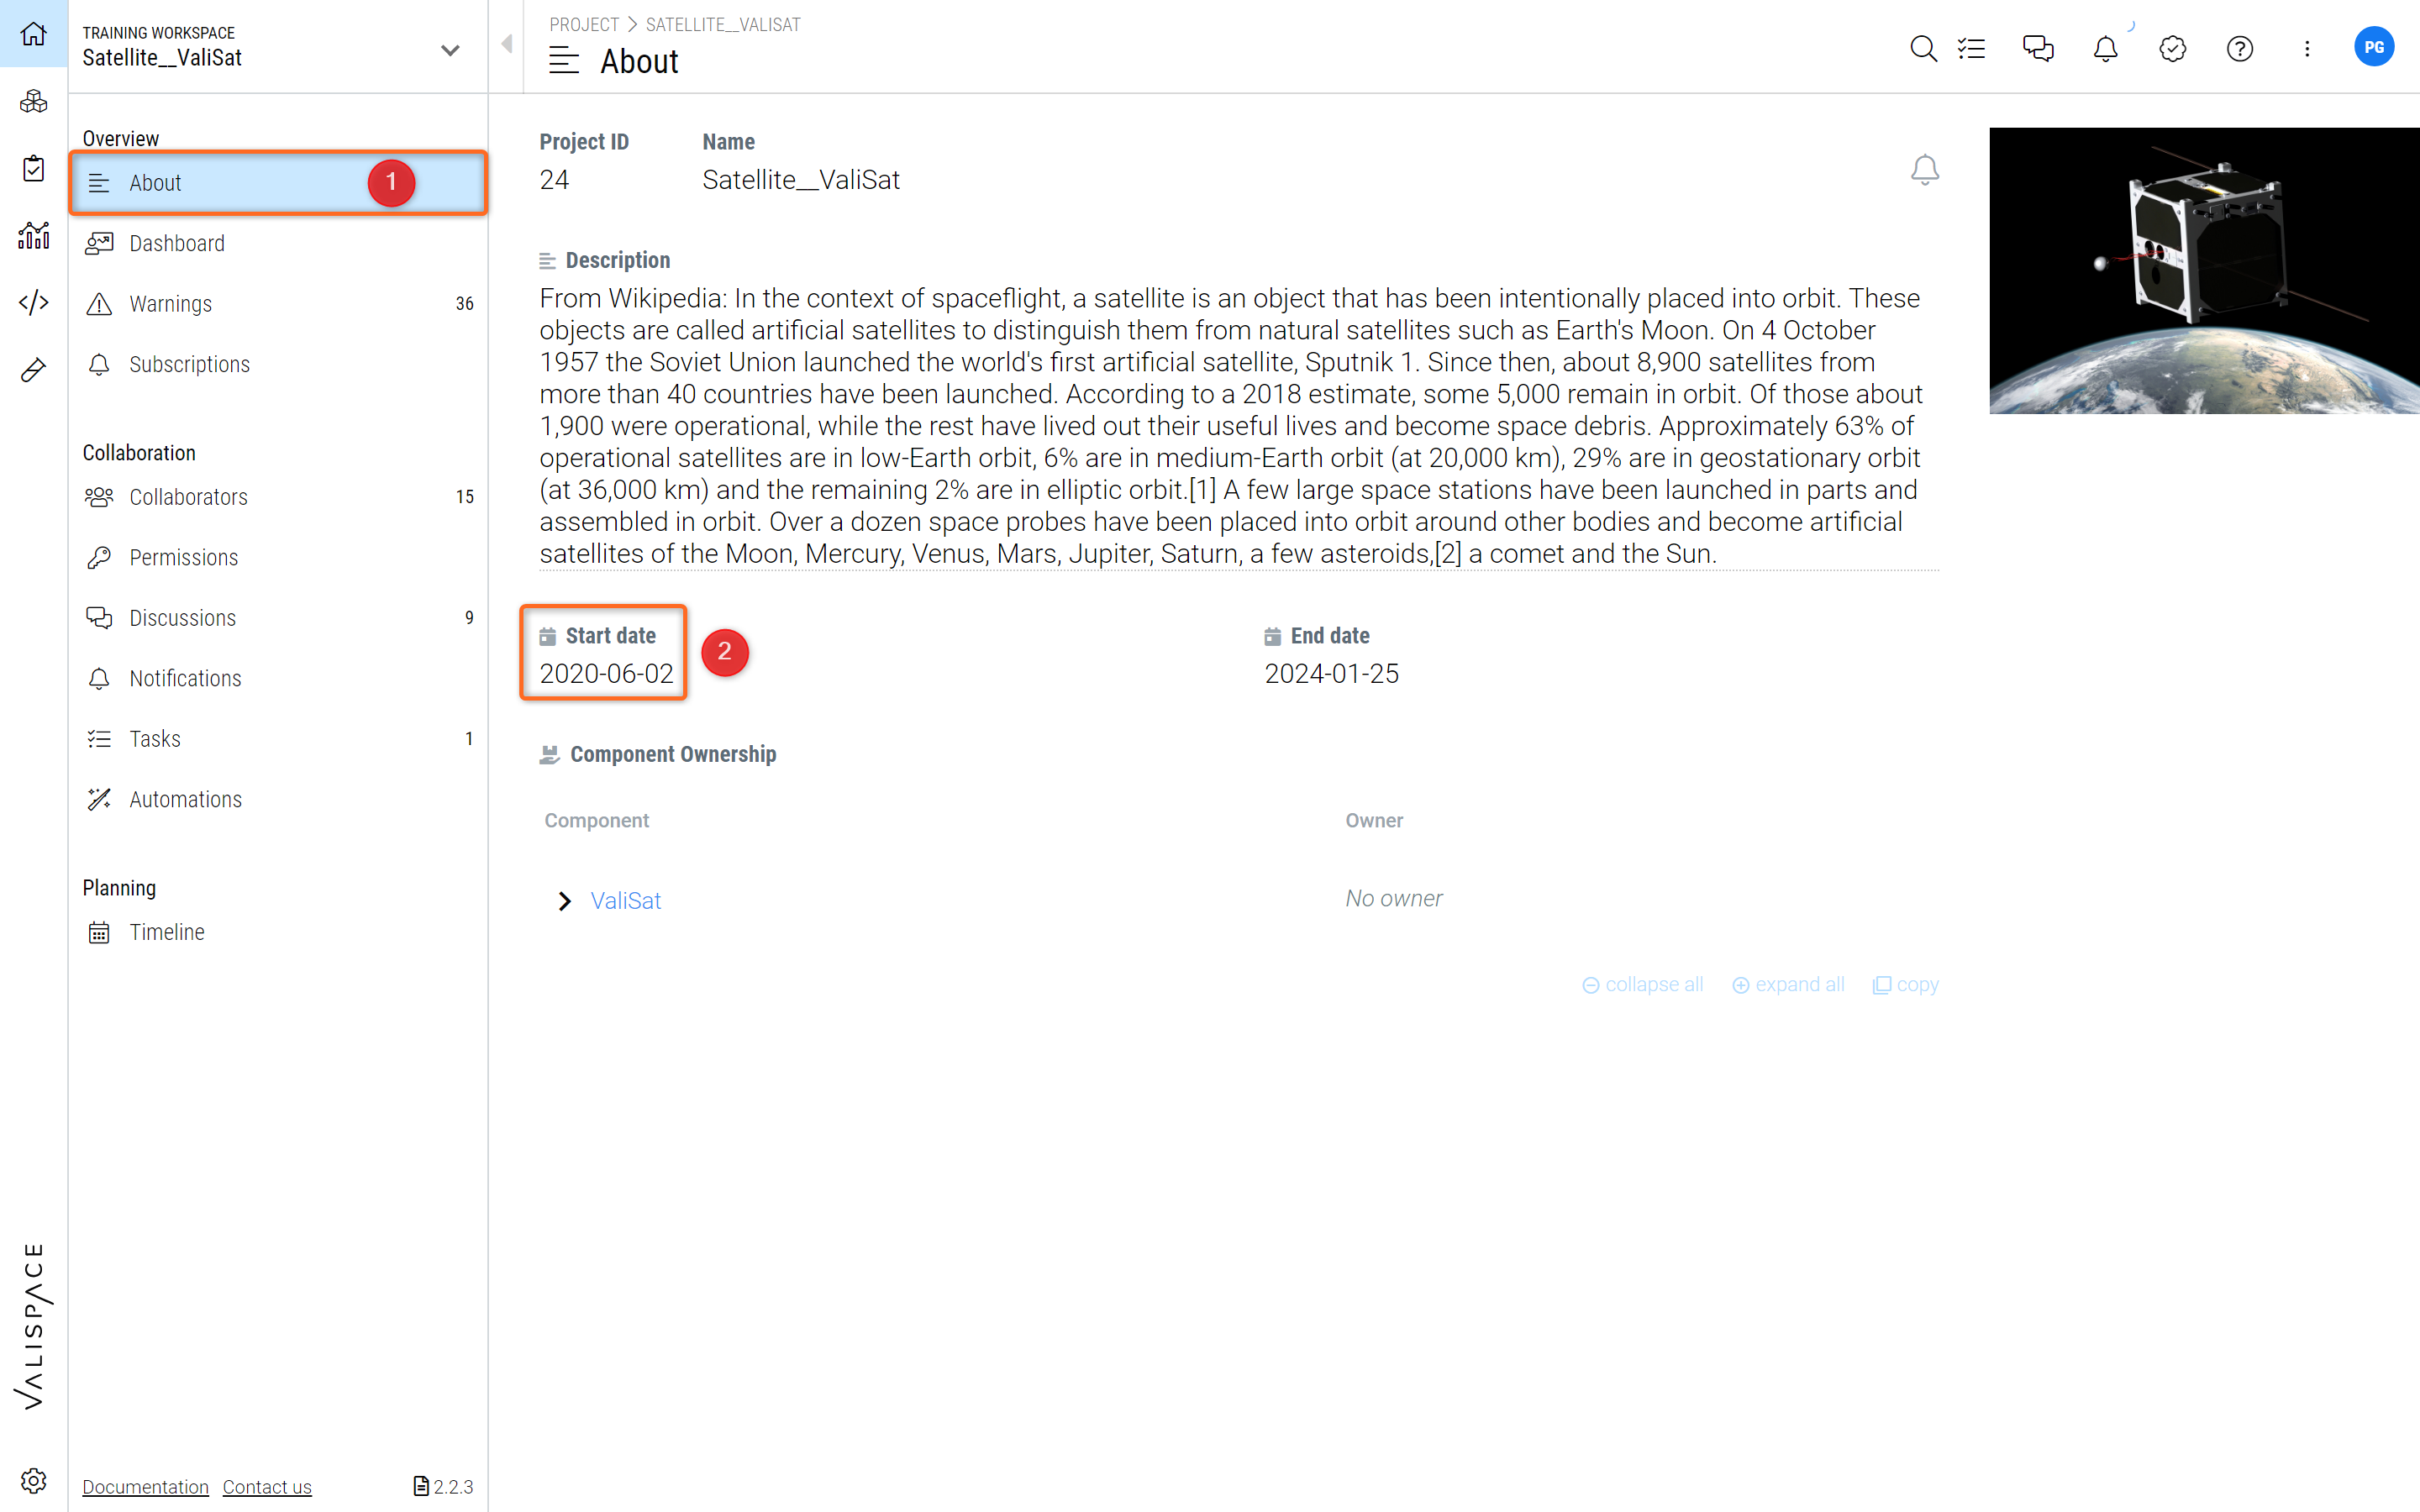
It is important to input the start date of your project to have the calendar view in the timeline. In case the dates are not provided, the calendar is shown as generic (with week 1 or day 1 based on your settings). To set the start date of your project, you can add them by going to “About” (1) in the Project Module, and in the right-side column, you have the “Start date” (2).
Option to add the start date - method 1
There is one more possibility to add the start date within the Requirements and Systems Portal. Hover over to the “Timeline” (1) and select the column “Linear” (2) and then add the start date (3). Adding or changing the start date in any of these places automatically updates it in both.

Option to add the start date - method 2
Creating Tasks
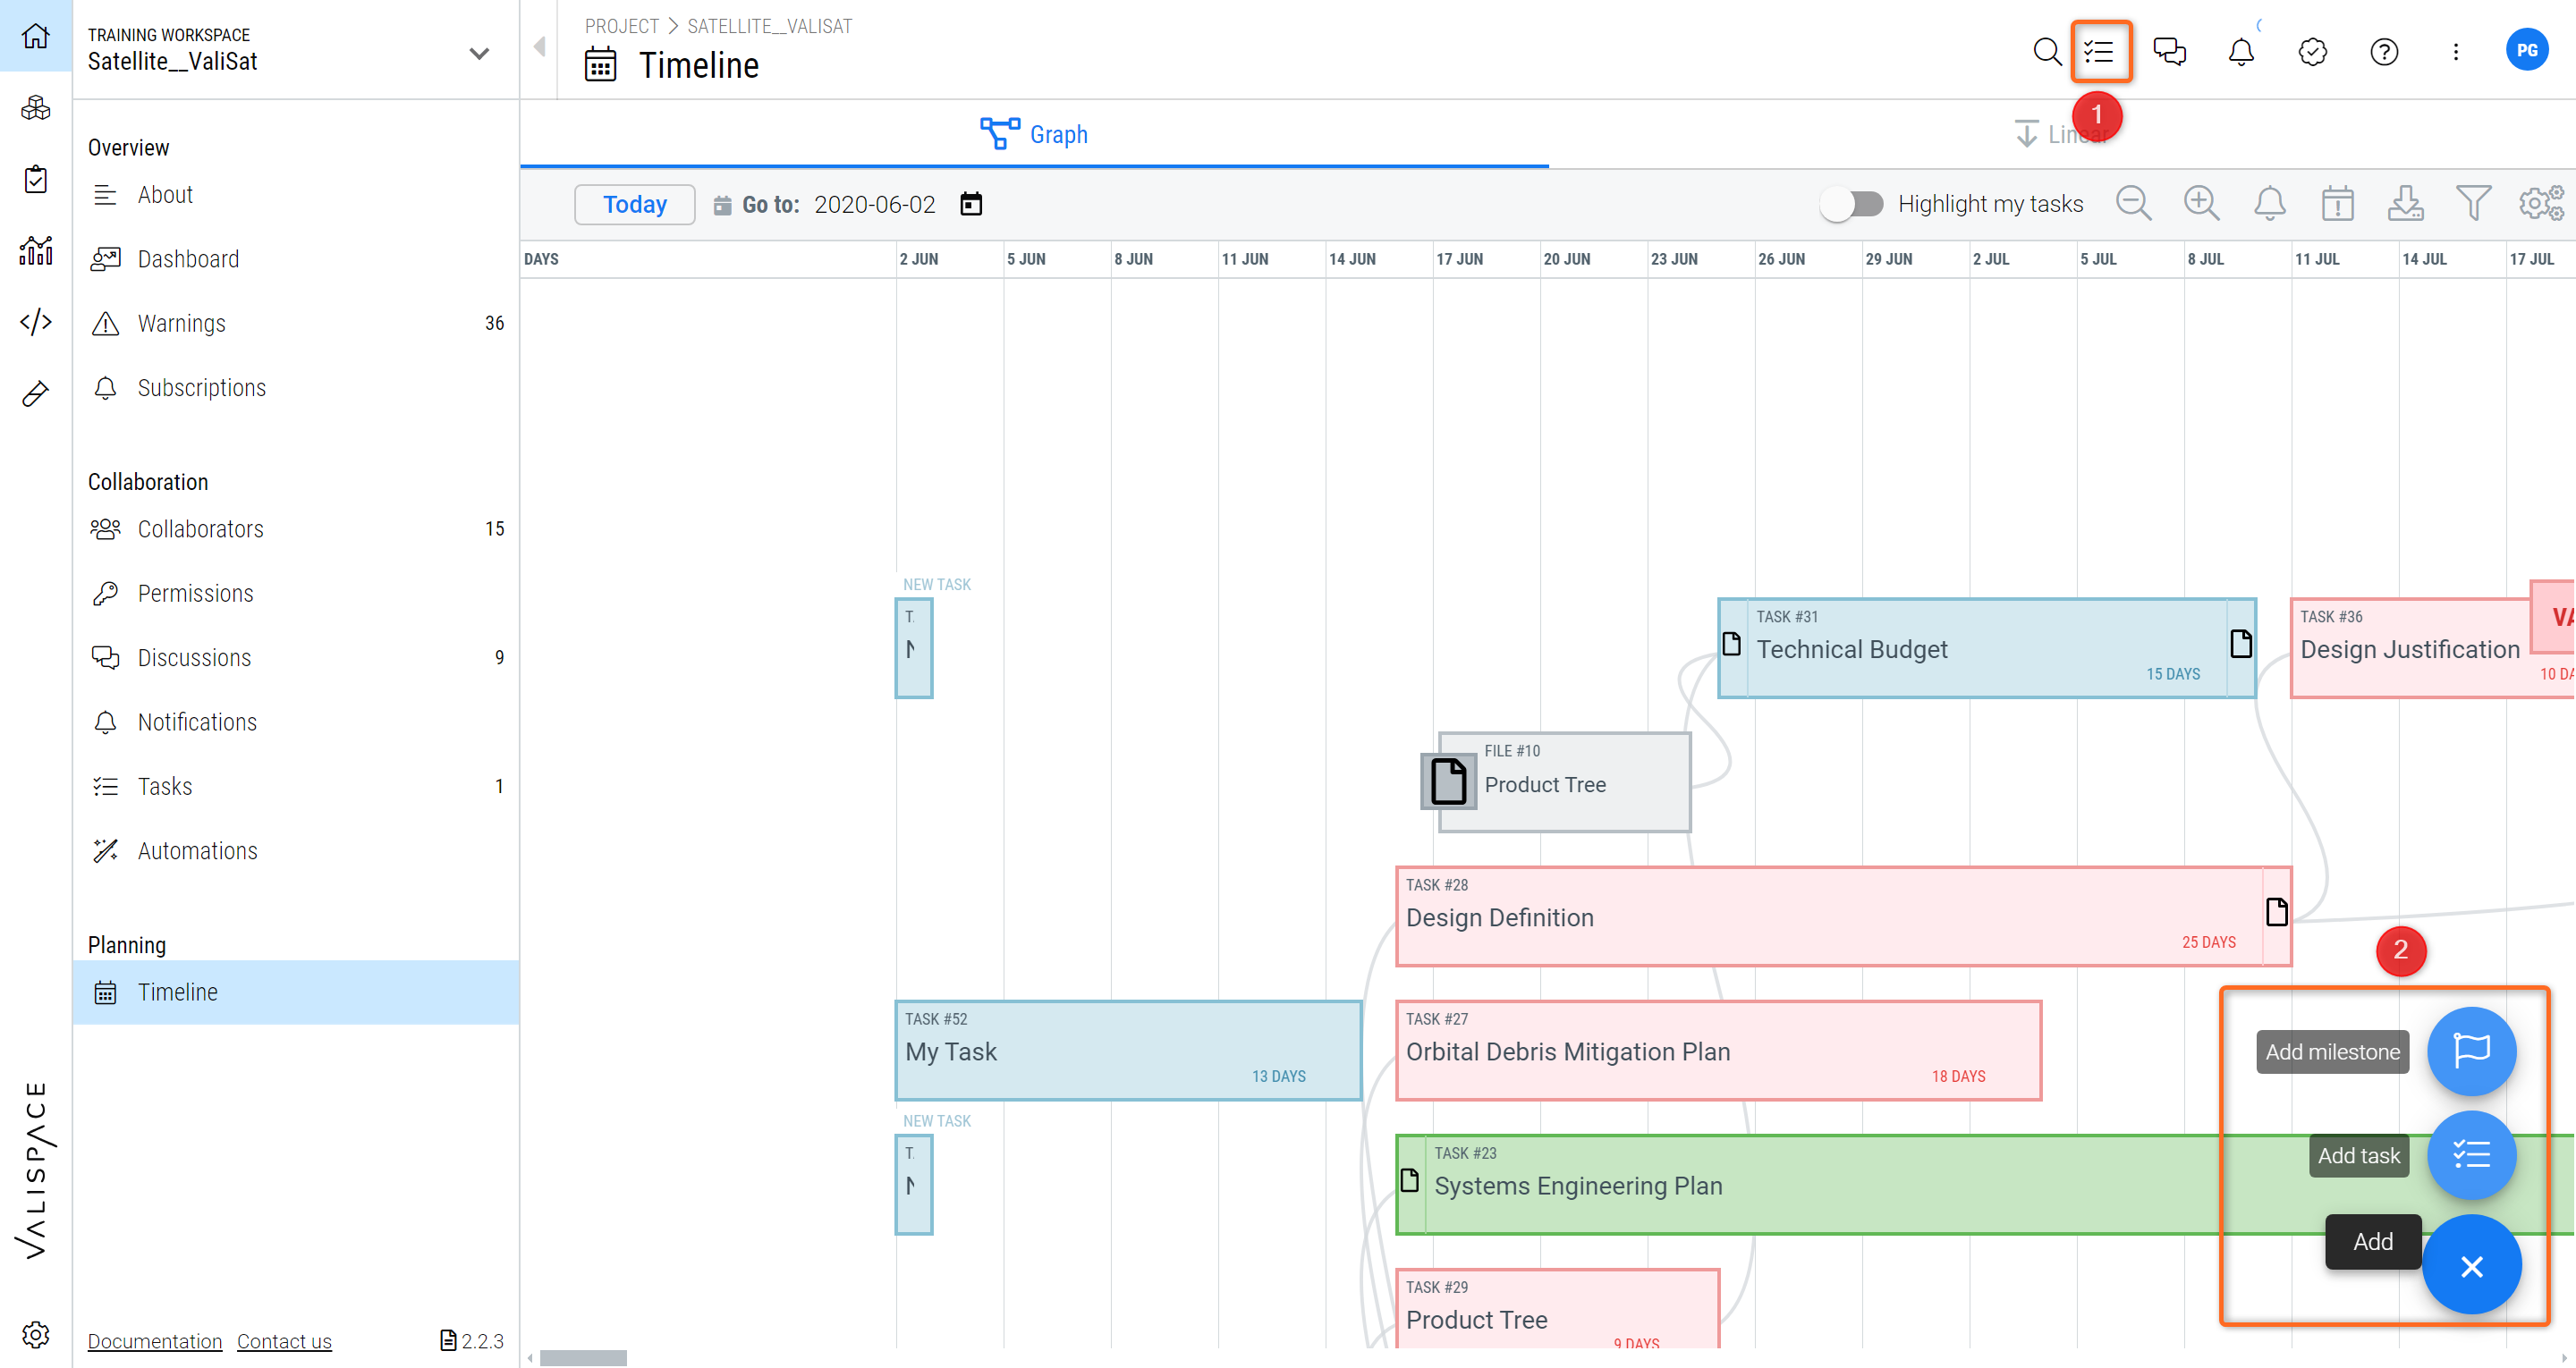
To create a task, either click on the “Add task” button on the bottom right-hand side (1) or use the tasks button on the top right side of the screen (2). The task will then appear on the project's timeline.
Creating a Task
Once you select the option “Add Task”, a small pop-up window opens up, where the user can add information in various fields which are explained below.
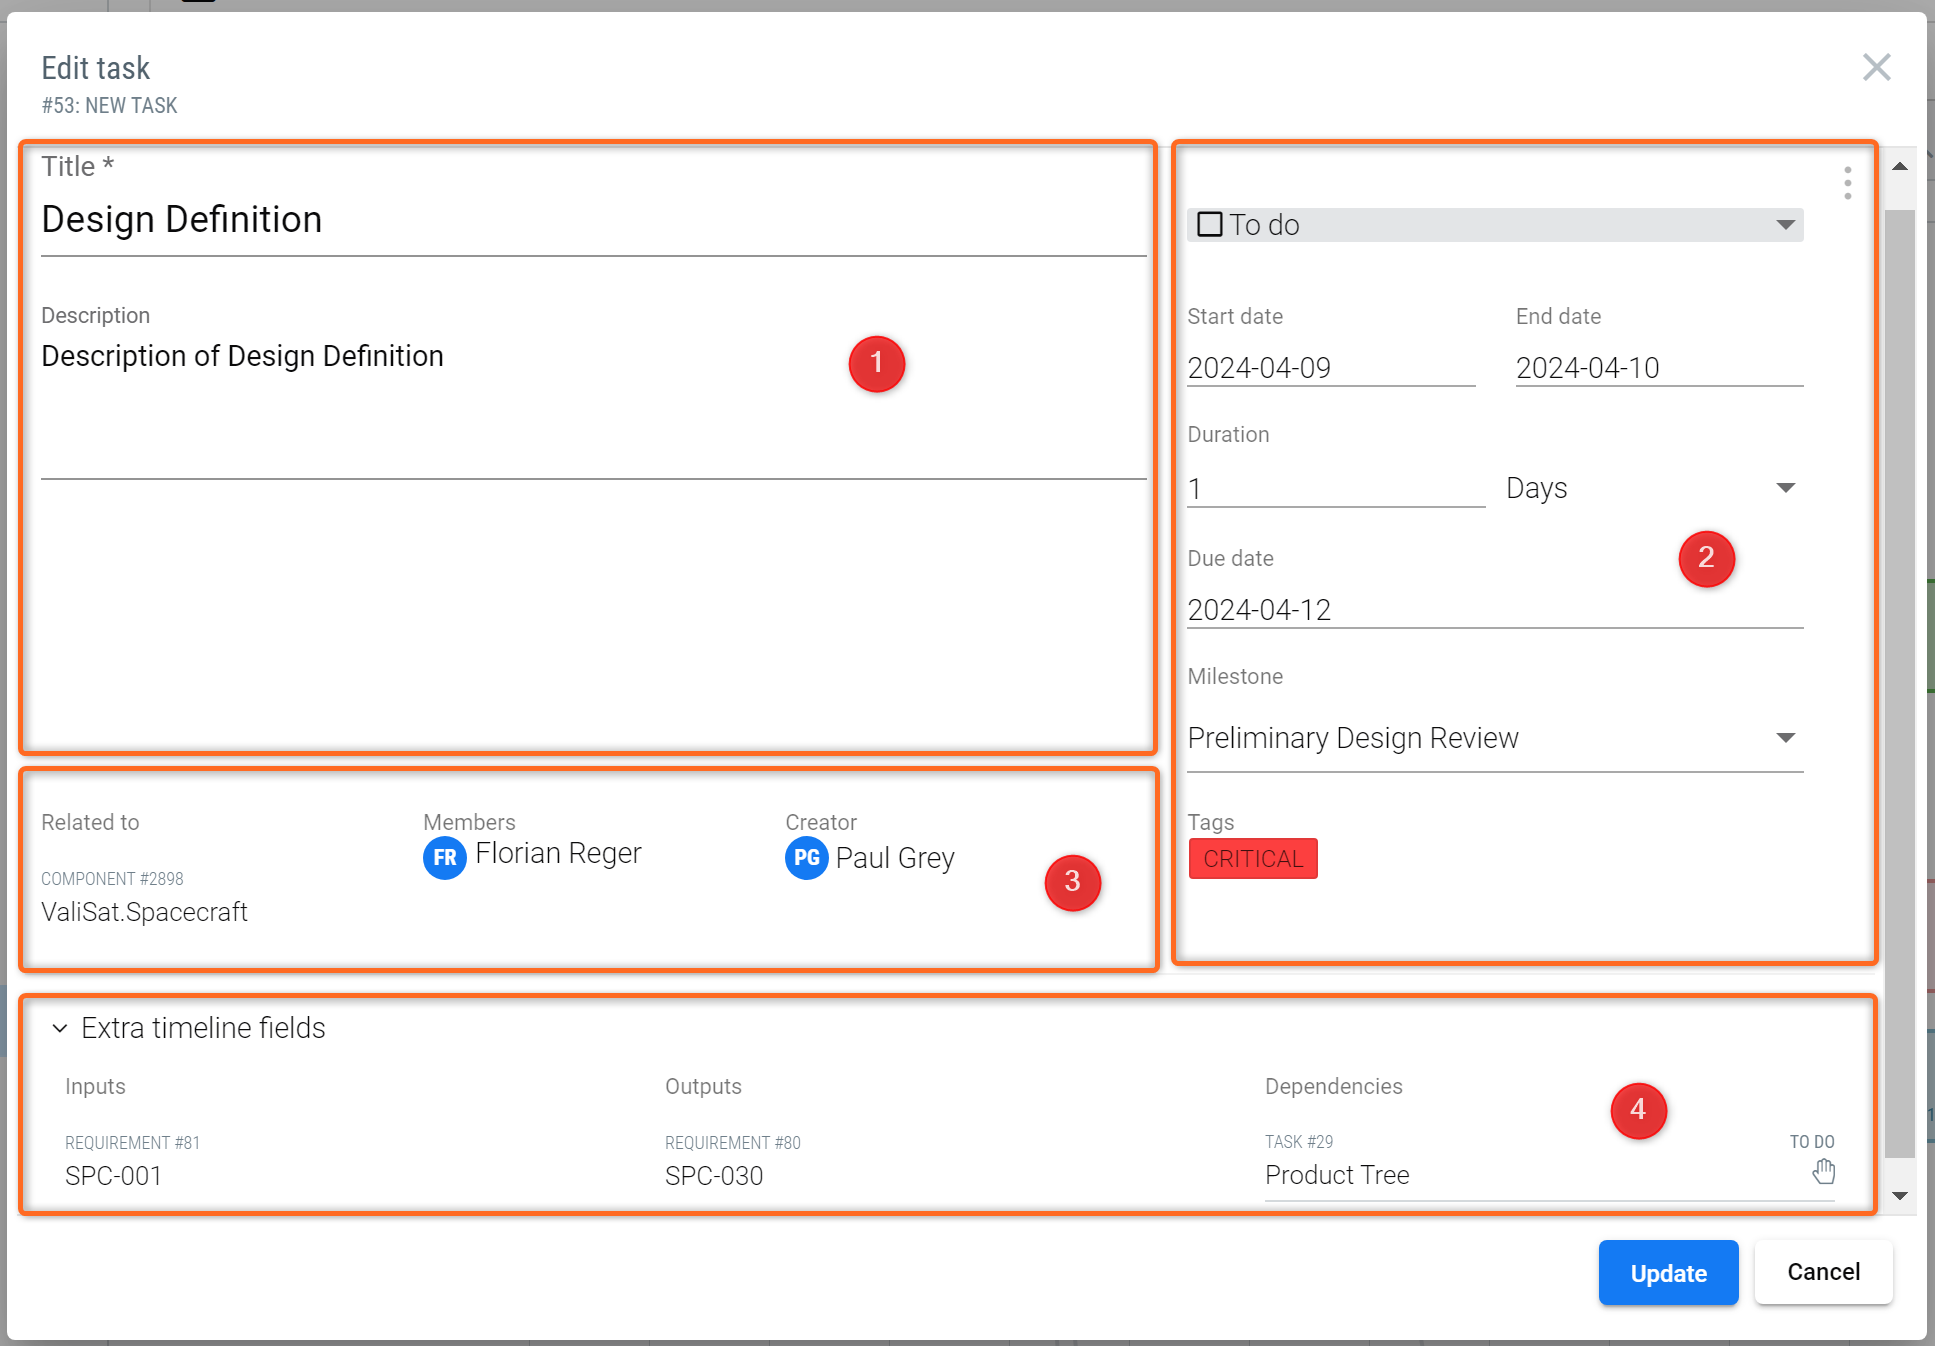
Tasks definition and available options
Title (1): the user can provide a short title describing the task concerned, e.g., design definition, system engineering plan, etc.
Description (1): provide a brief explanation regarding the tasks/steps.
Status (2): this field shows the status of the tasks eg: started, to do, or completed.
Duration (2): the user can provide information on the allocated time for the tasks. The Requirements and Systems Portal takes this information and adds it to the start date to create the blocks on the timeline planning.
Start date (2): the user can input the start date of the tasks. If the start date field is empty, the tasks will be created on the start date of the project.
Due date (2): each task can have a due date and this is not the “end date”. The end date is calculated based on the duration of each task. If the end date of a task is after the defined due date, a warning is added to the task e.g., “Task should have been completed on Aug 25, 2021”.
Milestone (2): milestones can be created in the timeline by clicking on the “+” sign on the right side. The user can relate the tasks to the project milestones (e.g., Phase A, PDR, etc) by adding the information here.
Related to (3): in case the tasks are related to projects/Blocks/Requirements/Valis/analyses/tests/ discussions, you can add this information in this field.
Members (3): the user can add the members/colleagues who are responsible for the tasks. The members receive a notification when the tasks are created with their names.
Inputs (4): the inputs for the tasks can be added in this field. The inputs can be a document from the file management or Blocks or specifications or requirements.
Outputs (4): the results/output of the tasks can be added in this field. This can be a document from the file management or Blocks or specifications or requirements.
Dependencies (4): task dependencies decide which tasks come after each other on the task timeline. There are two different ways of creating dependencies of tasks:
Create a direct dependency by choosing a task that has to be done before this task, in the Dependencies dropdown
Create dependencies with inputs and outputs to the task. Inputs and outputs are files (or eventually other objects) that can serve as a deliverable for one task and necessary input for another. When a task has for example a “CAD model” as output and another task has the “CAD model” as an input, these tasks will be automatically connected. The advantage is that this connection is dynamic, and a user that creates a task does not need to know which task comes before it but only which inputs are needed to complete the task
To create dependencies or add inputs and outputs between tasks in your project, use the “dependencies” box in the task details field to create dependencies between tasks.
Things to know
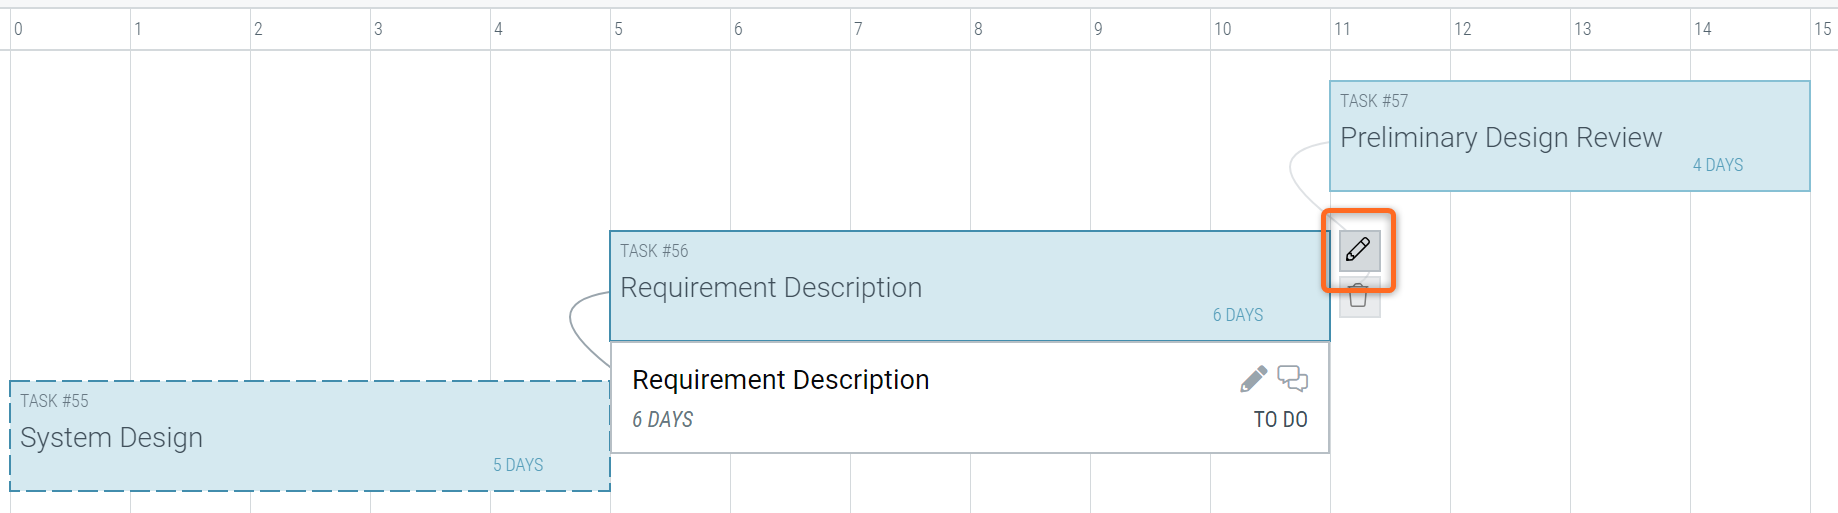
In case you would like to extend the duration of the tasks, you can simply go to the tasks and extend them by clicking on the vertical borders. If the duration of one task is decreased or increased, the other dependent tasks will move accordingly.
Once you have created a task, you can edit the details of the task by clicking on the “Edit” button on the right side of the task.
Option to edit the task information
Switch to the “Linear” view on the top panel to view the project's tasks and associated milestones.
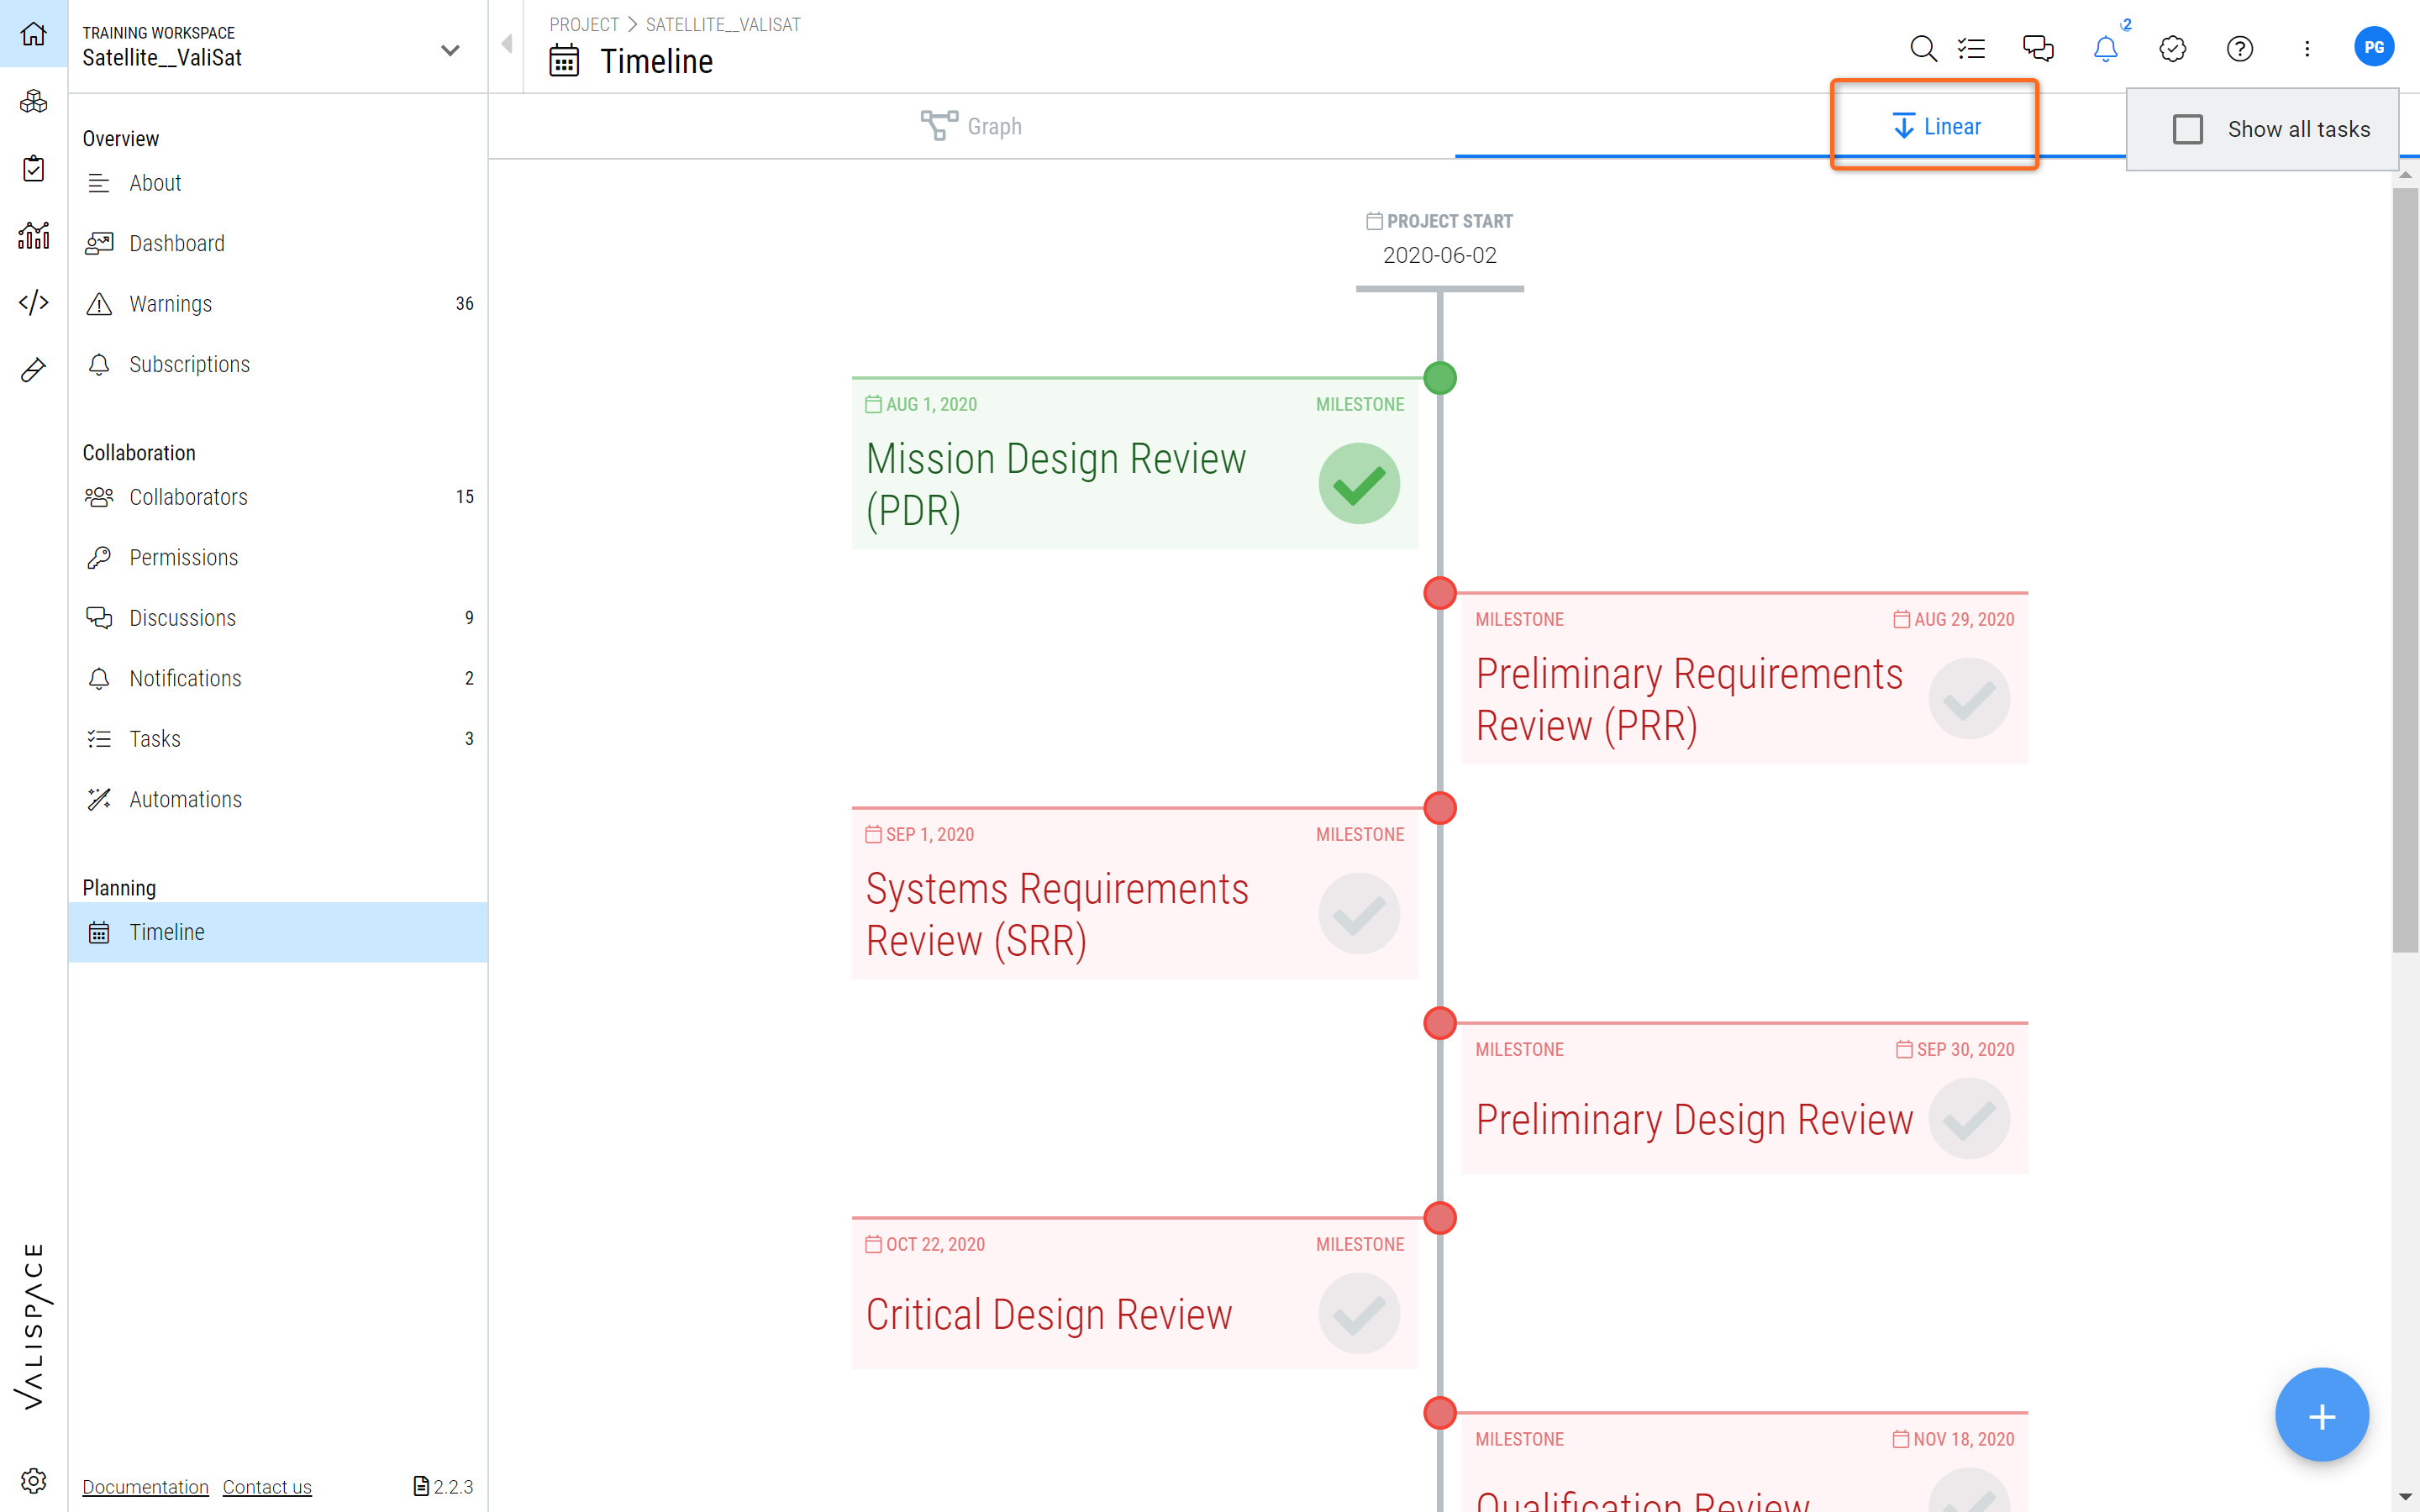
Linear view of your timeline
Additional Features
Use the panel on the top right side of the timeline module to manage your tasks (1).
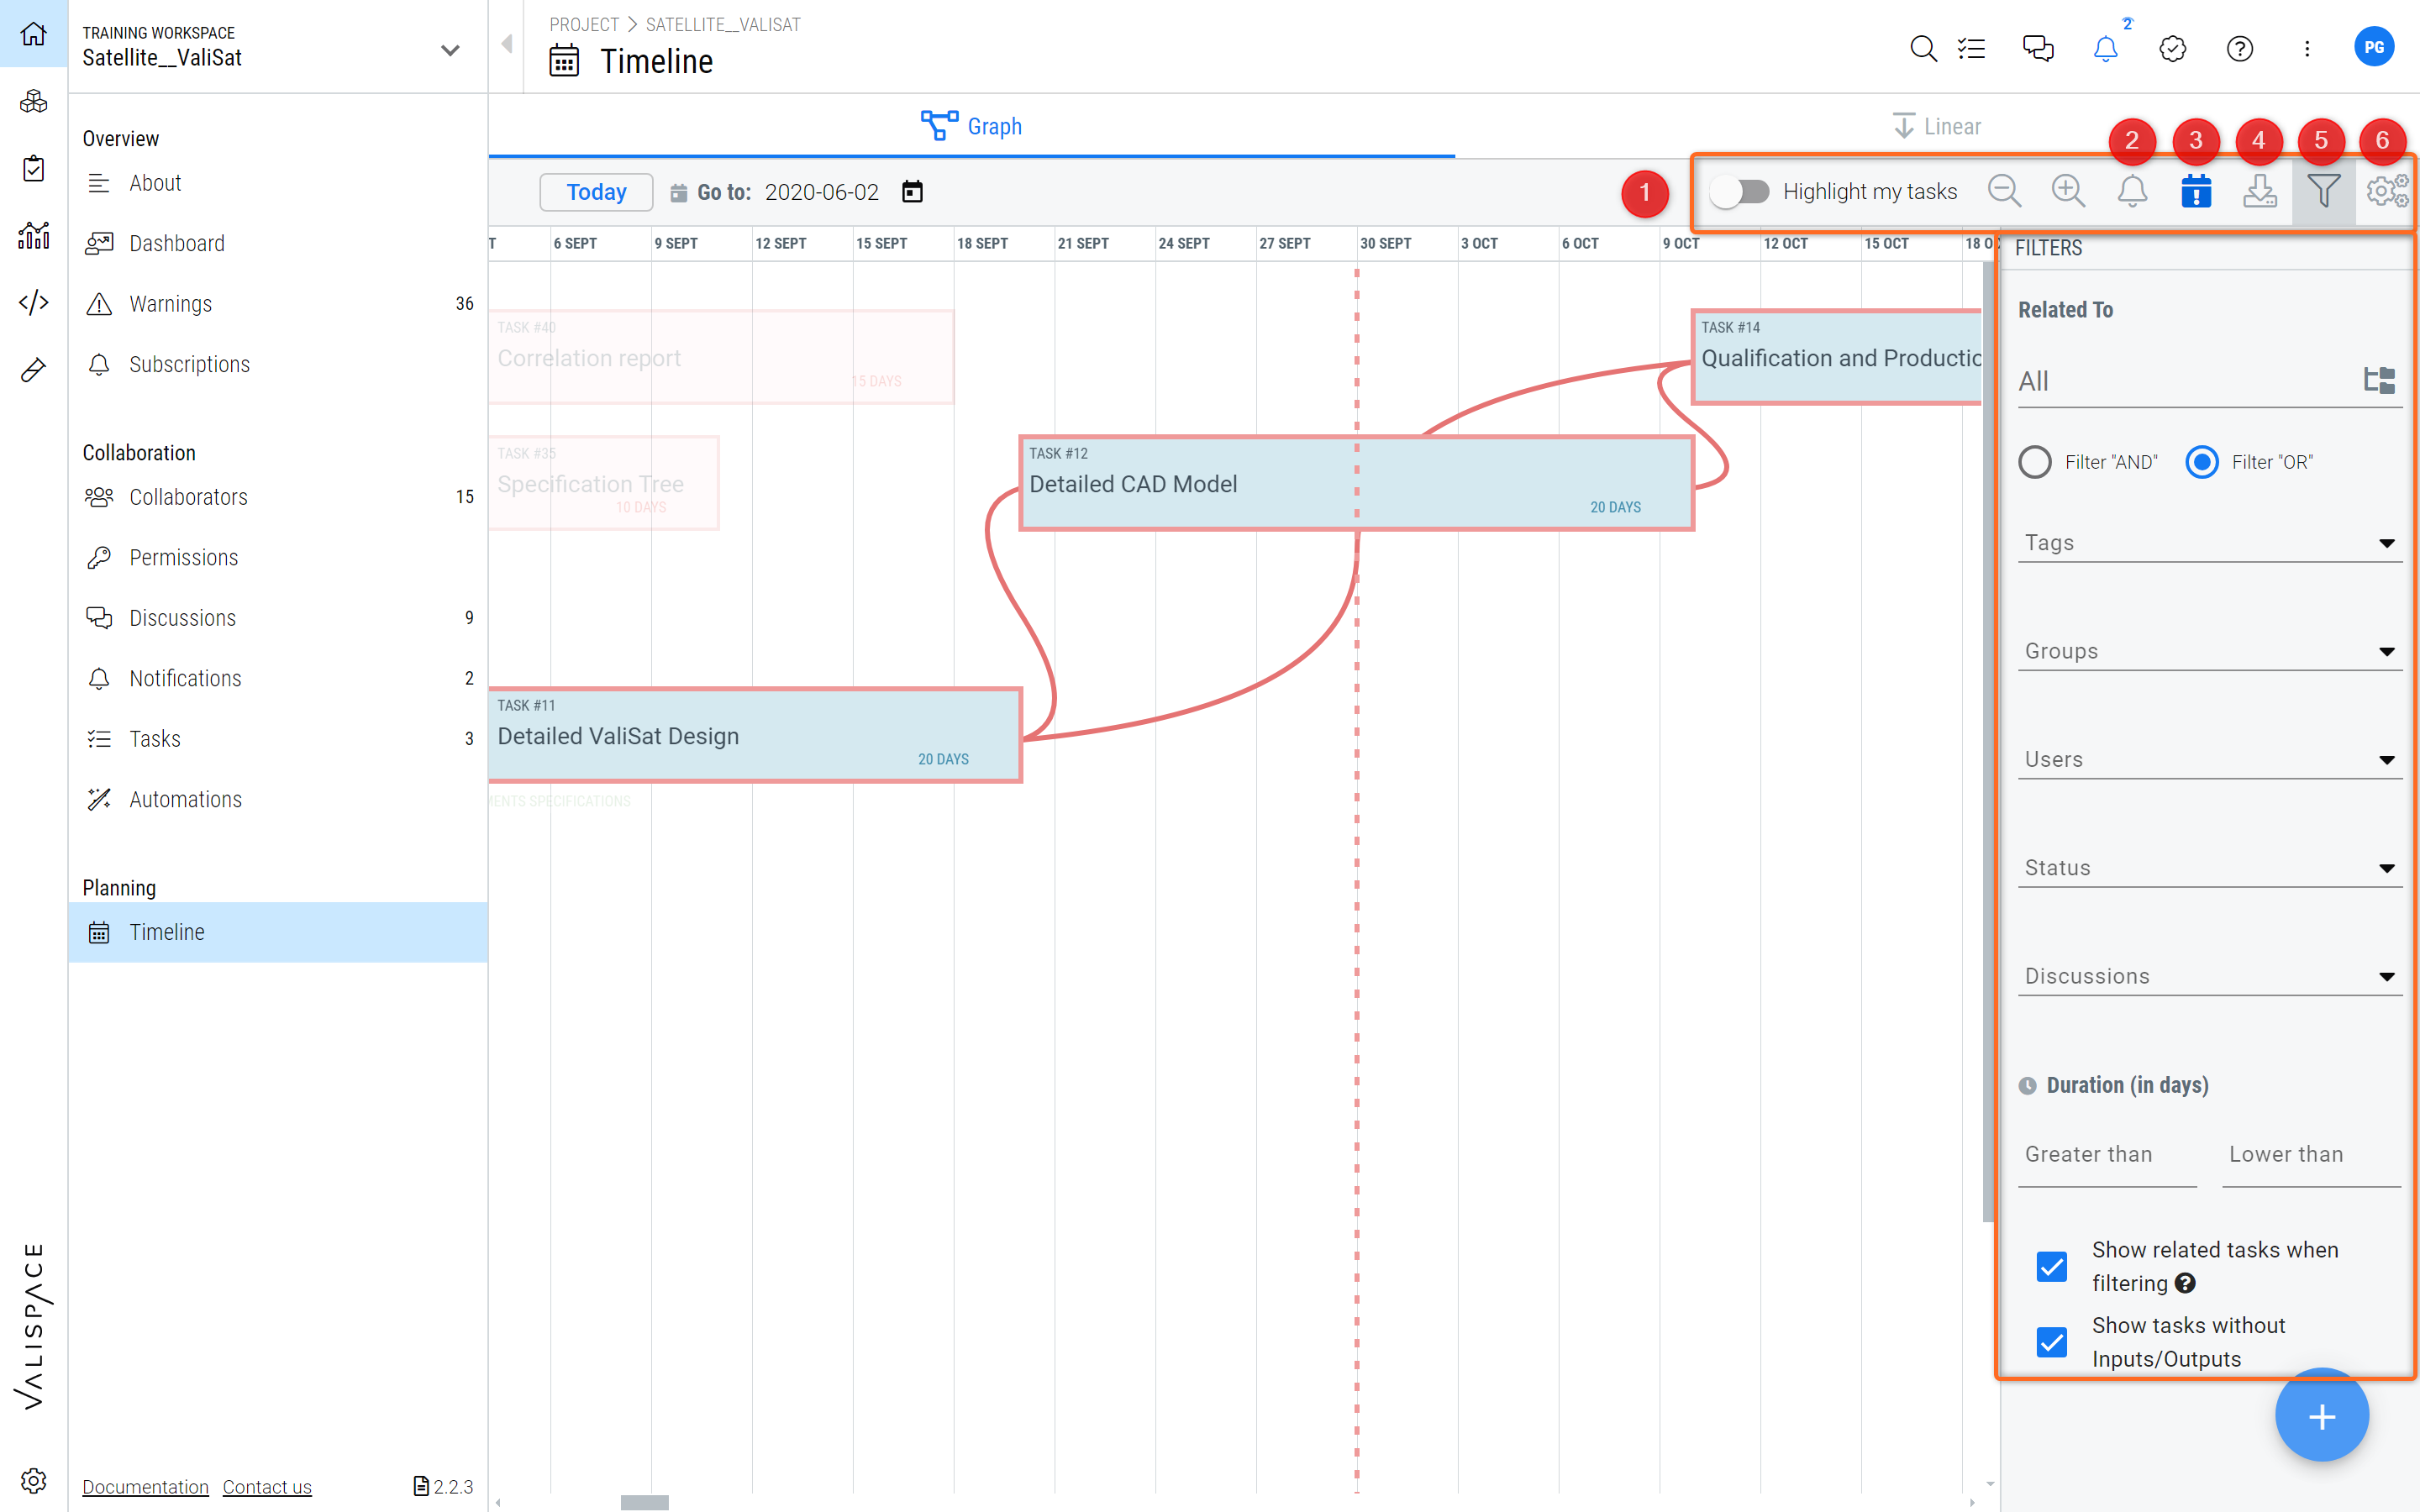
Additional features in the timeline
Subscribe to the project timeline to receive notifications anytime a change is made to a task or timeline (2).
Using the “Show/hide critical path” button you can view the critical activities associated with your project, highlighted in red (3). You can click on the download symbol (4) to download the timeline as a high-quality image file.
You can also filter for tasks (5) based on the type of associated Block, tags, groups, users, status, discussion status, and duration. By default, related tasks are also shown in the filtering meaning that if you filter for the user all tasks with the user as a member, its connected tasks will be shown. To remove related tasks from the filter results, edit the associated tick boxes at the bottom of the filter module.
Use the “Settings” button (6) to edit the timescale and layout of your project timeline. Choose a value and adjust the unit accordingly to either day, week, month or year. Additionally, the settings have different layouts which can be selected based on your preferences. It is possible to add test runs to your timeline by selecting the “show test runs”.
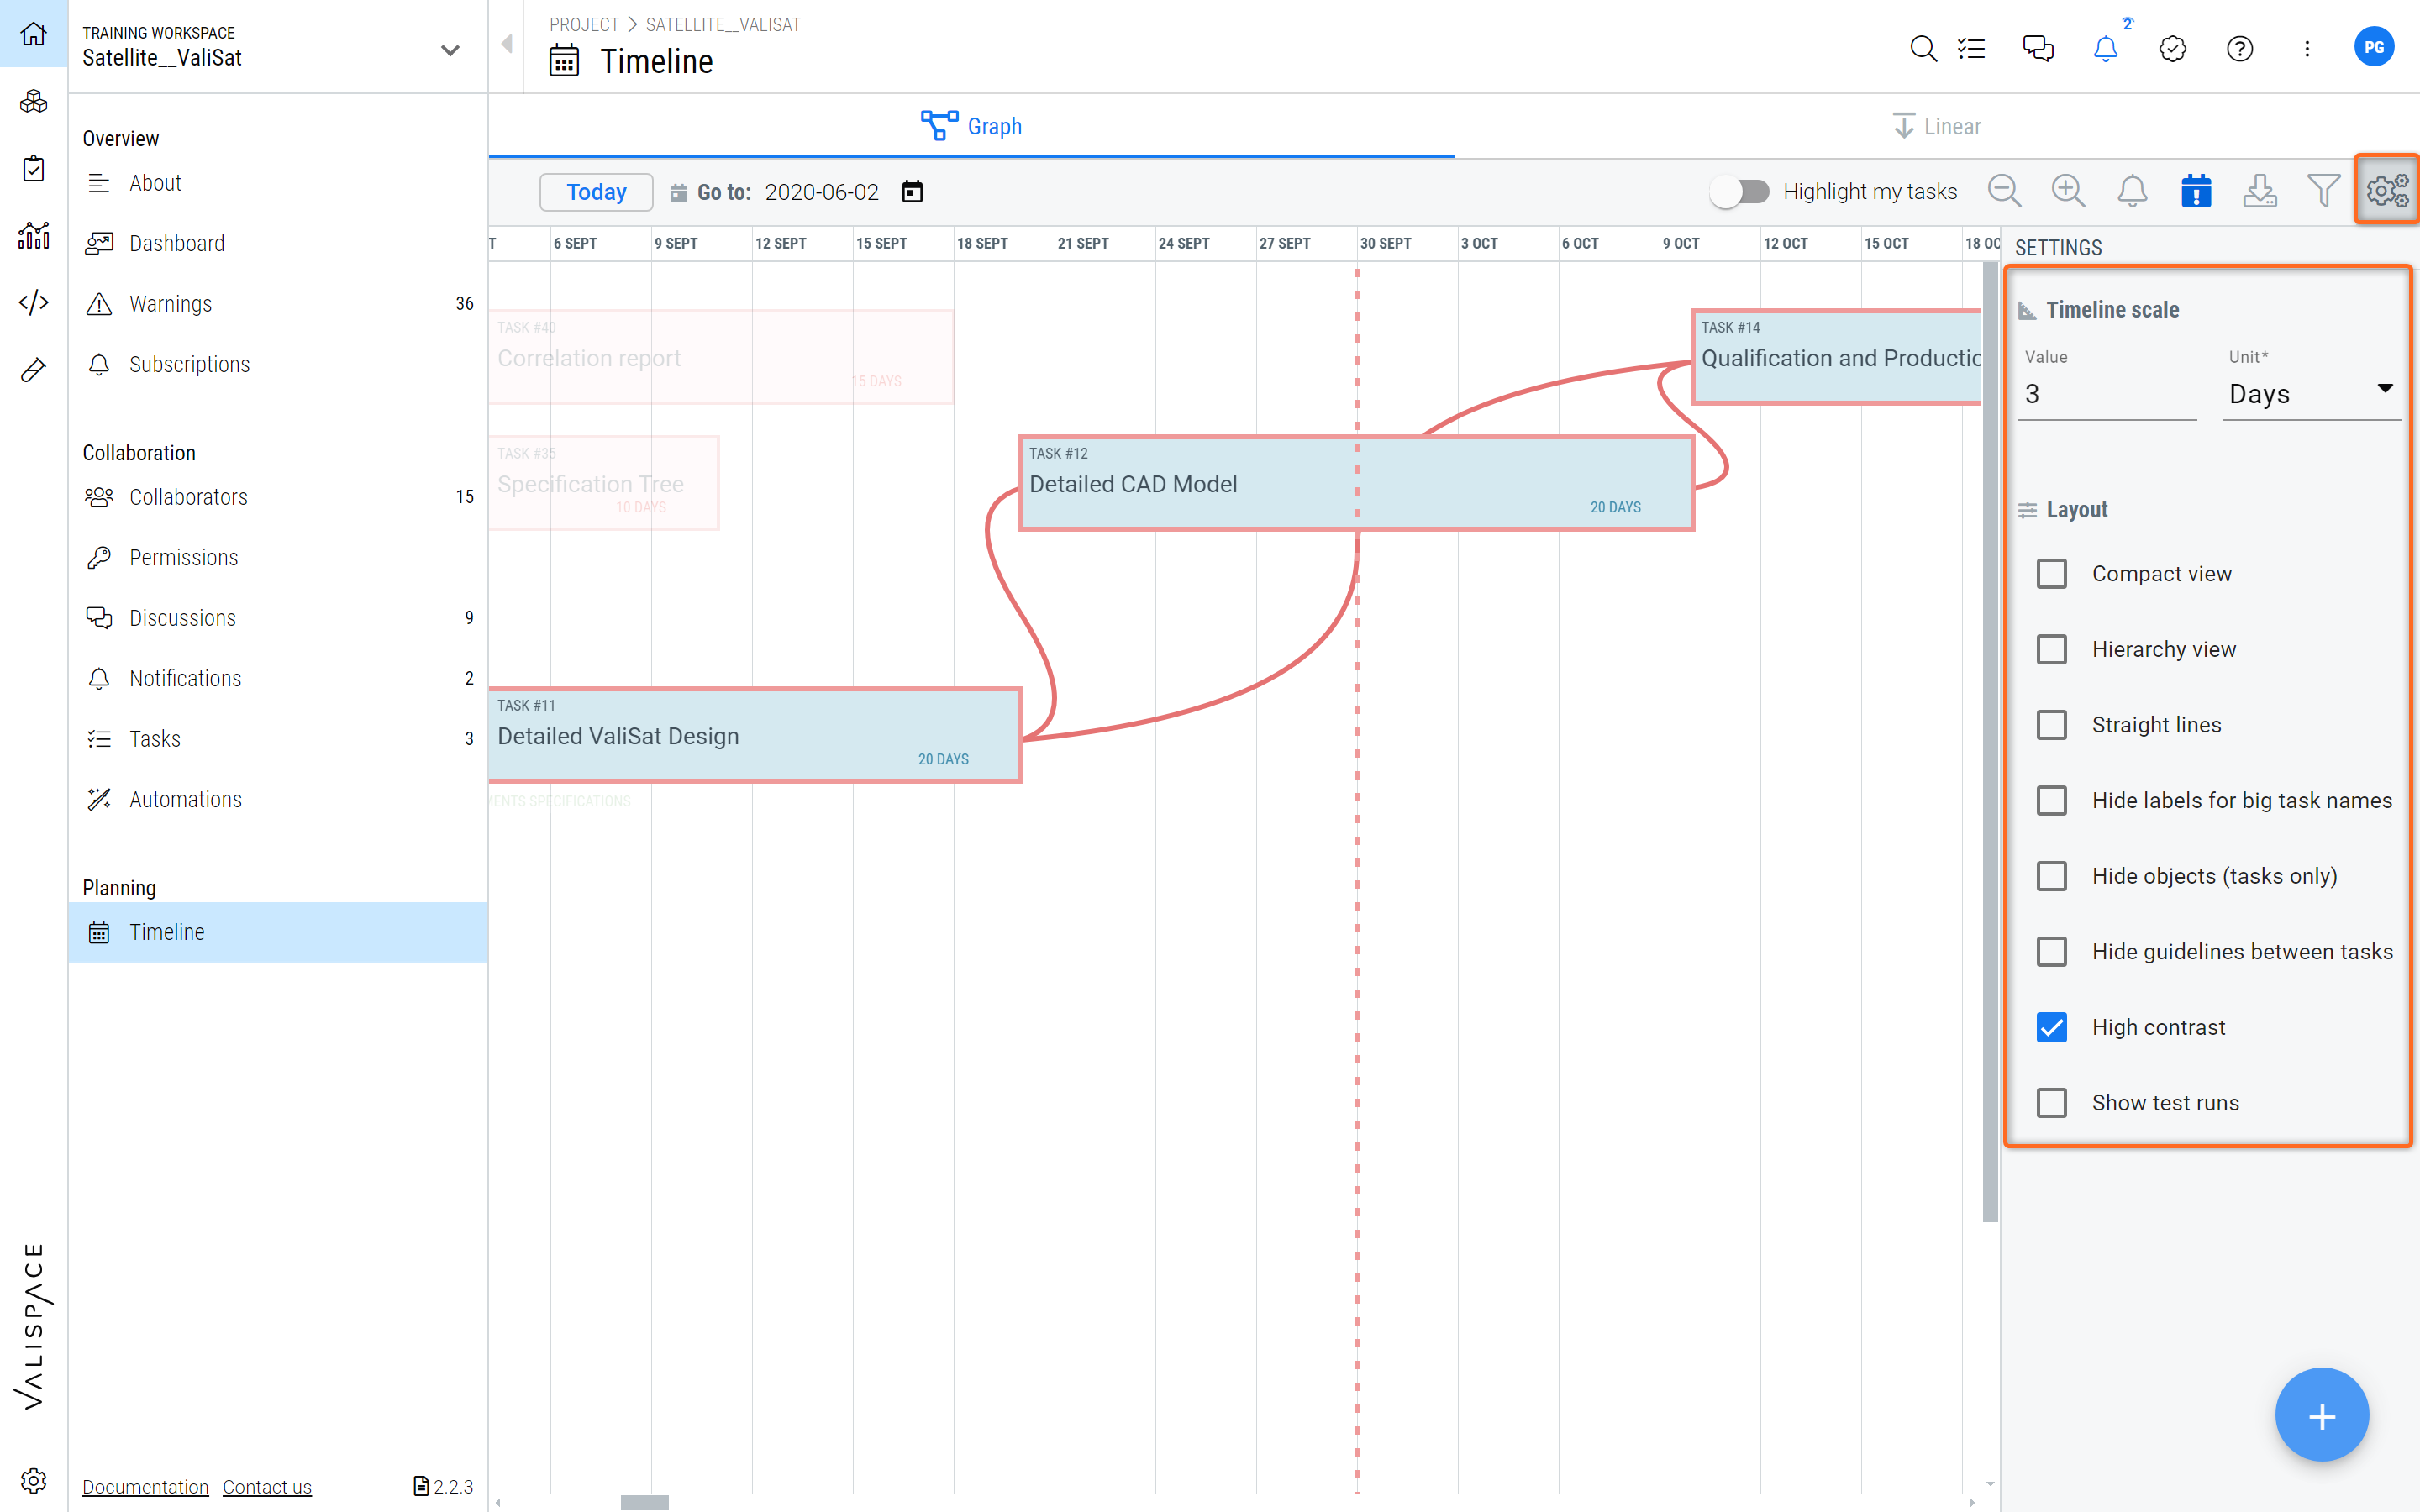
The settings menu of the timeline highlights the available options
To add a discussion to a task, hover over the task box and click the discussion button on the right side of the box. To view the added discussions, you can either open the side panel by clicking on the “Discussions” icon or go to the discussion page on your project home.
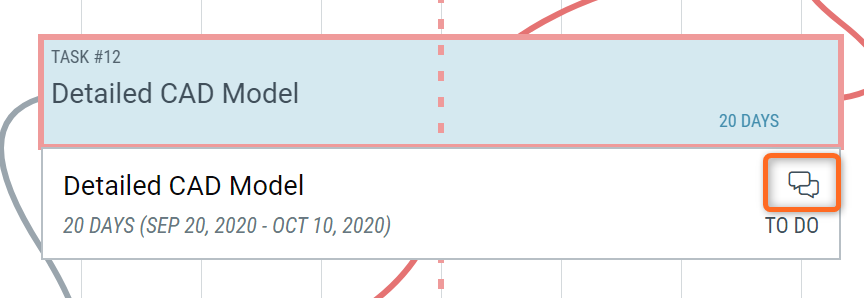
Create discussions related to the tasks
Tasks Status
Using the tasks dashboard, you can view and track the status of your tasks. To edit and view task details click on the task and the details will open up in a panel to the right.
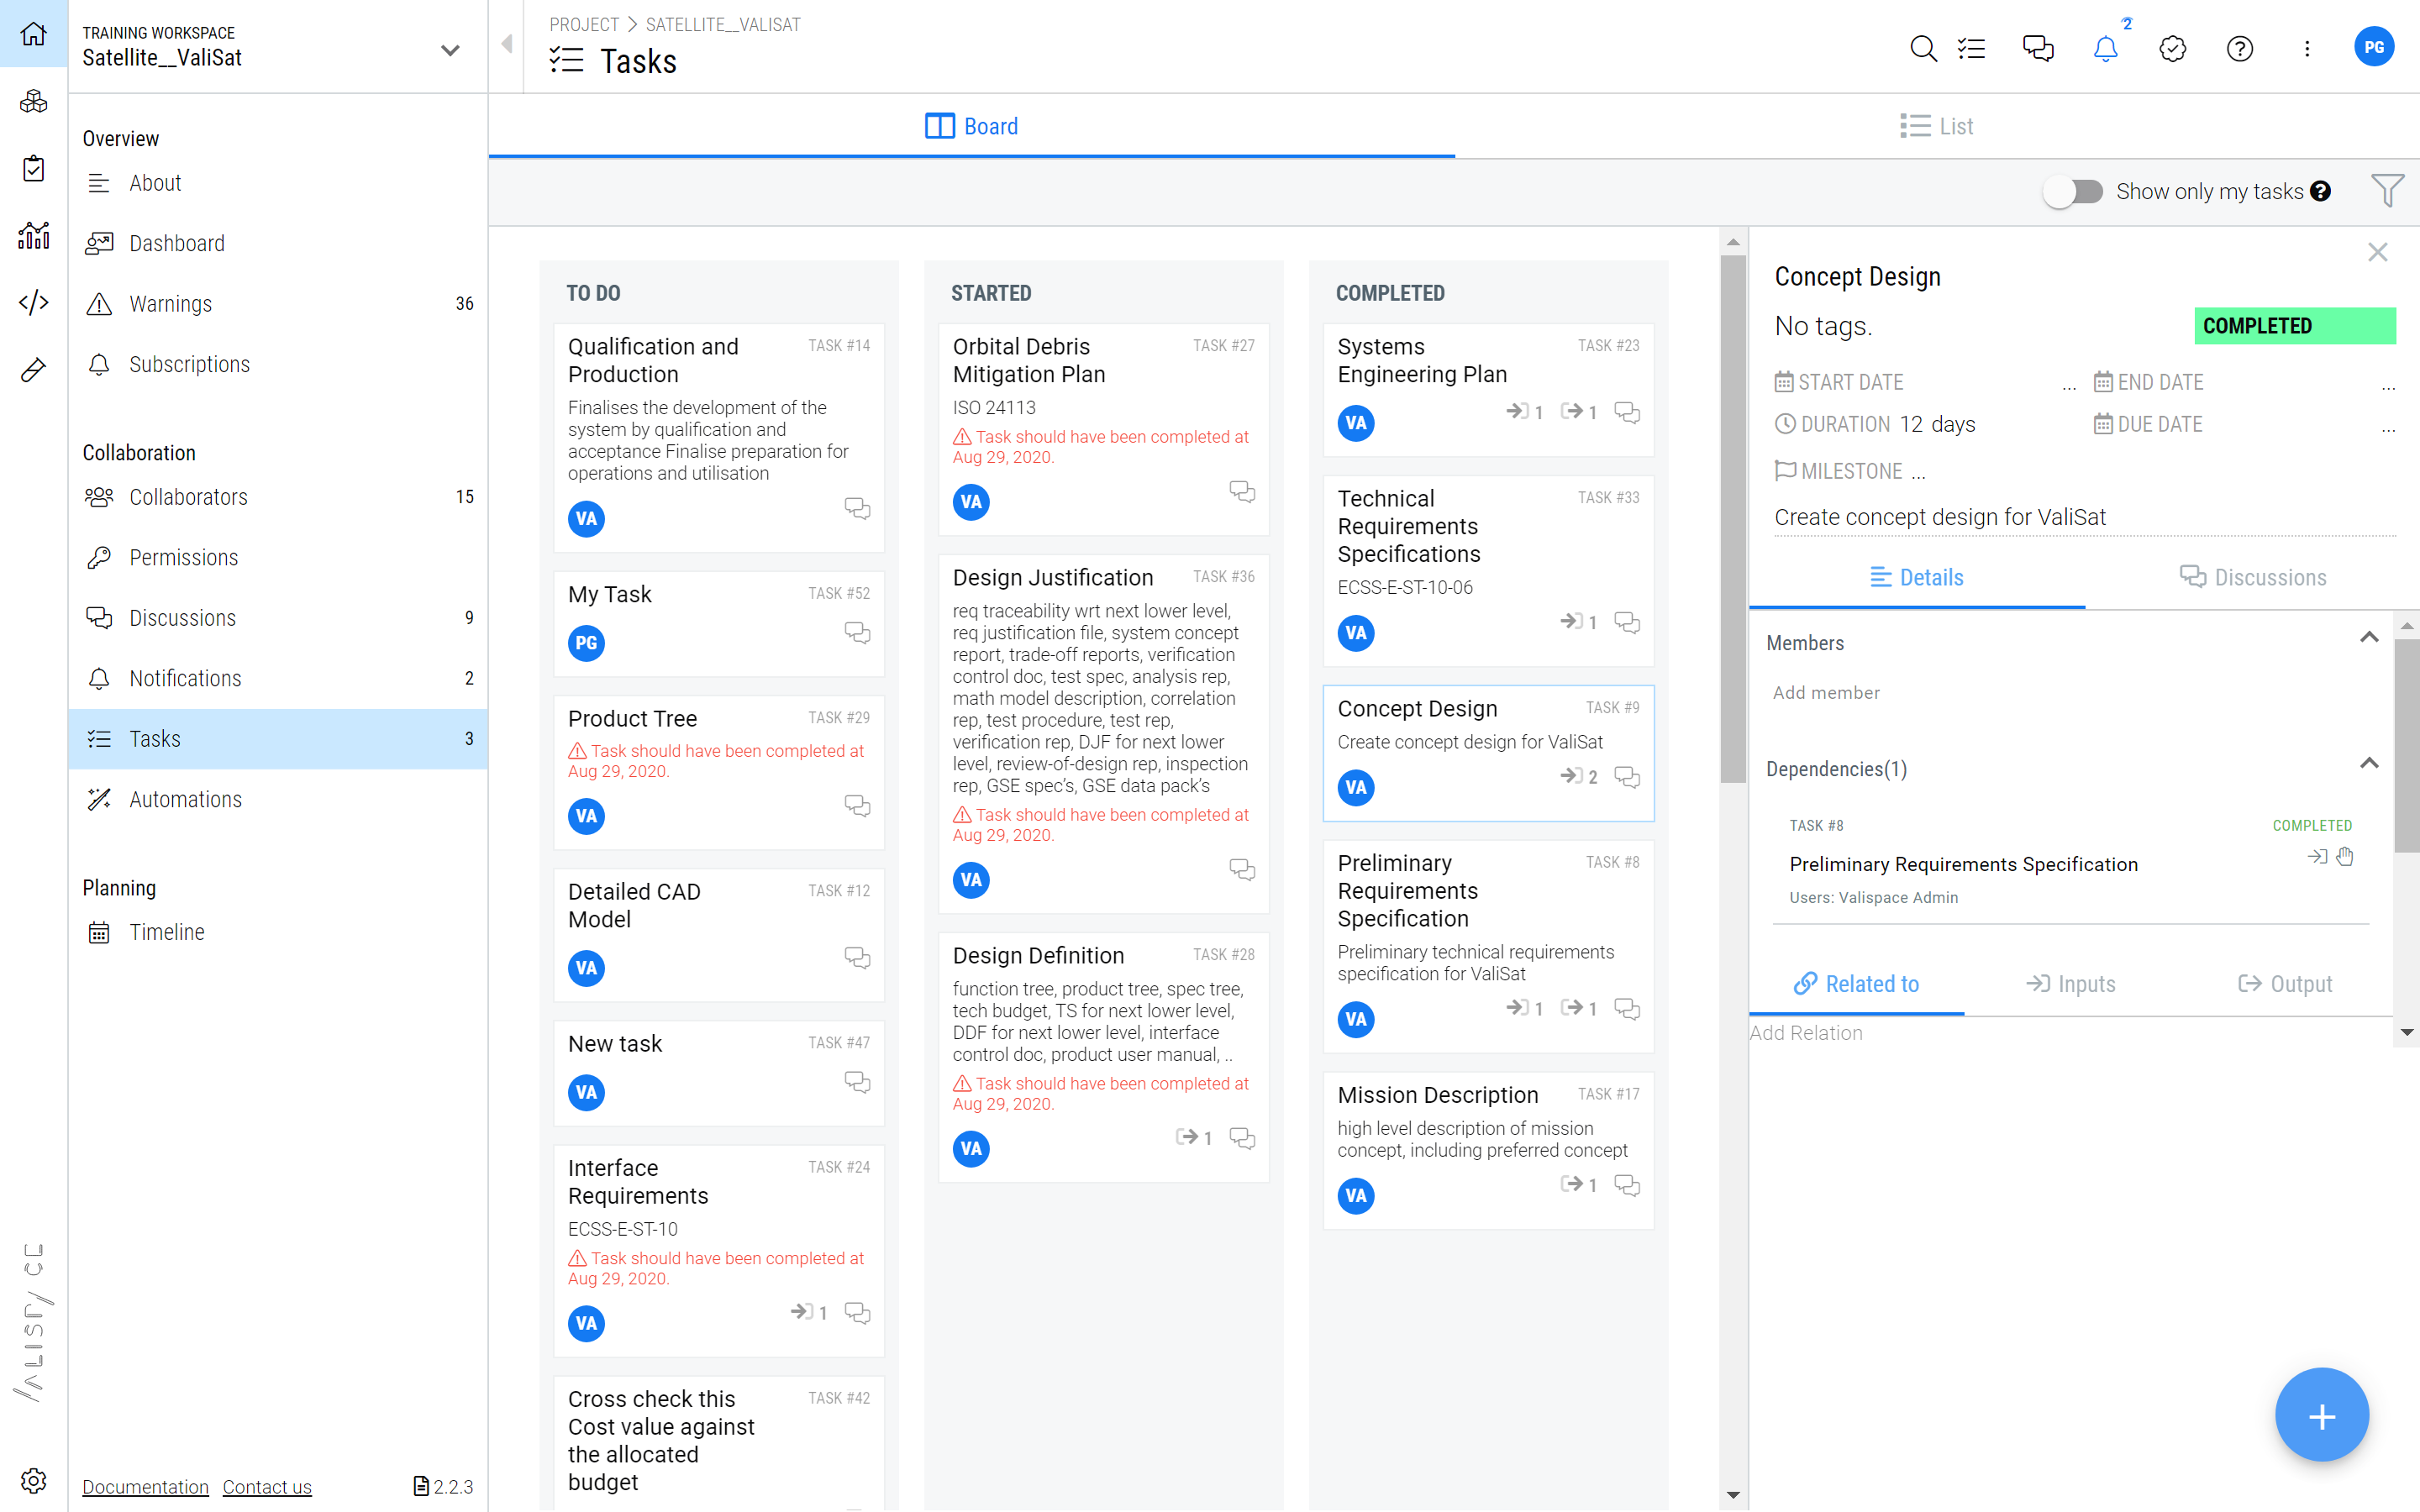
Task status
Switch to “List” to view all the tasks in list form (1), to edit columns click the “columns” (2) on the right-hand side.
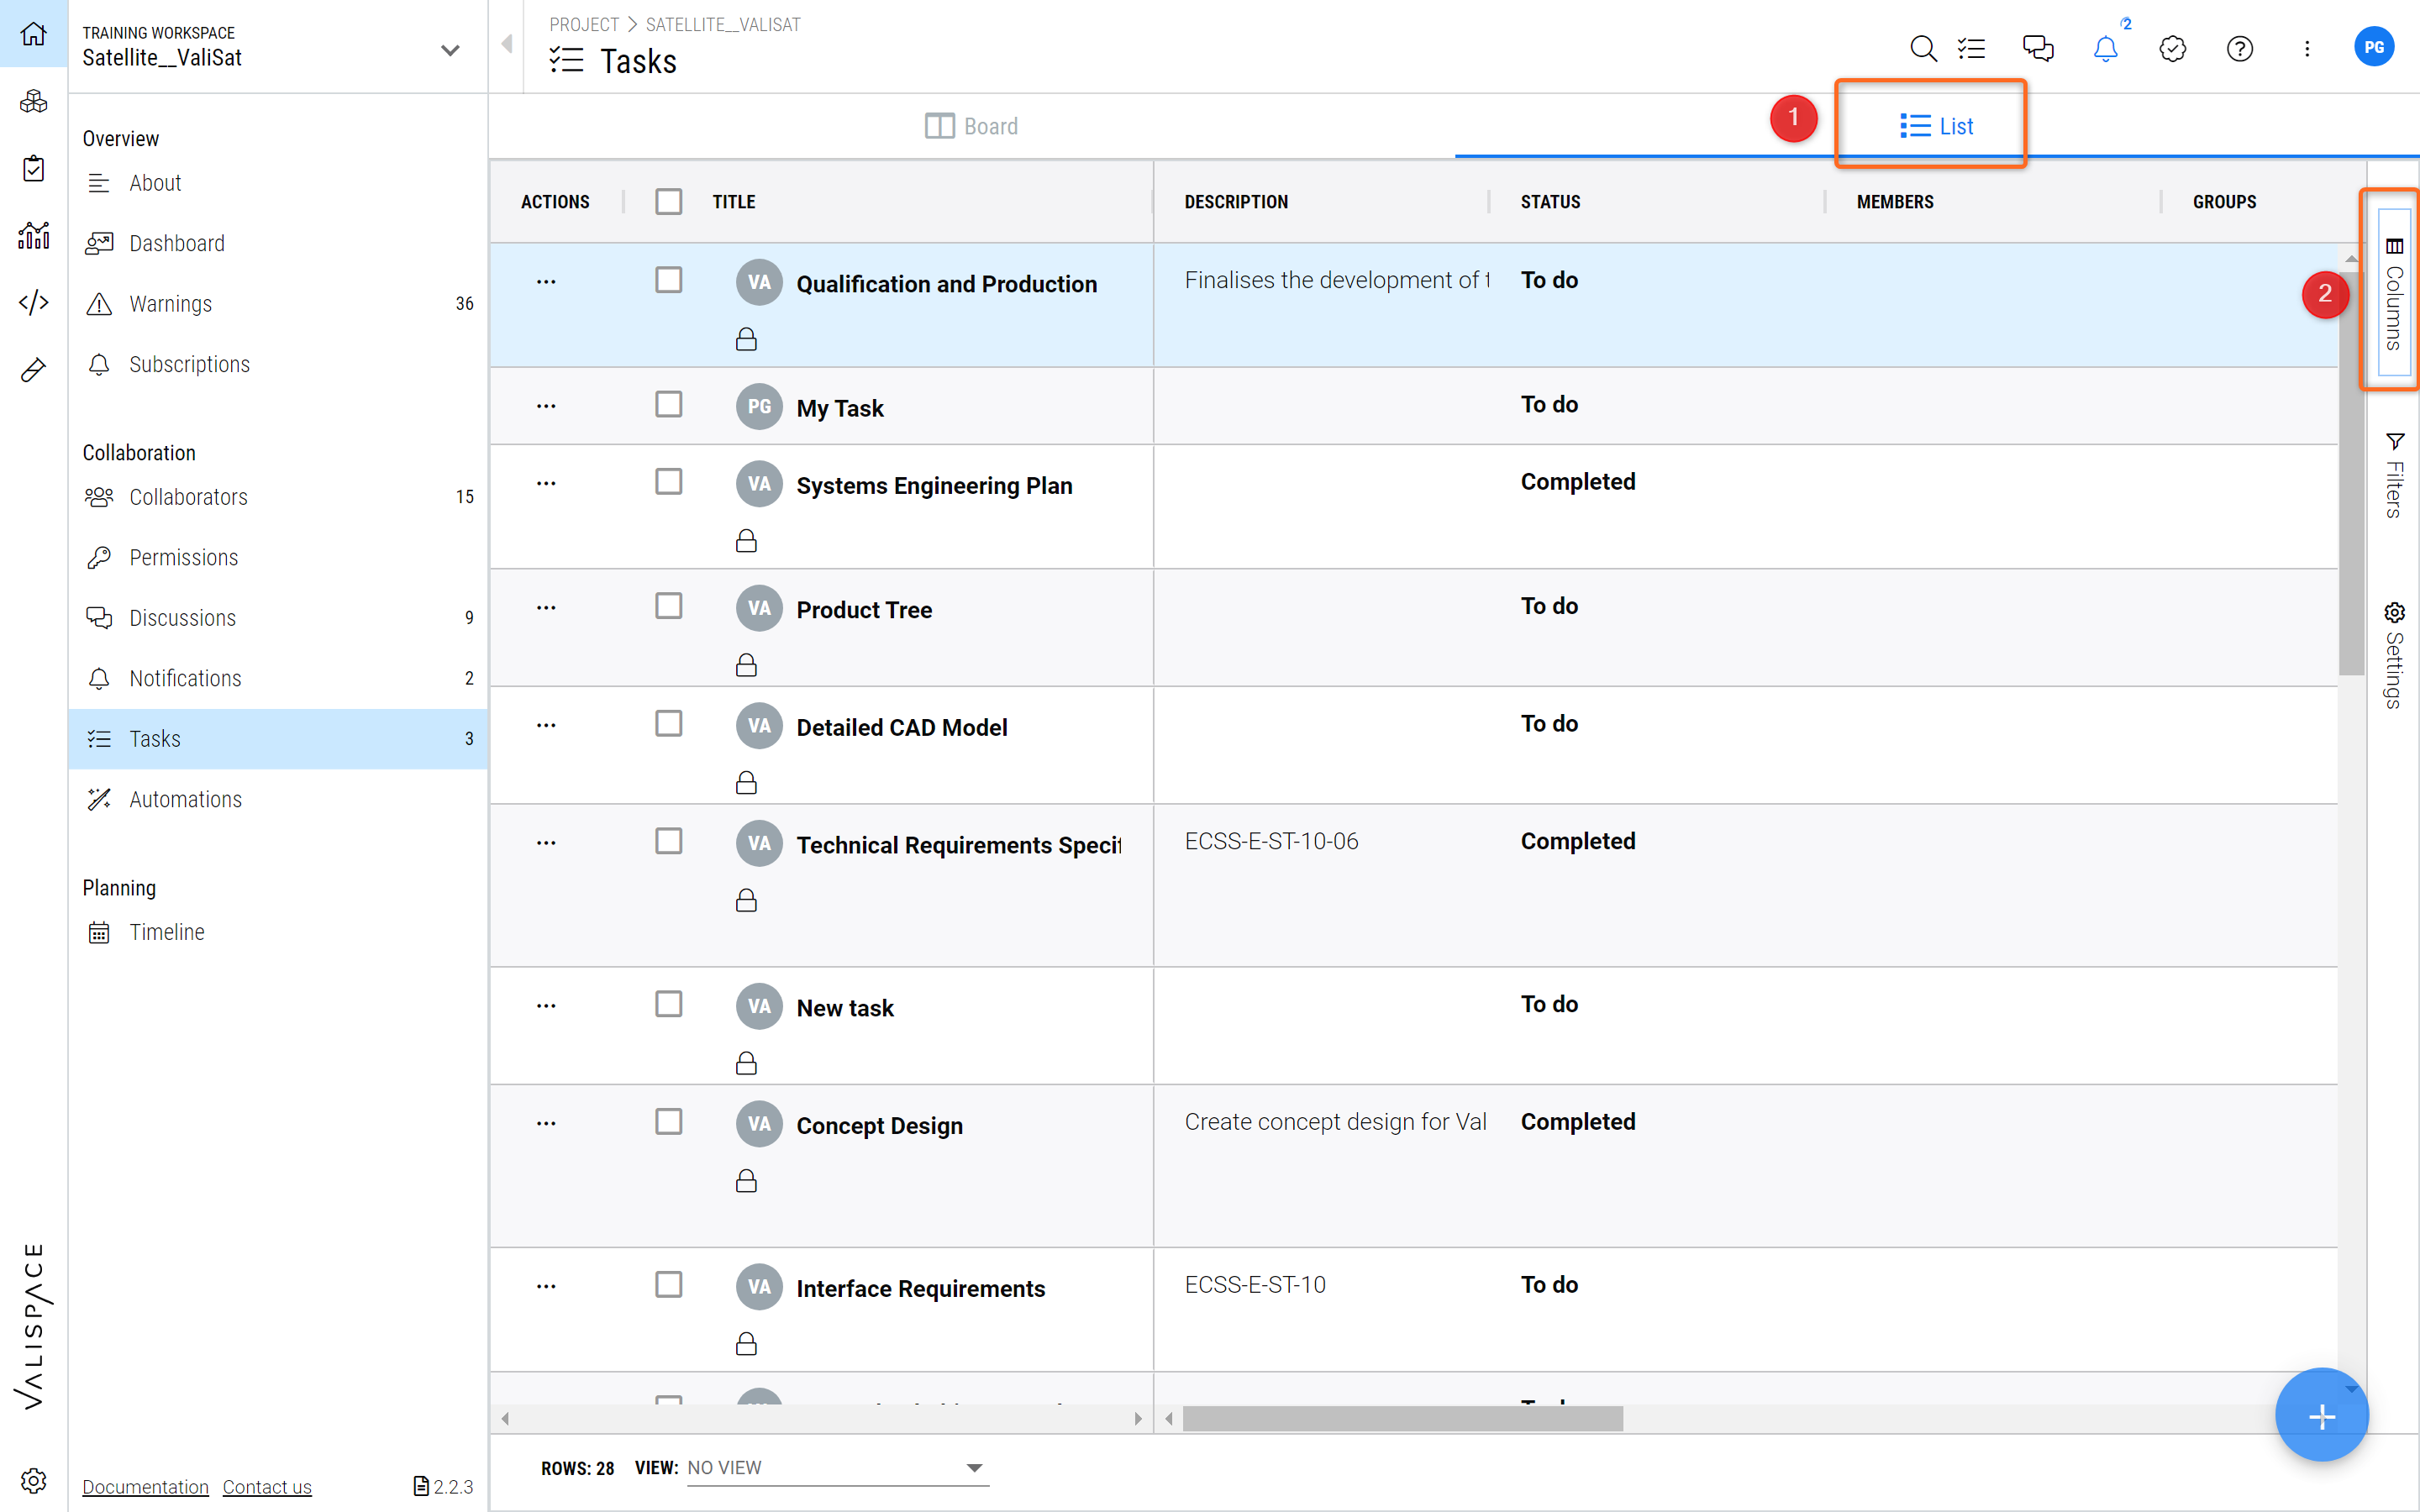
Where to find and edit tasks
To see all the information on one task, go to the tasks icon on top of the screen (1). In the ‘All my tasks’ column, look for the task and click on the three dots icon (2). A new window appears with all the information related to the task. There, you can edit its status (to do, started, completed) but also its duration and check its Blocks' connections. To save your modifications, click on update (3).
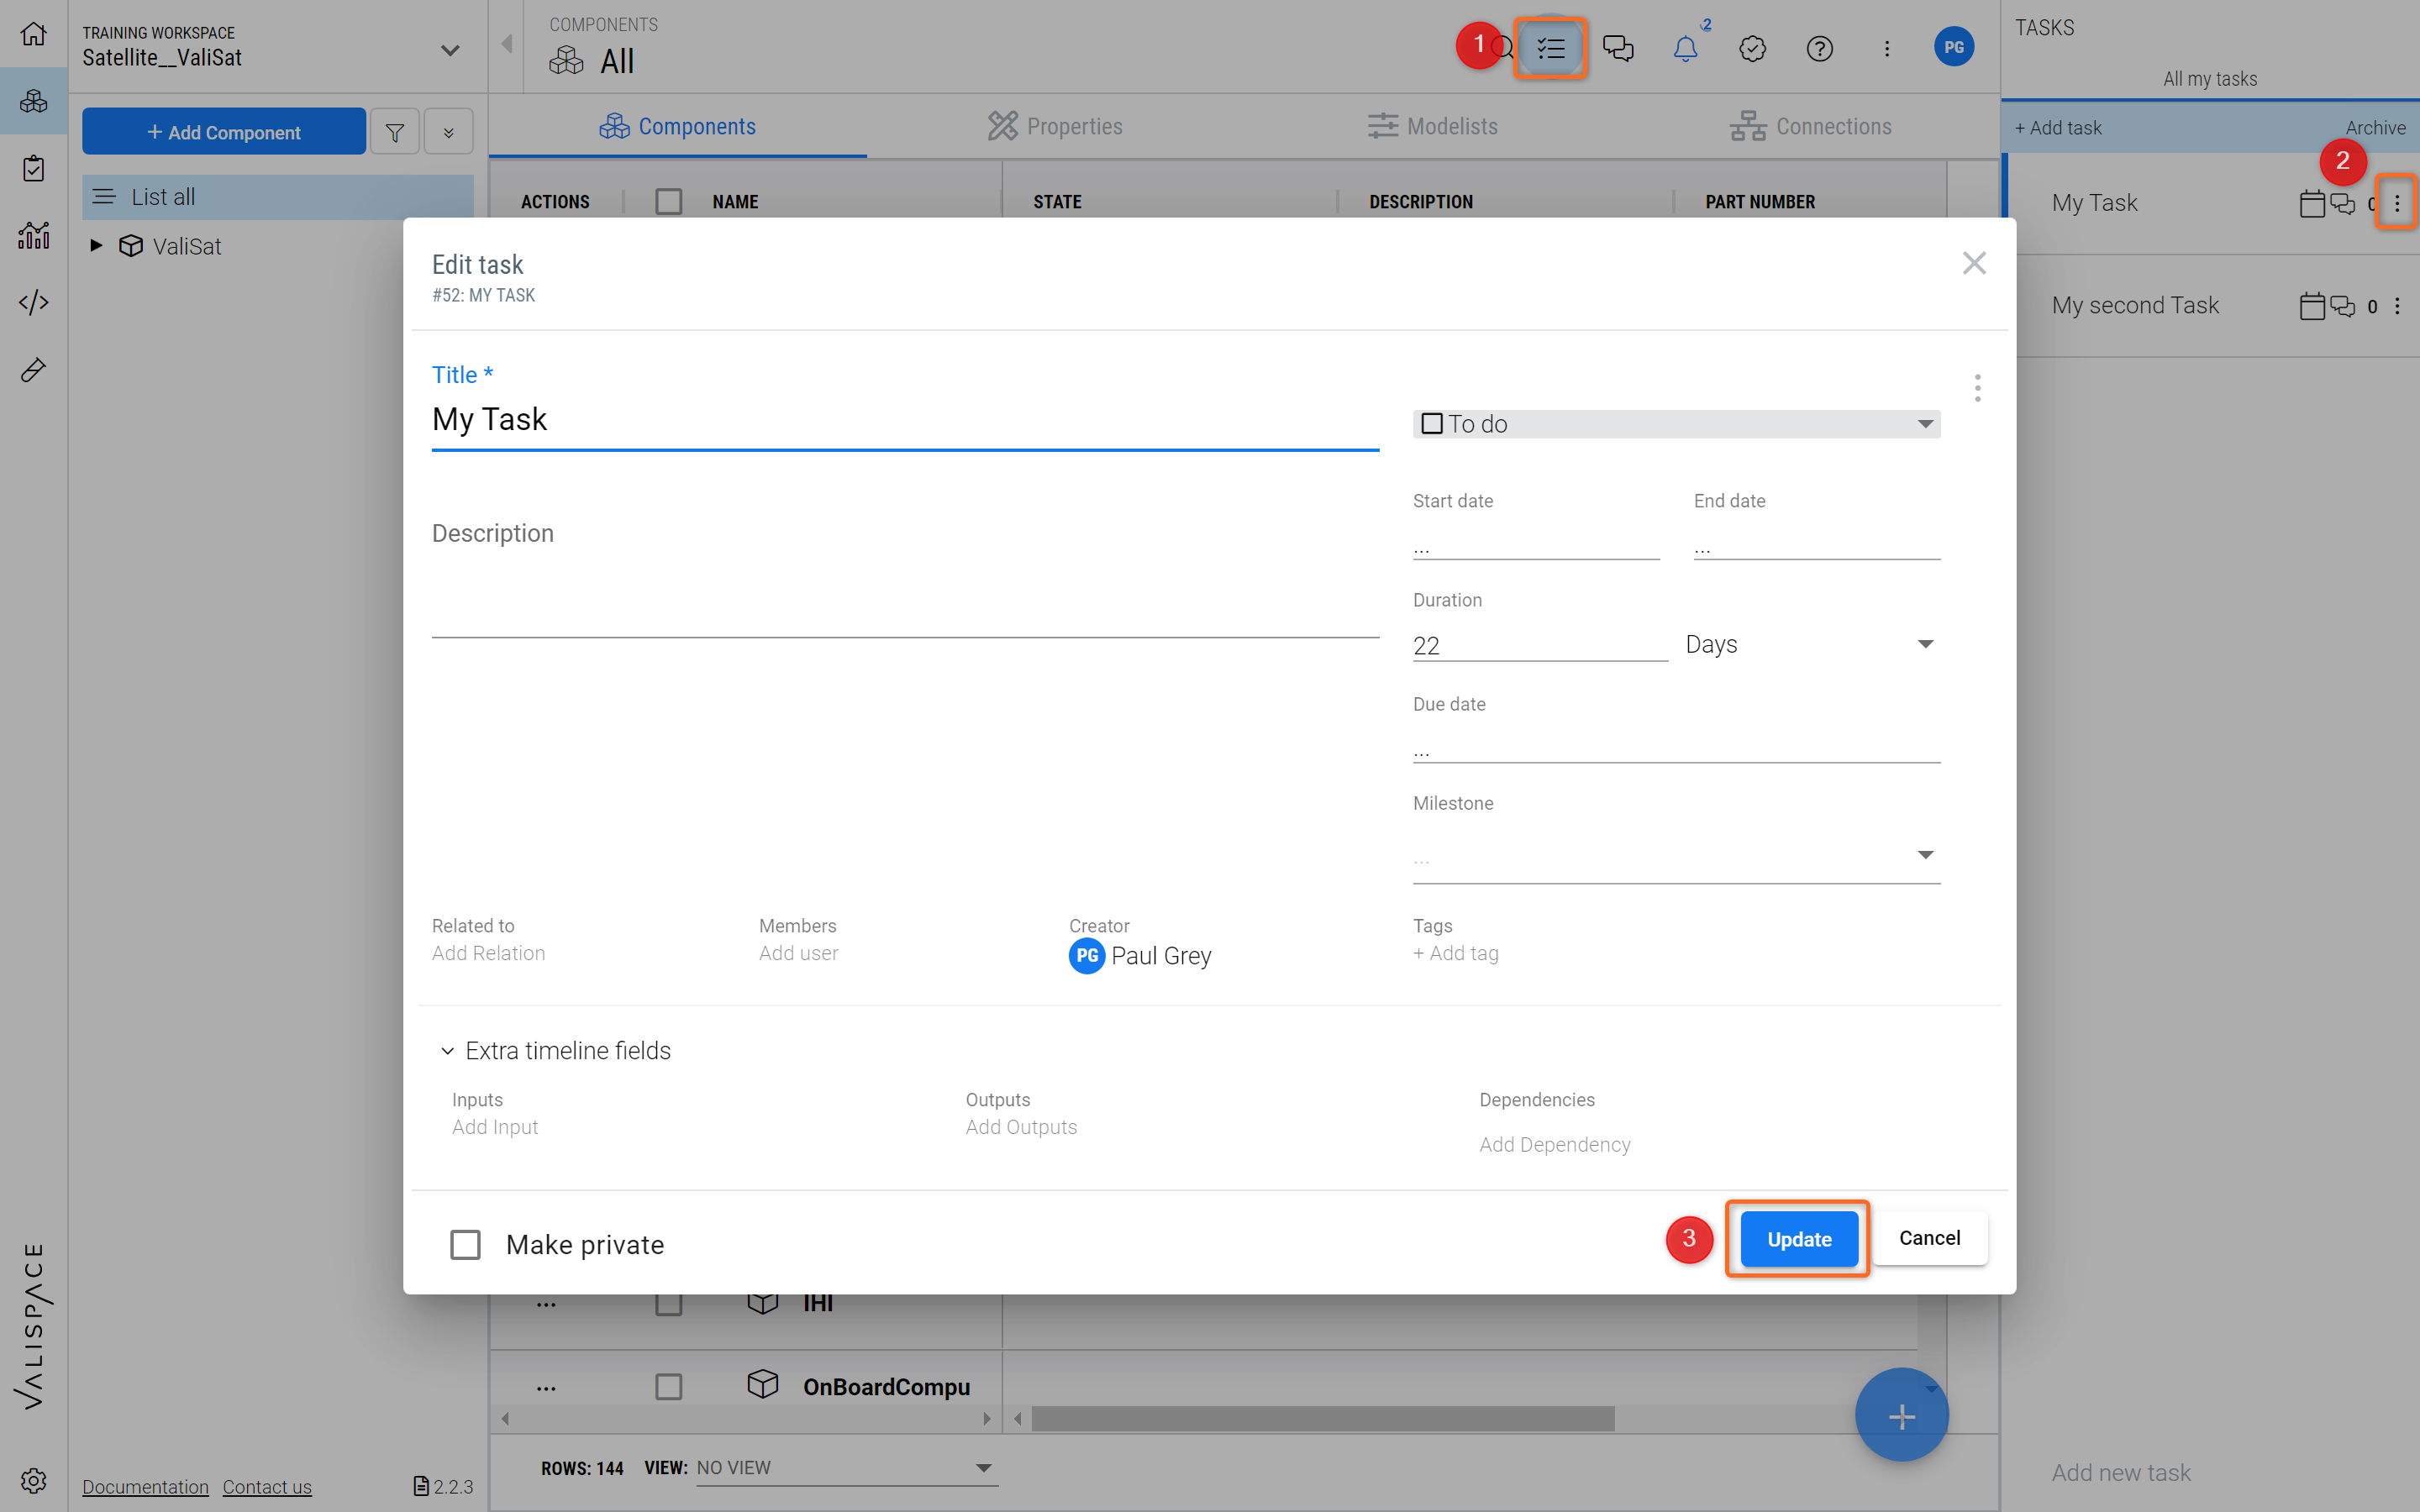
The different symbols
In the column of the tasks, the user can find the tasks they previously added to the Blocks/properties. There, it is easy to see the status of the tasks related to that object. Also, by hovering over the calendar icon, the user can check the start, end, and due date of the task without having to go to the timeline.

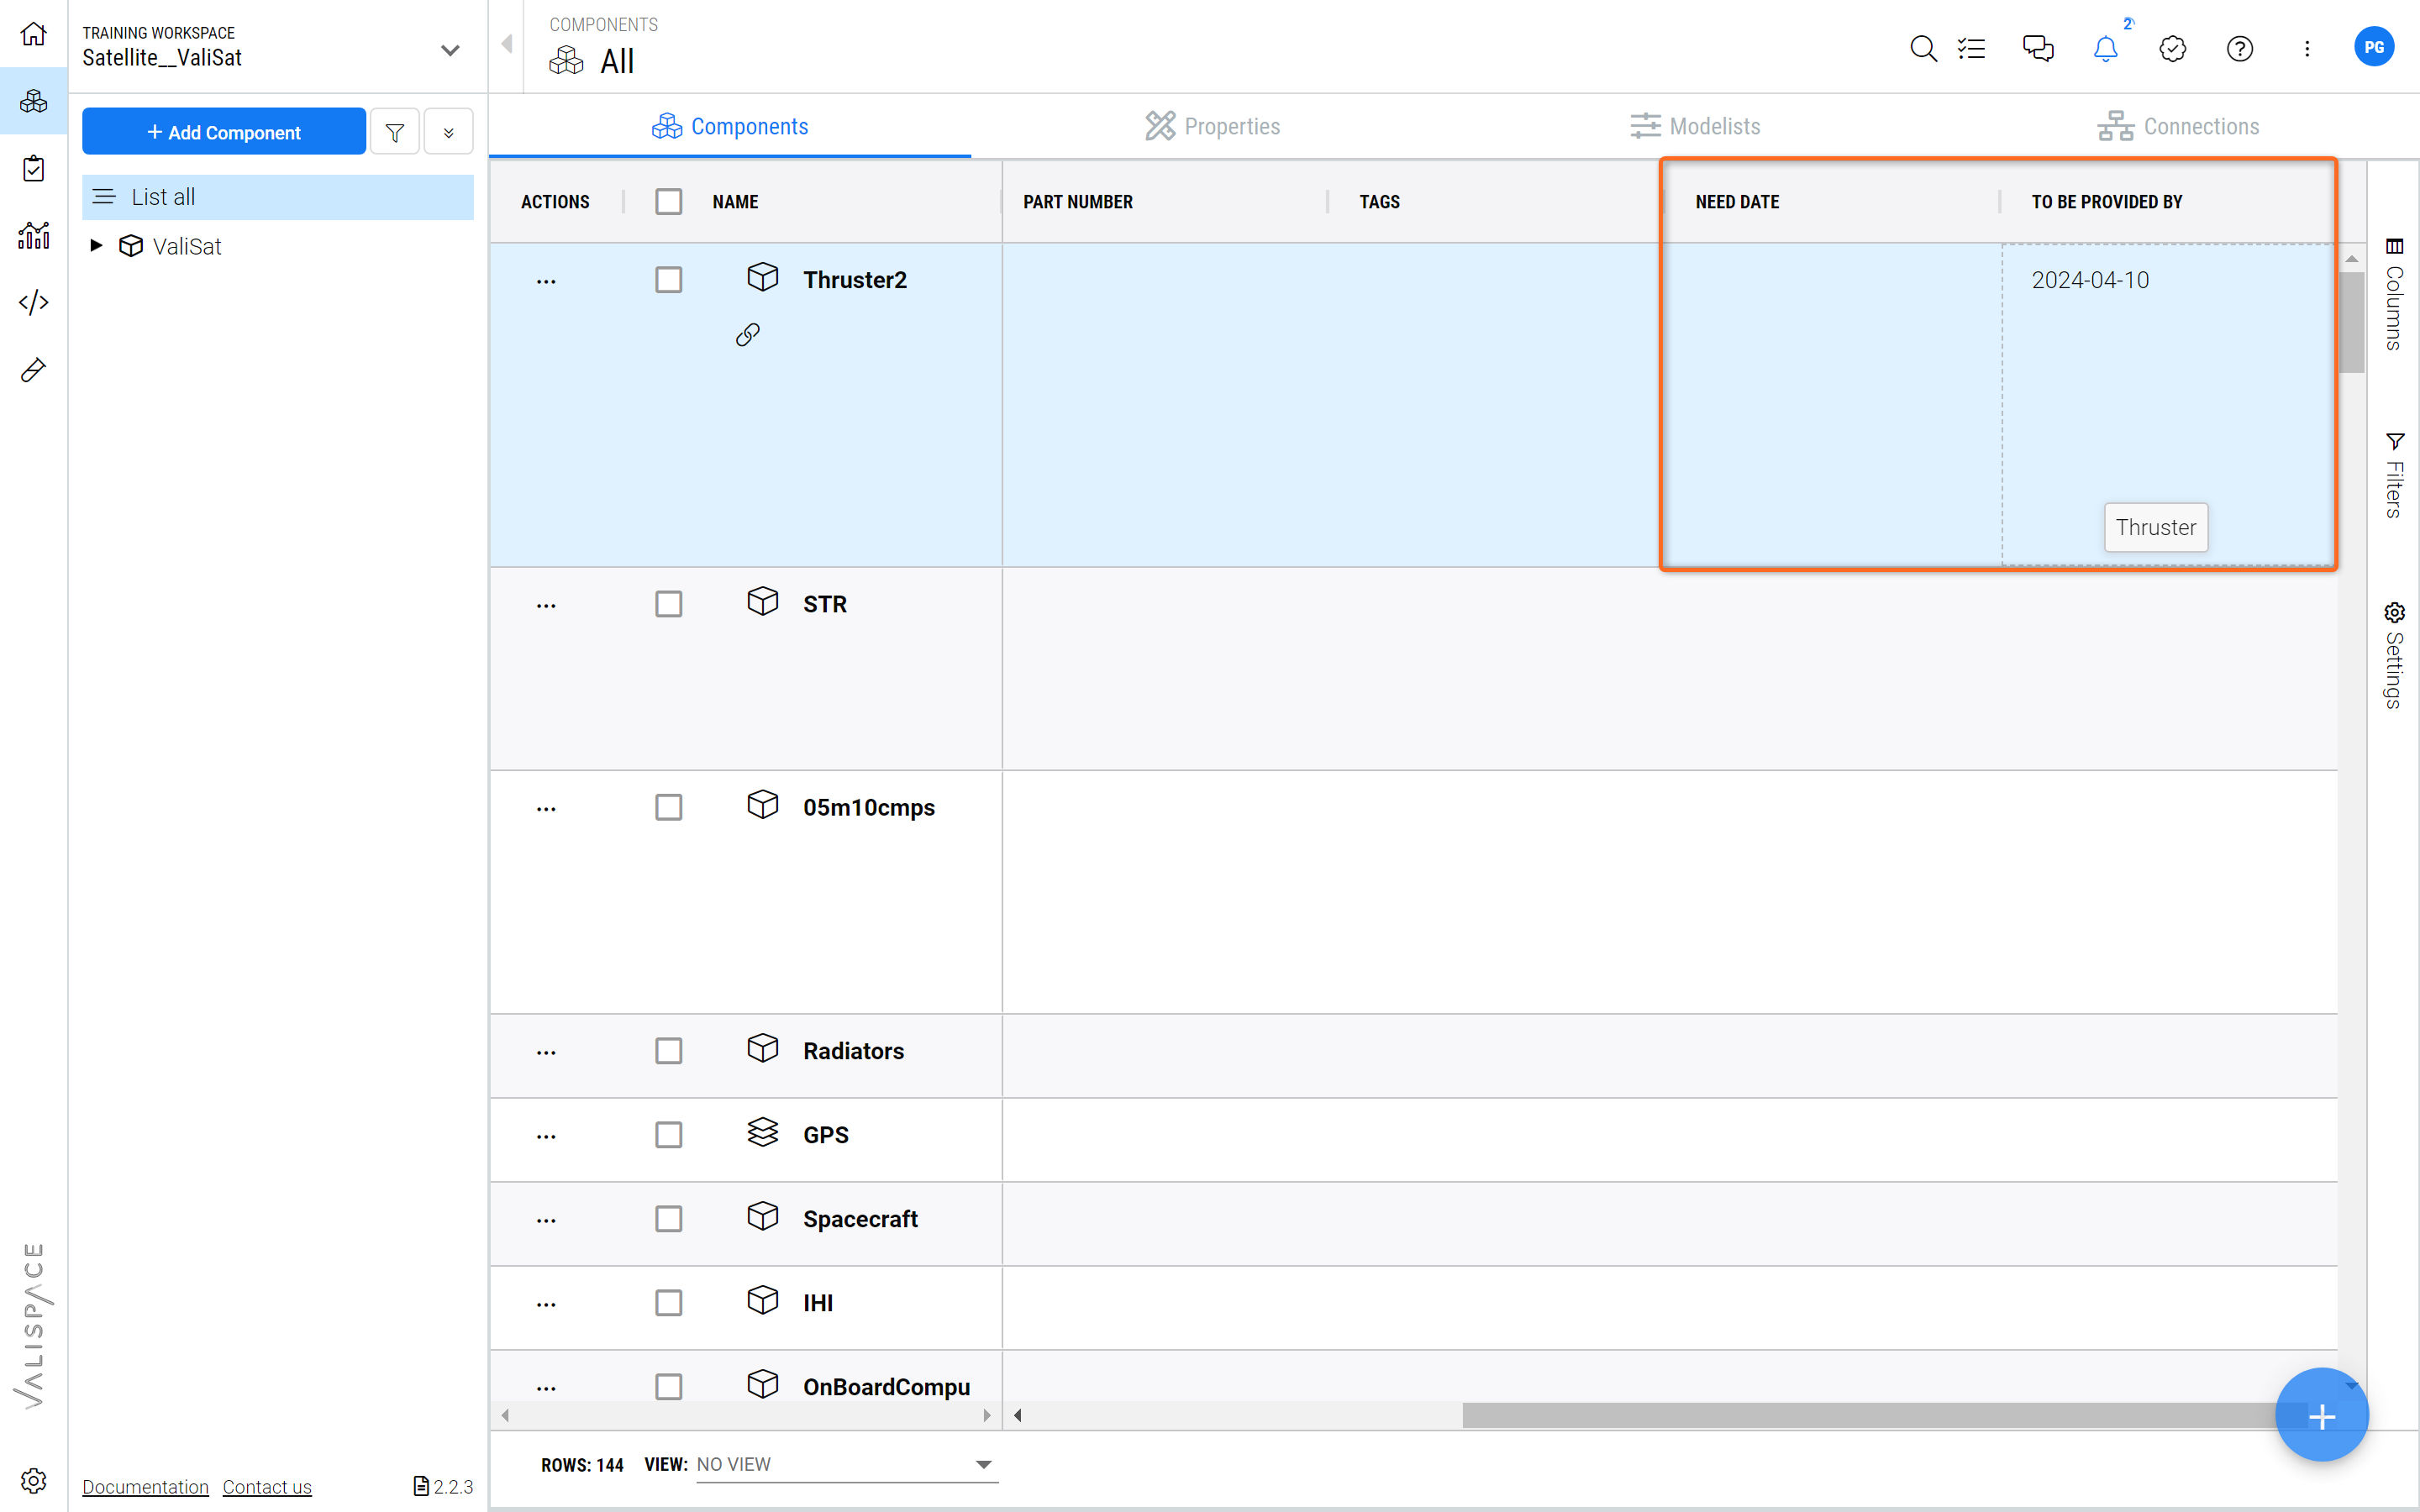
New columns in the Blocks table
Two new columns were added to the Blocks table. Now, the user can quickly look at the ‘Need date’ and ‘To be provided by’ information by adding the columns to its table. When creating task connections with Blocks, the data is automatically added to the columns. Therefore, the user knows when the Block/Valis is needed and will be provided.
Milestones
Users can create milestones either directly within the Timeline or by navigating to the Milestones section(2) in the Settings page(1). The Milestones section provides a comprehensive list of all milestones within the project, and users can also create new milestones(3) from this page refer to the Figure Milestones in settings page.
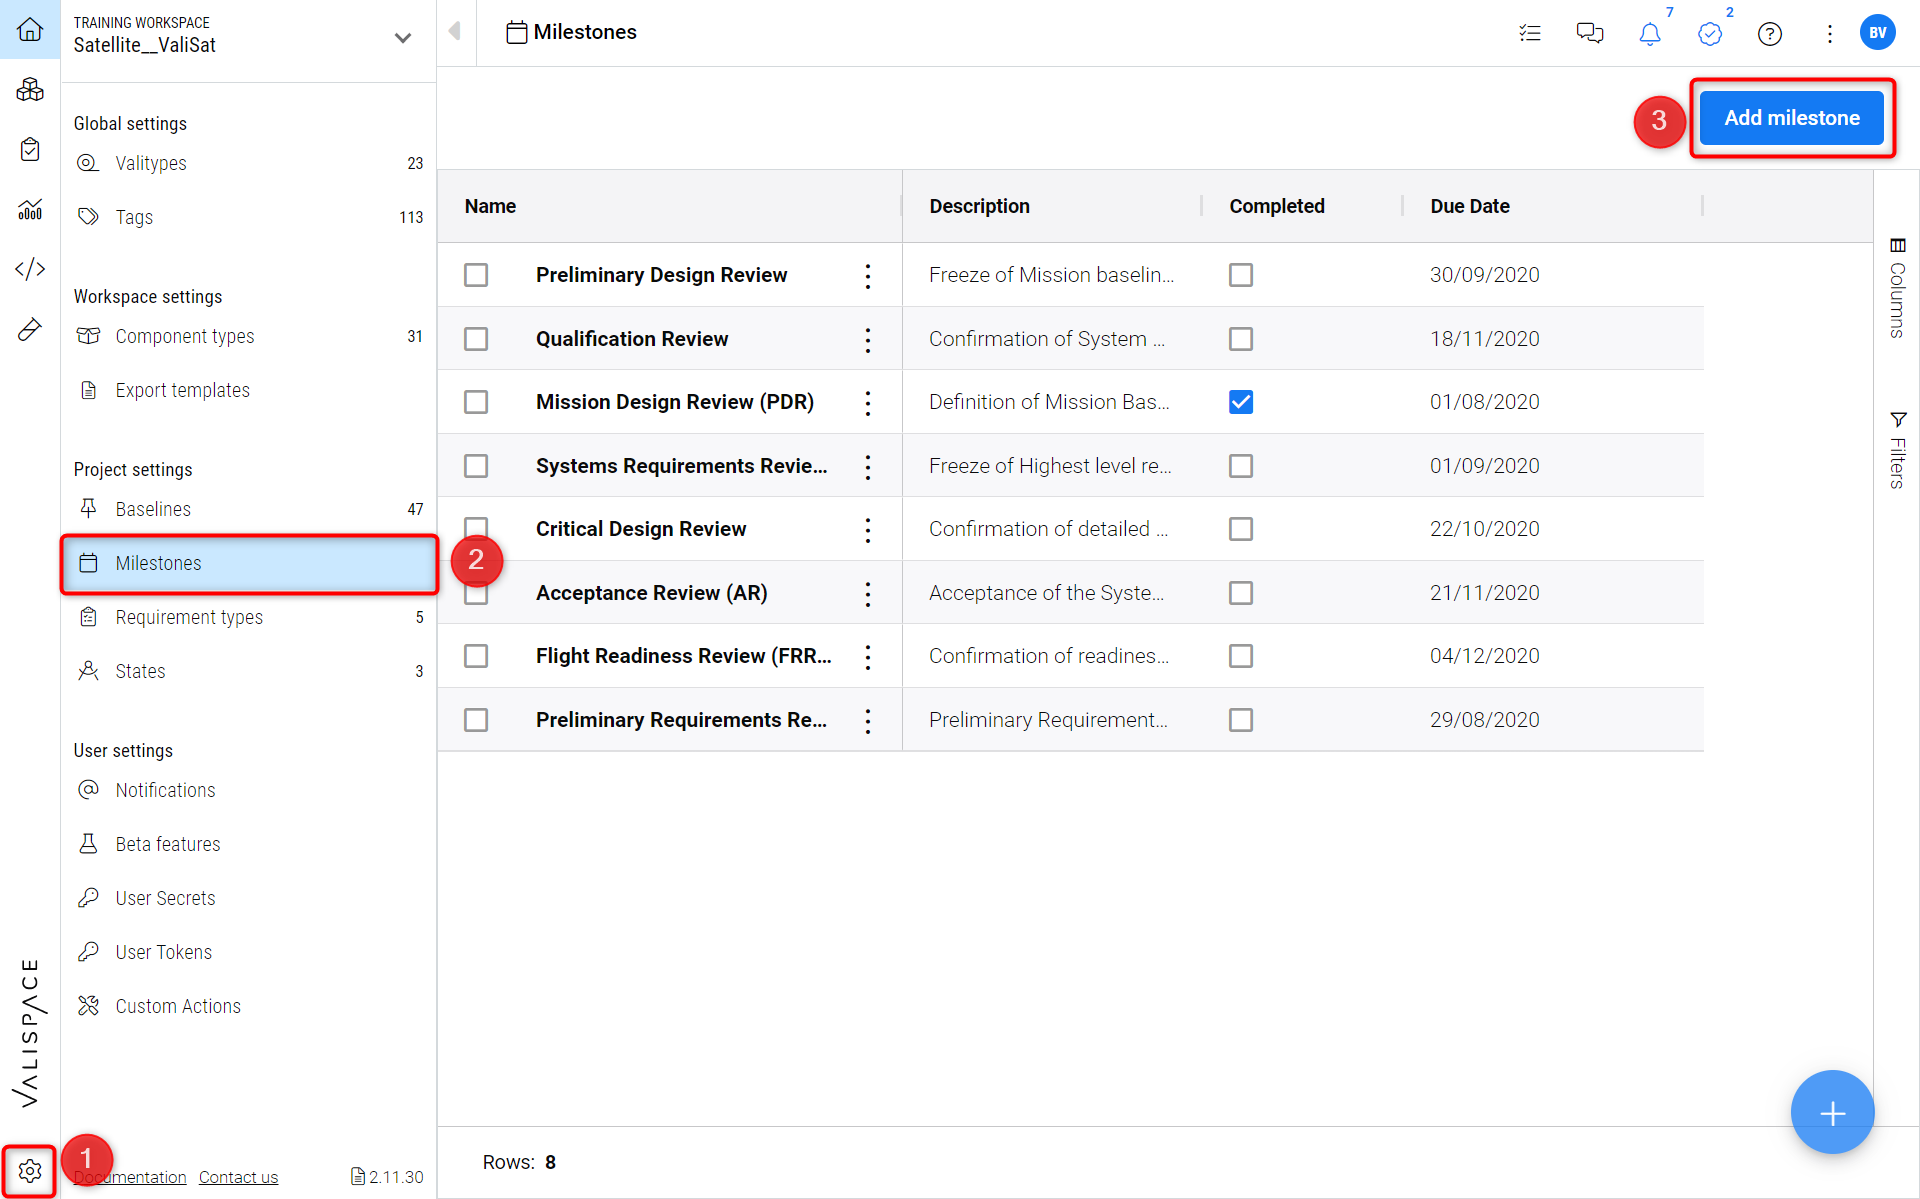
Milestones in settings page - The page lists out all the milestones available in the project and shows the description, completed status and the due date.