Tests Module - Introduction & Setting up
In the context of this documentation “Valispace“ will be called “Requirements and Systems Portal“.
This feature of Requirements and Systems Portal will be completely remodelled and improved into a comprehensive “Verification & Validation“ Module that encompasses all relevant features for the verification and validation of Requirements.
Please consider using the new “Verification & Validation“ Module before using the feature(s) below.
Introduction
Within the Tests Module, the user defines the test procedures step by step in a detailed manner. Also, the responsible engineer (Testing Engineer or System Engineer) reference the requirements to the test step and keeps a track of the test runs and updates the verification methods (tests) of a requirement automatically.
Setting up a Test Module
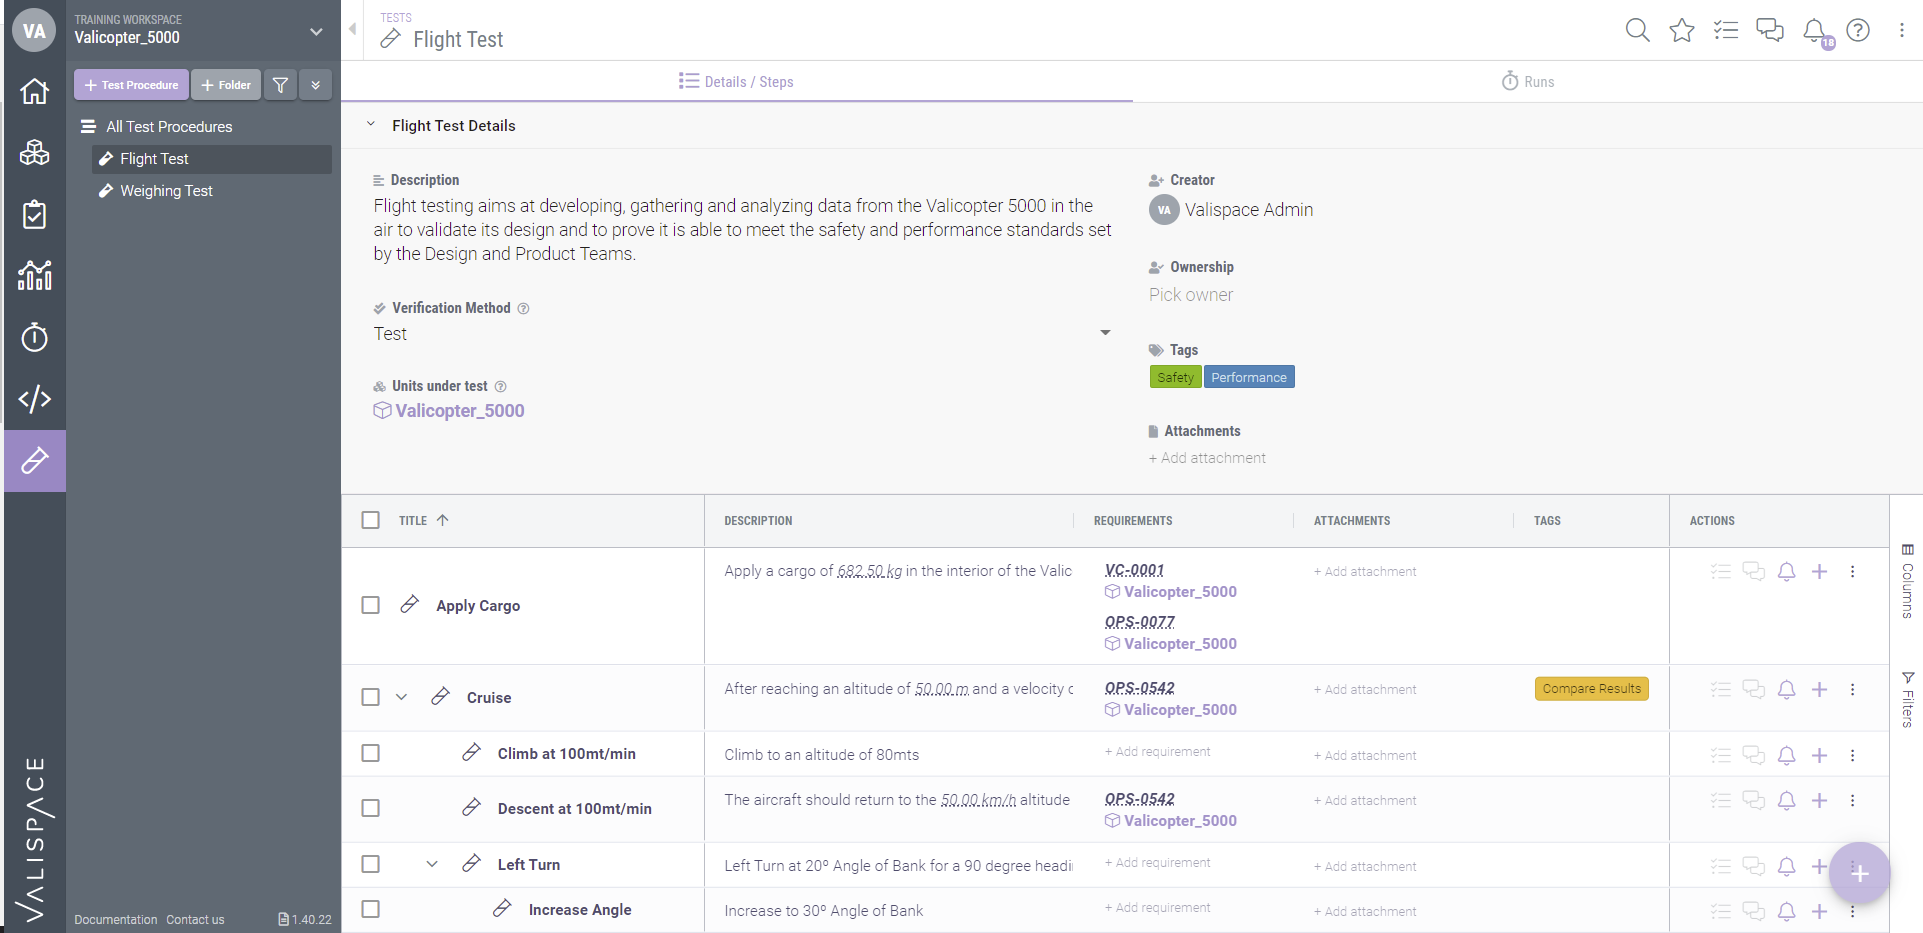
Each test procedure you create can have a set of details that defines it. These details range from Name and Description to Owner and Creator. Besides these details, you can also add some tags and attachments to the Test Procedures. They will help you keep track of the stage of the development process to which a particular test belongs, as well as store important documentation annexed to it. To facilitate your workflow, Requirements and Systems Portal allows you to add multiple files or tags to each test.
A Test Procedure is composed of different steps. The test creator and their team will be able to detail exactly what is expected from each step so that the Test Engineer knows how to perform their job and exactly what to look for at every point of the procedure. For further support, each step can also have files and tags attached to it.
Each step can be as detailed as needed. Requirements and Systems Portal allows the creation of substeps inside each step, thus allowing a deeper level of understanding, detail, and continuous development to each one of these.

Although substeps are connected to their parents, they can also have independent files and tags. So, imagine you need to leave your Test Engineer an expected output chart for example. You can do so by adding a file (image, pdf, etc.) to the step and adding a tag Compare results (shown in the above image), allowing your Test Engineer to perform their job at maximum efficiency.
.png)