Users and Groups
Add, Deactivate or Activate Users
Adding Single Users
Navigate to the Project Module (1)
Select the “Collaborators” tab (2)
Click on the “+” sign on the right end corner to select the option “Create user” (3)

Creating Users - Only the Admins can create new Users
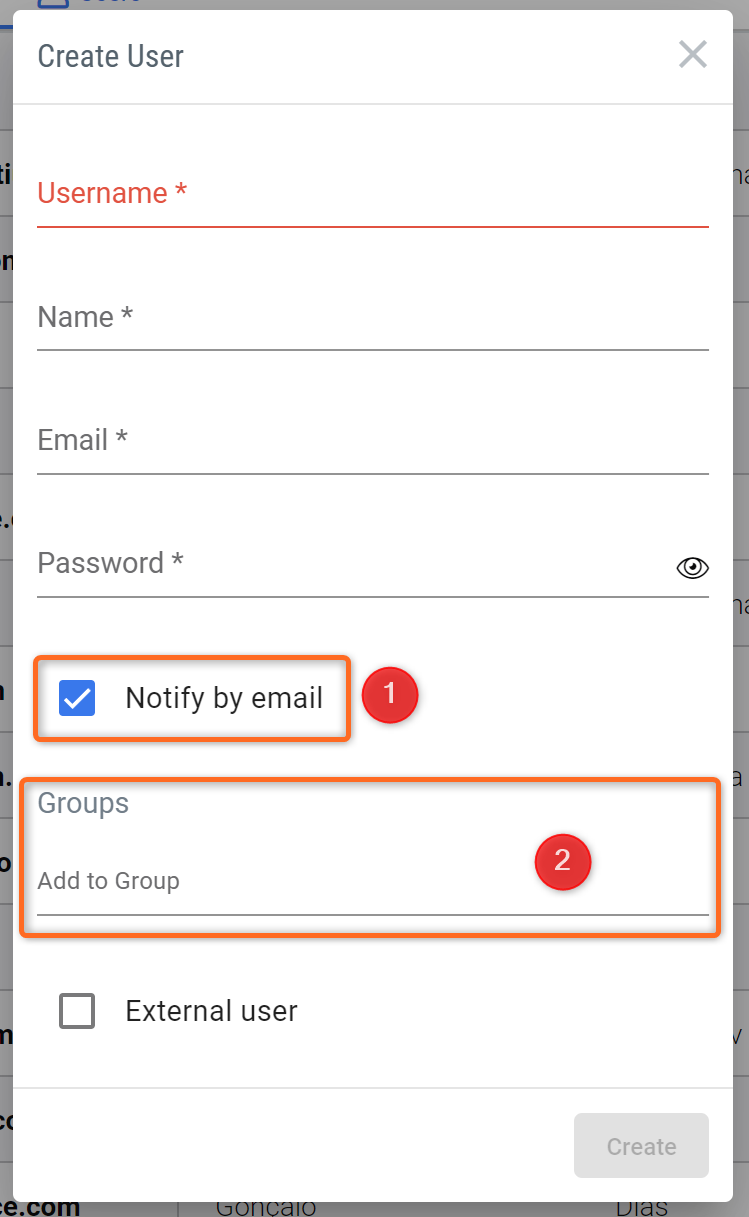
Once the “Create user” is selected, a new pop-up opens, where the information of the new user can be registered. You can notify the new user through email (1). Once the new user logins for the first time with the login credentials, the new user will be requested to reset the password. Also, you have the option to add the new member to the groups directly by adding the group names in the “Group” (2).
New Individual User - Information box for the New User
Add multiple users
To add multiple User you can use the “Import Users” feature, which is the second option in Figure Creating Users above. Once you select this option, the admin has to create a .csv file with the format shown below.
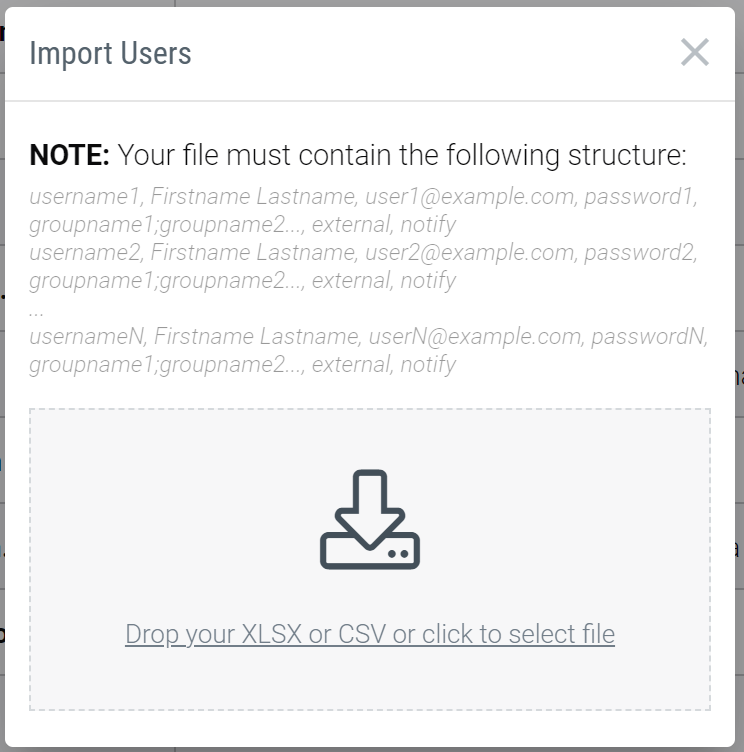
Bulk Add users - Users can be added in bulk by following the data structure
Once the .csv or .xlsx file is created with the information, you can just upload the document here and the users are added immediately. Groupname is not an essential field and it can be left out if you are not planning to assign the users to any specific groups. On the first login, the user is requested to reset the password.
Deactivate/Activate an existing user
To see the complete list of your collaborators:
Click on Project
Navigate to Collaborators
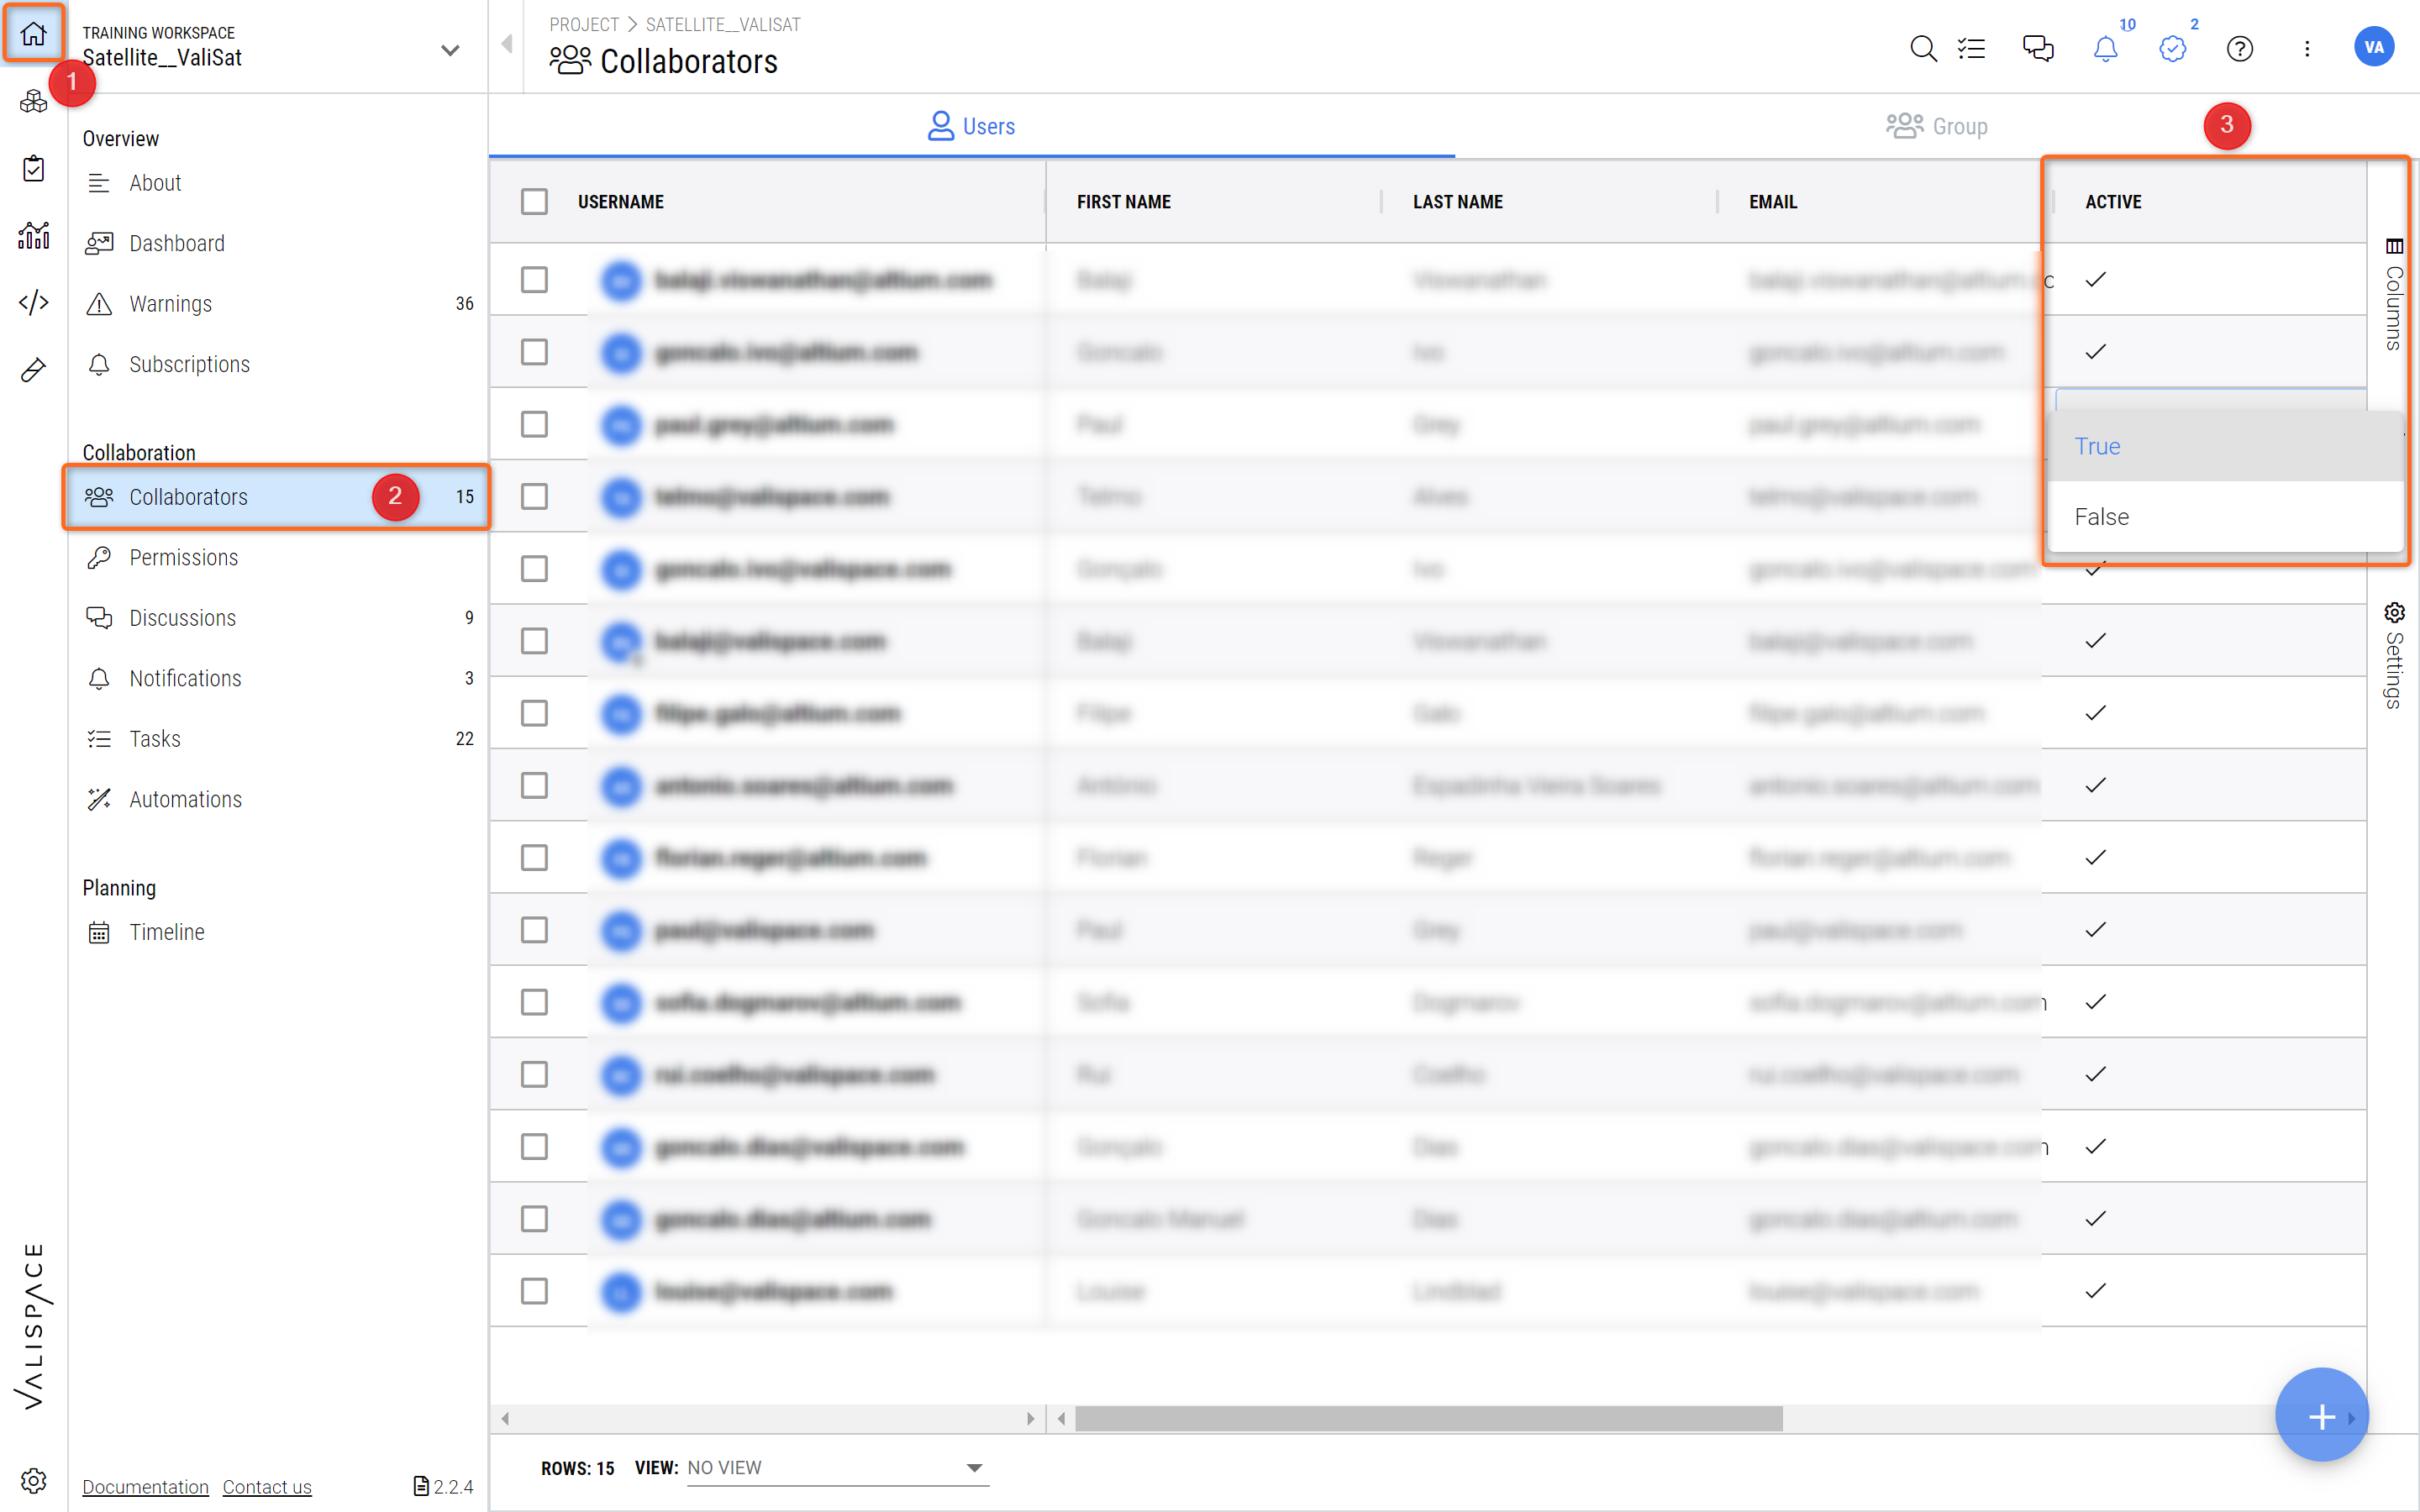
Deactivating Users - Enable the “Active” column and double click in the cell for the specific user to deactivate them.
Within Collaborators, you can edit the user name, as well as the first and last name of the users by double-clicking on the column field. Moreover, you can see the groups the users have been assigned to.
To deactivate a user,
Select the column “Active” (3)
Go to the cell of the user and double click on the cell to change the status from “True” to “False”
Create a group and assign users to it
Create Groups
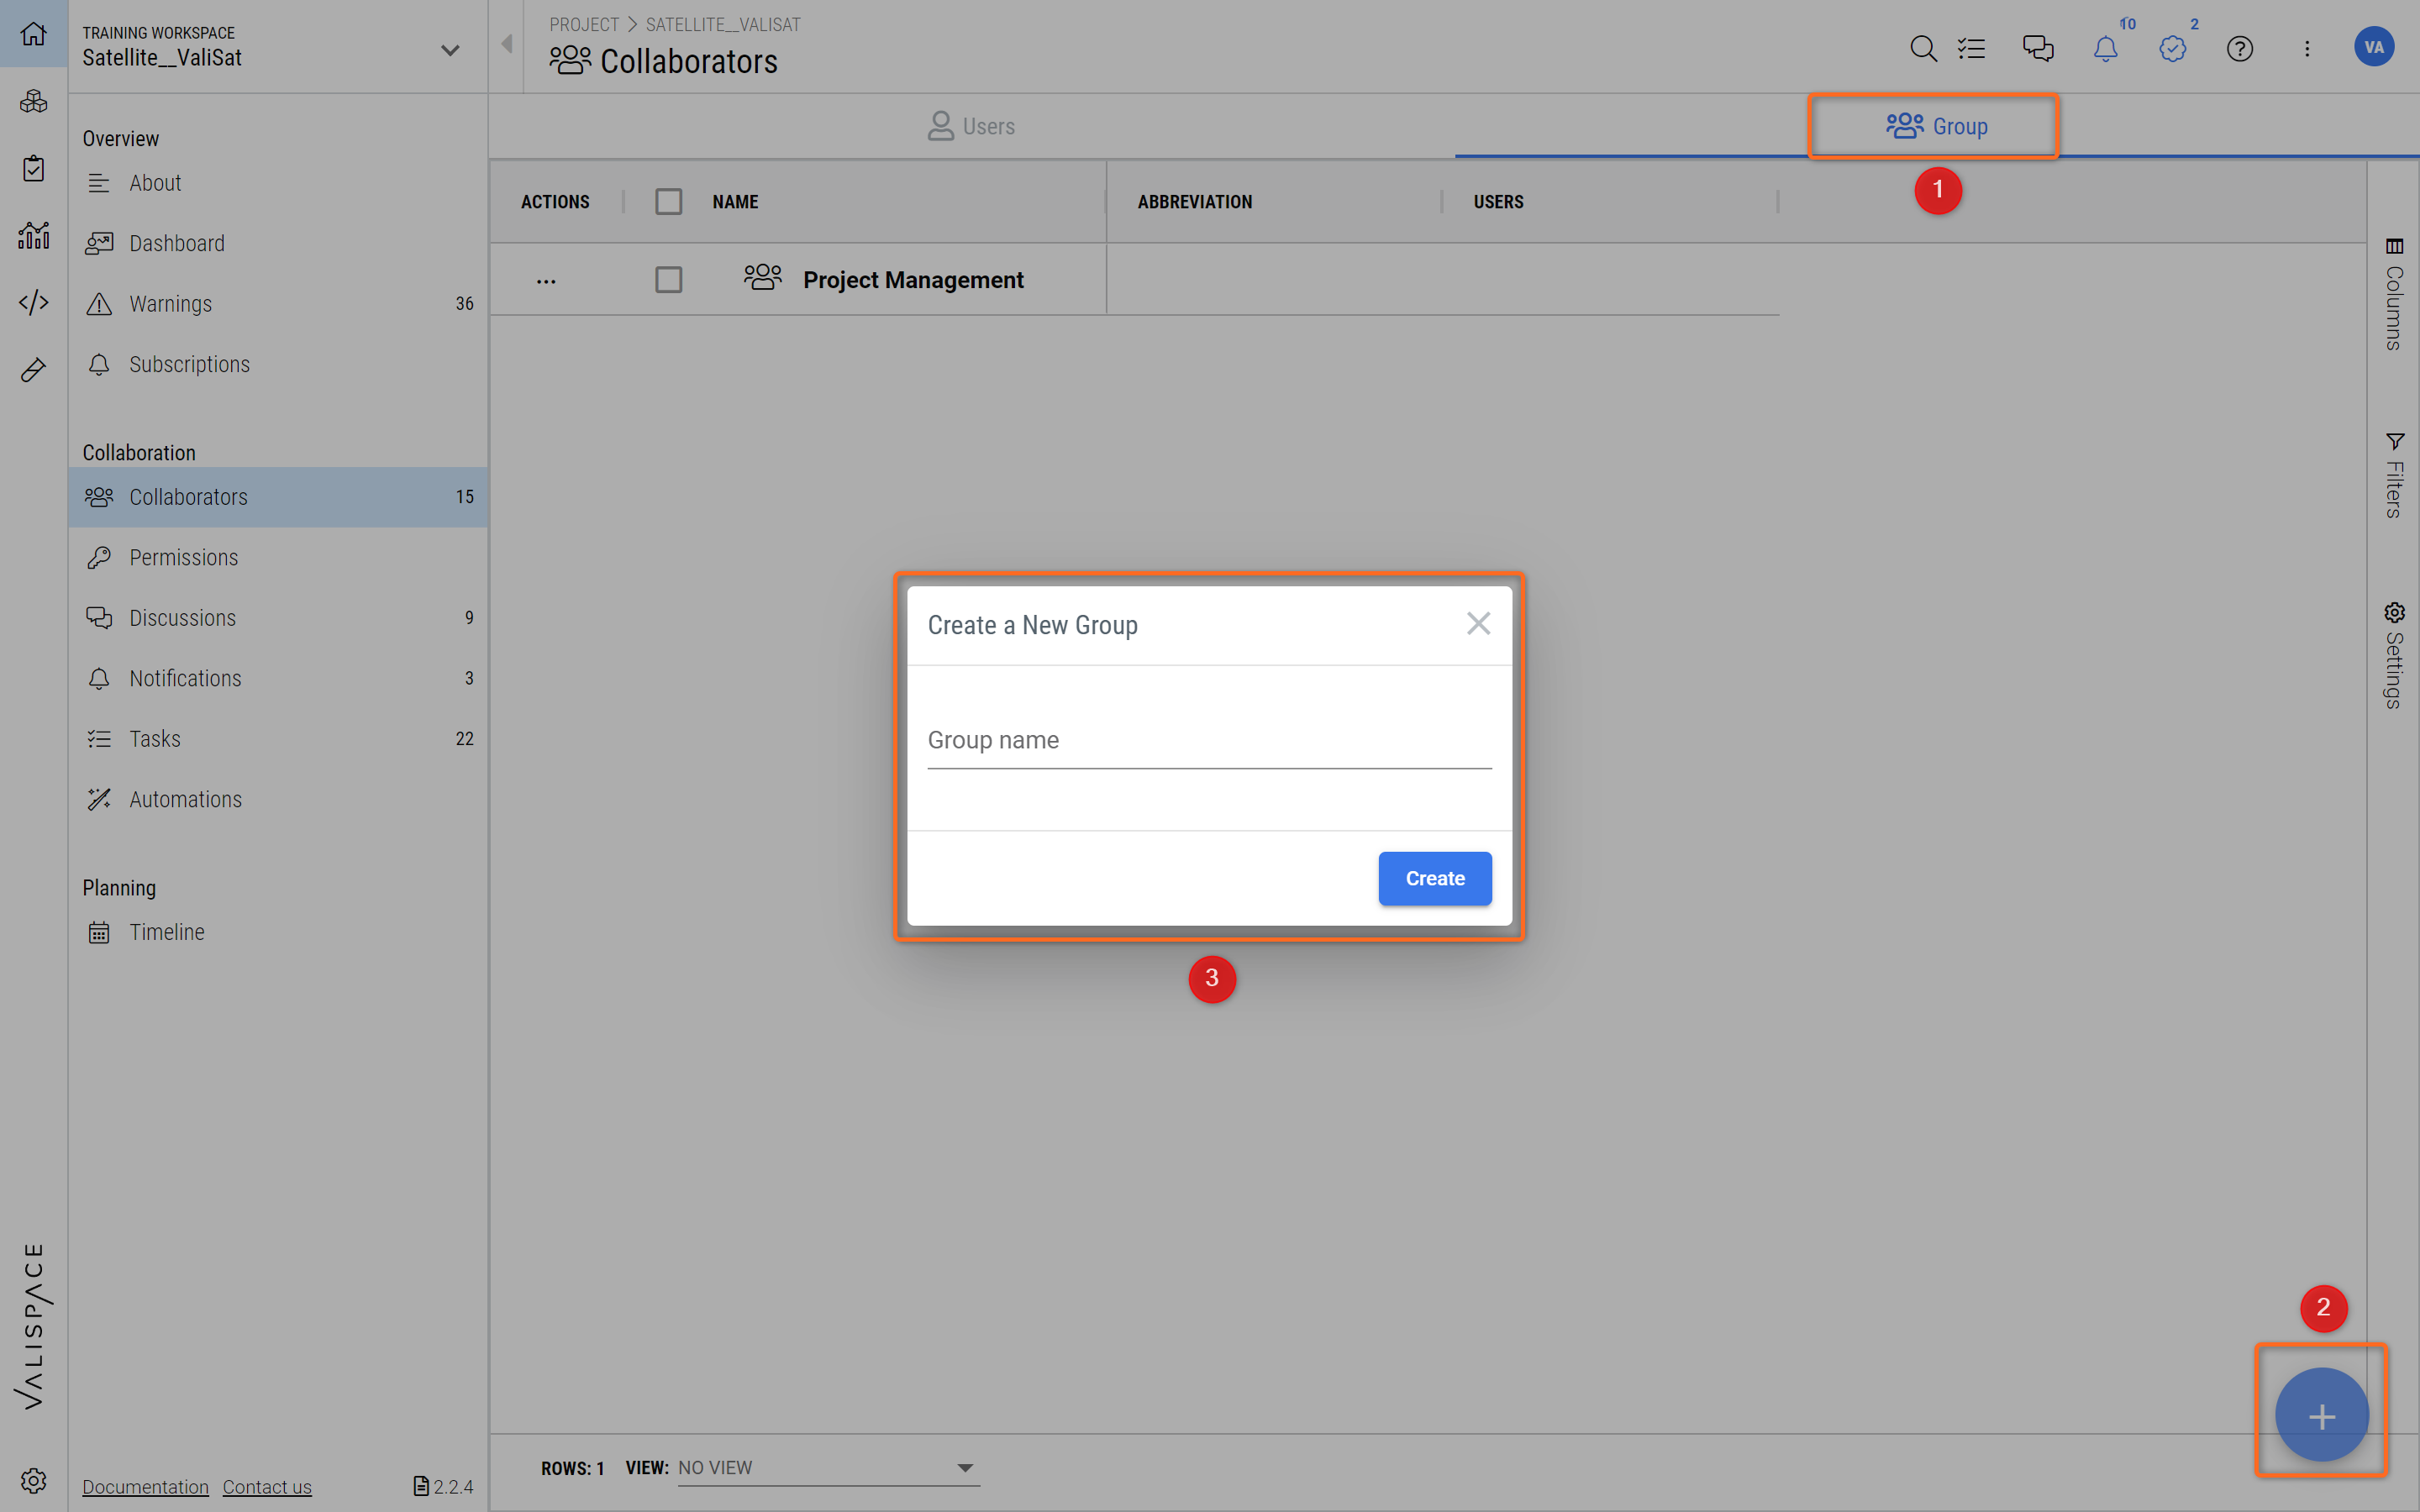
Click on the "Group" Tab on the top (1)
Click on the "+" sign on the right corner (2) to add a new group
Add the name of the group and click “Create” (3)
Creating a Group
Now you can add users to this group by double-clicking on the column field user. A pop-up opens up with the list of users in your Requirements and Systems Portal instance. You can add the users and also delete them from the group by clicking the small “x” button next to the user’s name.
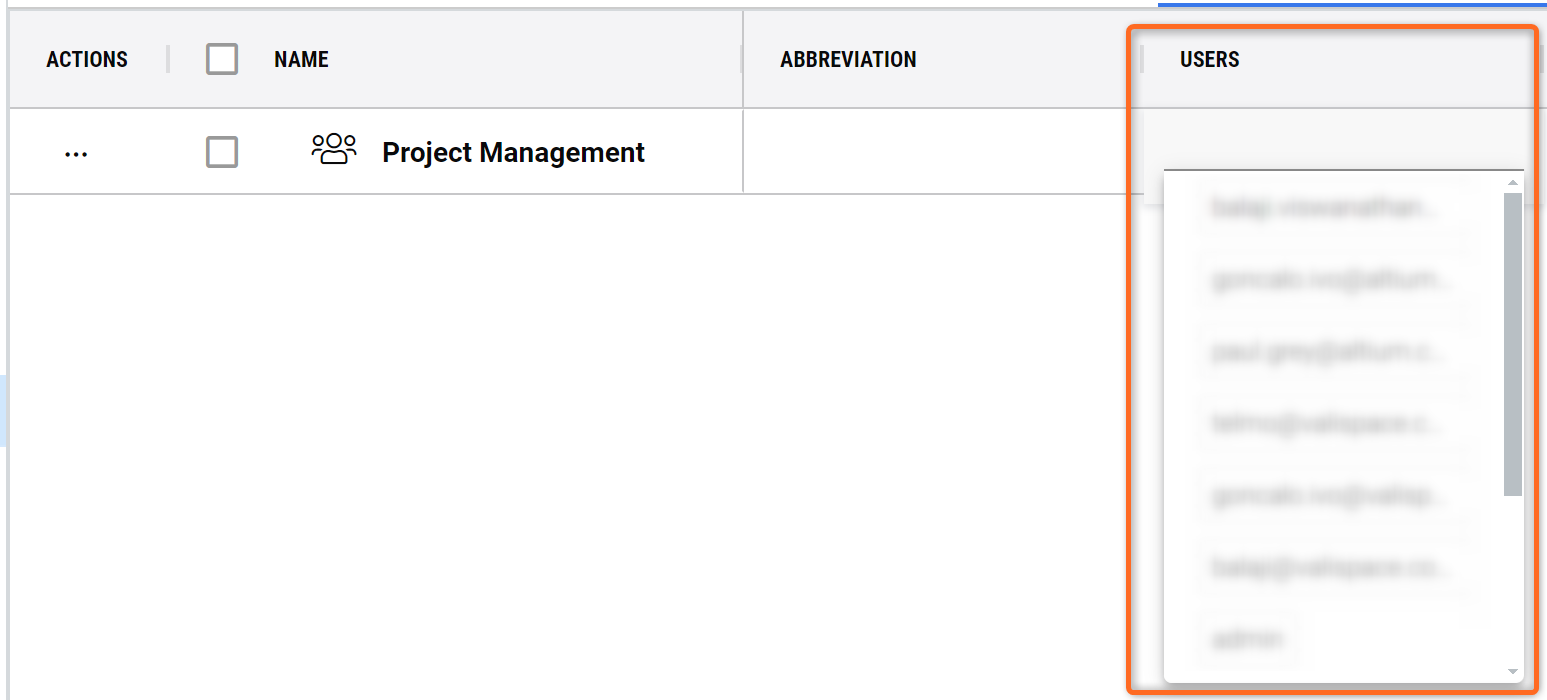
Adding Users to a Group
Deleting Groups
To delete an existing group, click the three dots on the right side of the menu available on the group name row.
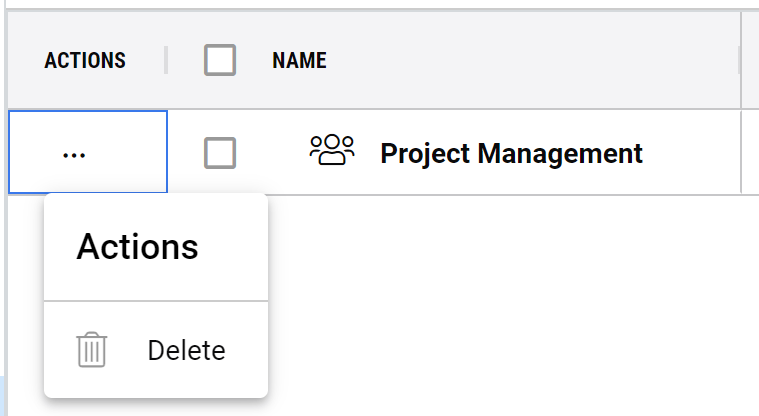
Deleting a Group