Fan Tutorial 1 - Specify Product - Part 1
In the context of this documentation “Valispace“ will be called “Requirements and Systems Portal“.
In this tutorial, we will go through one of the primary user flows that can get you started using the Requirements and Systems Portal:
Gather and Write Requirements
Breakdown Requirements
Review and Improve Requirements
Approve and Release Specifications
The first two aspects, ie “Gather and Write Requirements” and “Break down Requirements” are covered in Part 1, and the rest in part 2 of the specify product tutorial. This first tutorial will take approximately 15 -20 minutes to complete. All the values and requirements are arbitrary
(1) Create a new Project
If you are accessing the Requirements and Systems Portal instance for the first time, you can skip to the Figure Quickstart Feature.
In the top left corner (see Figure Creating a New Project), click on the project/workspace dropdown menu (1)
Verify that you are in the correct workspace. If you are not, select your workspace from below.
We recommend you to create the tutorial project in the “Training workspace”. If you are in the default workspace, you can select the “Training Workspace” and create the new project.
In the list of projects, scroll down and select
+ Create new project(2)
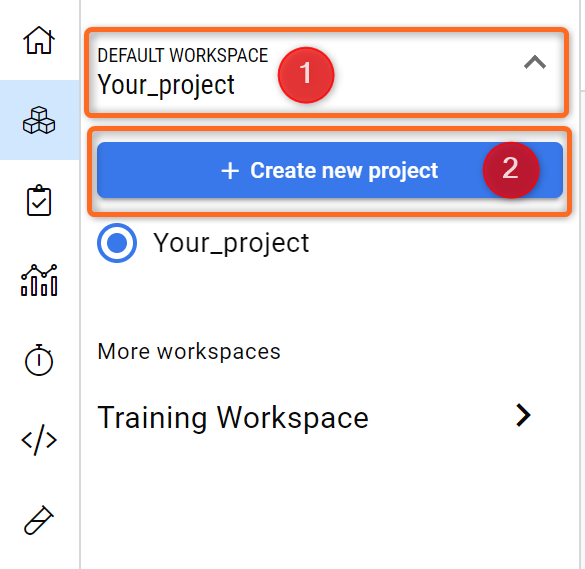
Creating a New Project - You can create a new project by clicking on “+ Create new project“
Once you select this option, you will be taken to our “Quickstart” Feature (see Figure Quickstart Feature). Click on the
Simple Createoption for an “Empty project”

Quickstart Feature - From here, you can create a new project in various ways. For this Tutorial, please select “Simple create“.
Upon clicking, you will be asked, as seen in Figure Setting up Project Name, to Enter a unique (not yet existing) project name (e.g.
ValiFan_yourname) (1) and pressCreate Project(2). In the Project permissions, you can choose to use the same permissions as for the workspace, which means that the users who have access to the workspace will also have access to the project. You can also set up custom permissions to select the user permissions yourself. For this tutorial, select “Use workspace permissions (Read & Write)” for the Project Permissions.
The project name does not recognise special characters except “_' and “-”. Also spaces are not accepted.
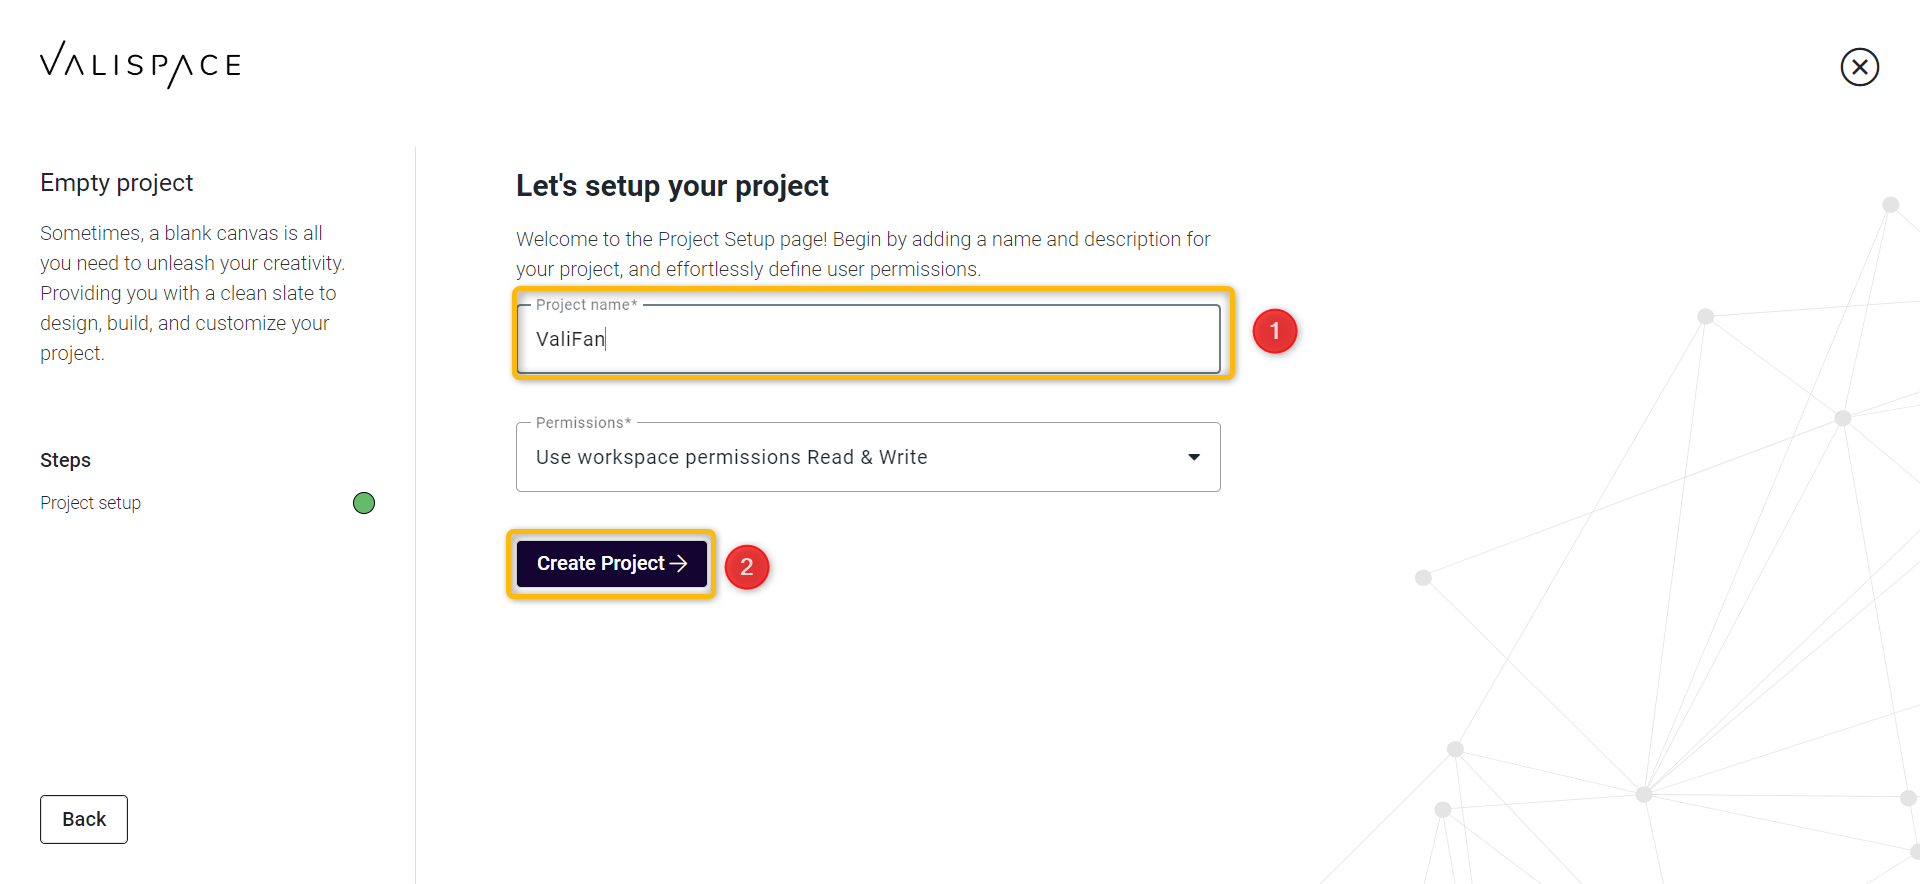
Setting up Project Name - Here, you can choose the project name and the permissions. For this tutorial, leave the permissions as they are for now.
After the project is created, you will automatically see the default “Dashboard”.
Navigate to
About(1) in the left navigation panel, and feel free to add information about your project. Here, you can also change the name of your project (2) at any time (see Figure About Project Page).You can always collapse or expand the main navigation pane by clicking the arrow (3) next to it.
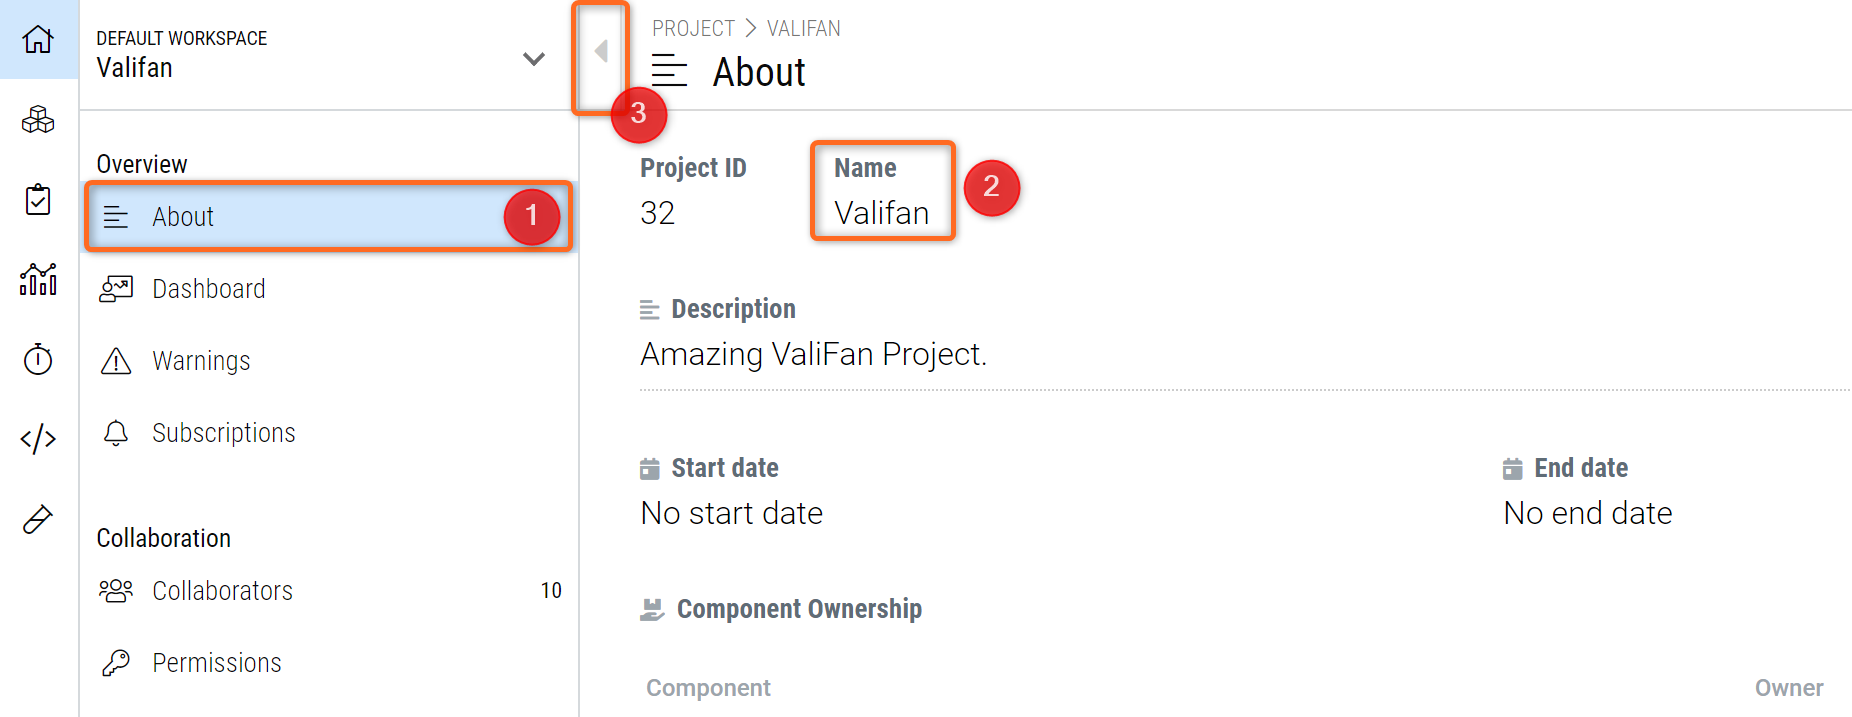
About Project Page - Here crucial project information is displayed such as name, description, image and Start and End Date.
(2) Define Stakeholder Requirements - Import Requirements
Most system design and development follow the V cycle. The first process in a V cycle is understanding the business needs and eliciting the stakeholders' needs. These Stakeholder needs are then converted to Stakeholder Requirements. The Stakeholder's requirements can be directly created, imported through CSV/XLSX, or even created through the AI-powered “ValiAssistant.” So, for this part, we will concentrate on the import method.
We have received a file from our stakeholders and will import these requirements.
To do that, download the following CSV file:
Valifan_stakeholder_Requirements.csv
Go to the Requirements Module (see Figure Requirements Module) by clicking on
Requirementsin the left navigation pane (1)Upon entering the Requirements module, Click on the
Import Requirements(2)
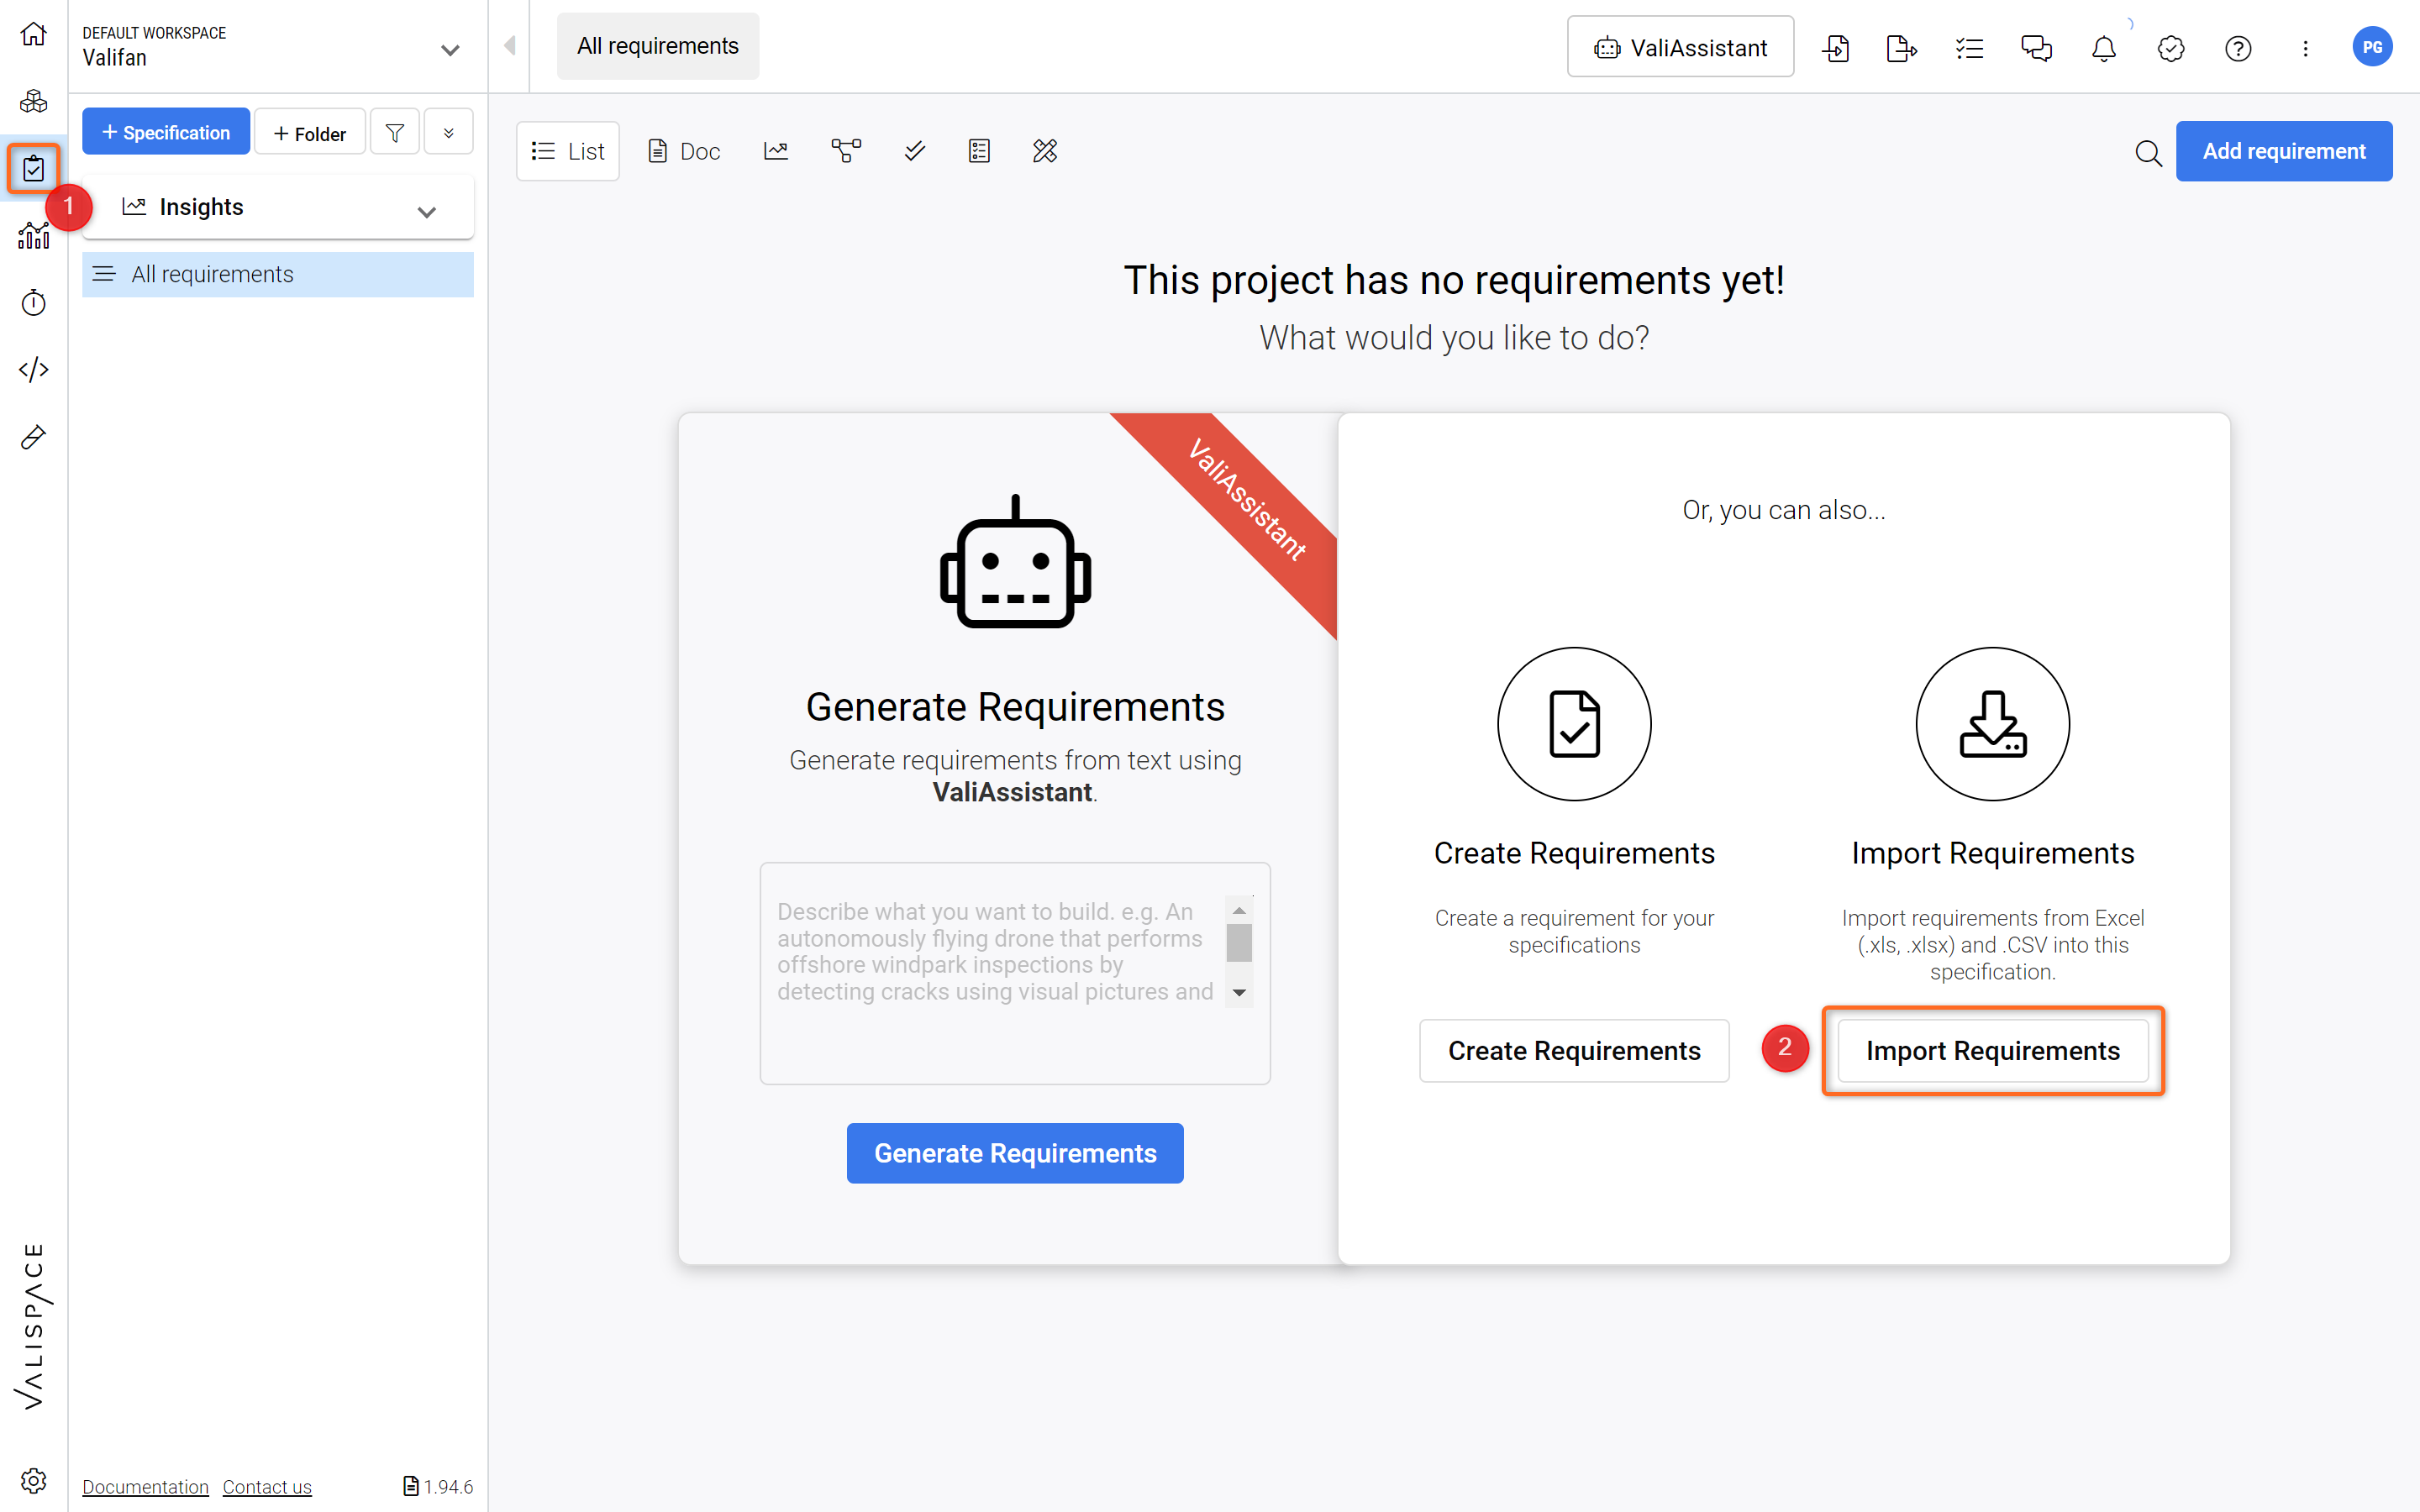
Requirements Module - This is the Requirements Module of the Requirements and Systems Portal. Here, we will upload the Stakeholder Requirements.
Once the option is selected, you can choose a specification or create one directly within the import wizard. We will create the specification within the import wizard (see Figure Import Wizard 1).
Select
Create a Specification, typeStakeholder_requirements,and clickContinue.
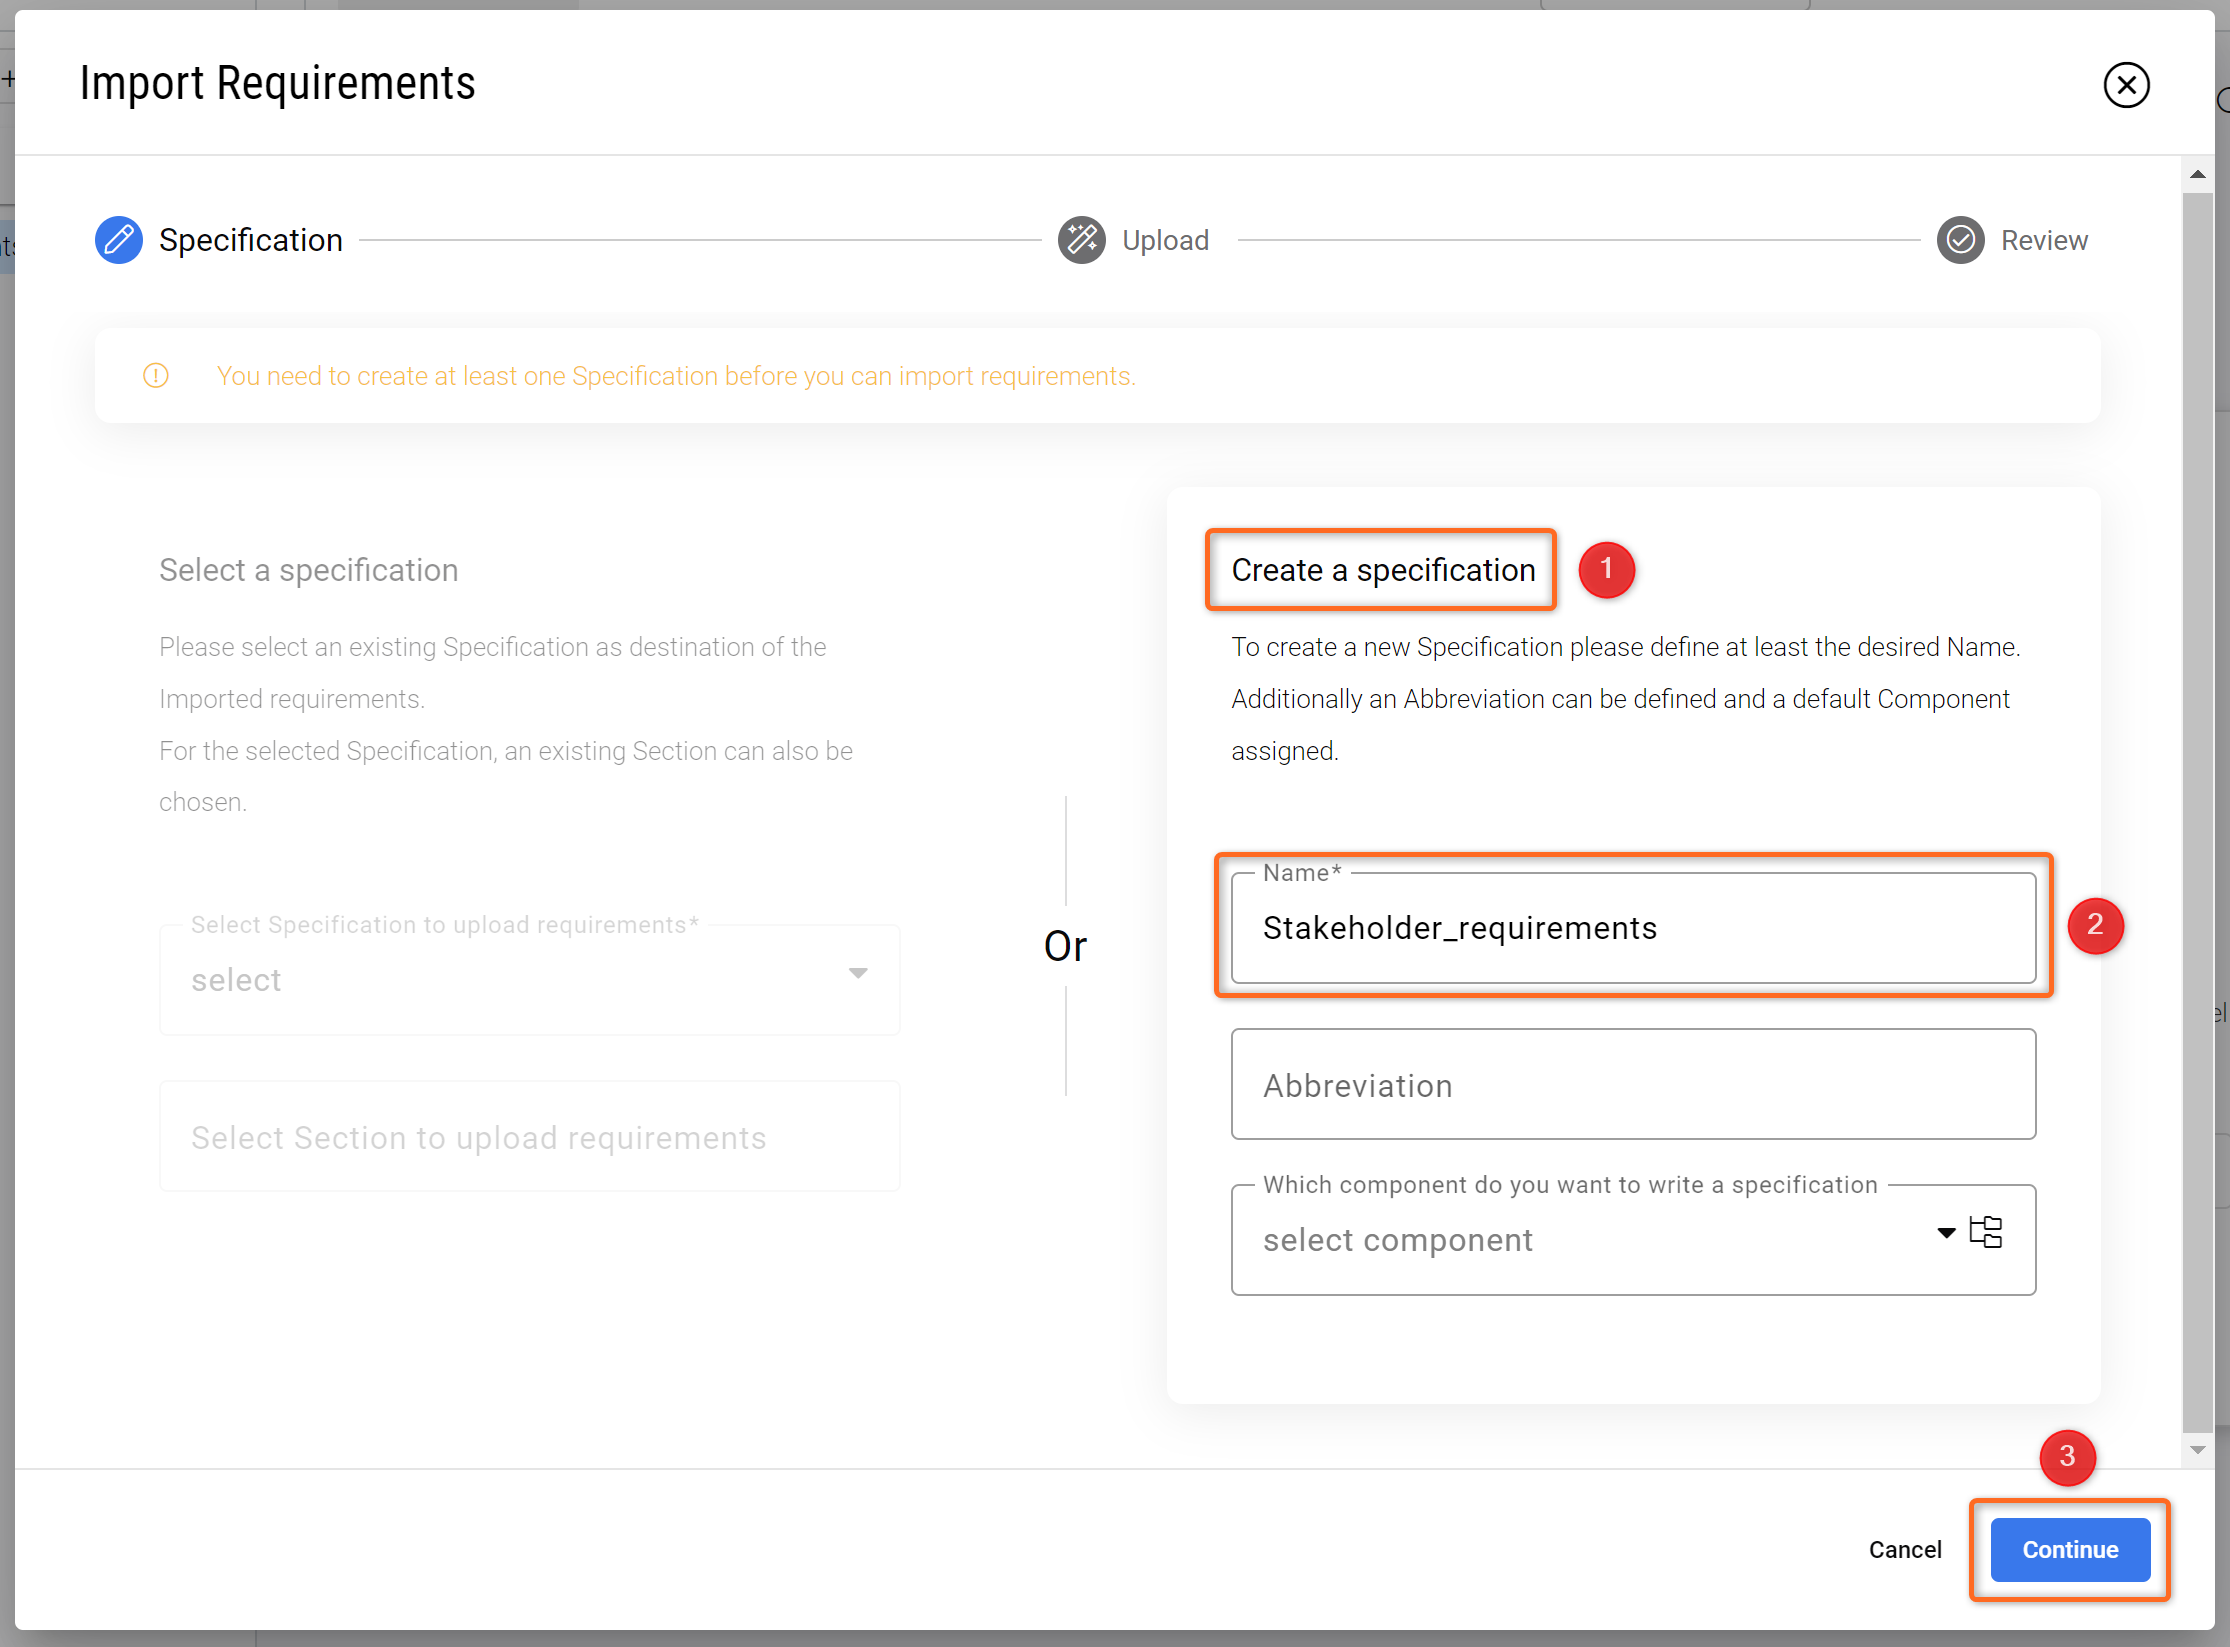
Import Wizard 1 - In the first step, we create the Specification where the Requirements will be stored.
The next step is to upload the CSV so that the import wizard can read and import the file. Once the import is done, you can use a feature called “Valify“, which transforms text-based parameters into references that store the value and the unit, also called Valis. This is shown in the click-through below.
During the import of requirements, we demonstrated a feature called “Valify”. After mapping the attributes and importing the requirements, you have a message screen where you can use “Check Now” to use the “Valify” feature.
The “Valify” option lets you convert the numerical values to the requirement valis automatically. Valis are technical parameters of Blocks, requirements or analyses which can be used in calculations and documentation. A Vali has a numerical value and contains additional information such as type, unit, formula, description, and minimum/max requirements.
Doing so, you can compare the requirement Vali's with the design Vali’s from the System Design Module in the future as the project progresses.
(3) Add System Requirements
In a typical system engineering flow, the systems requirements are created with the help of the stakeholder requirements. Most technical developments are designed against strict requirements, e.g. on mass, power consumption and budget. The Requirements and Systems Portal maintains a complete overview of whether your design fulfils all these requirements.
Now, we will create some system requirements manually (see Figure Creating the Fan Specification)
Click on
+ Specification(1) and enterFan_Specs(2) and clickCreate(3)
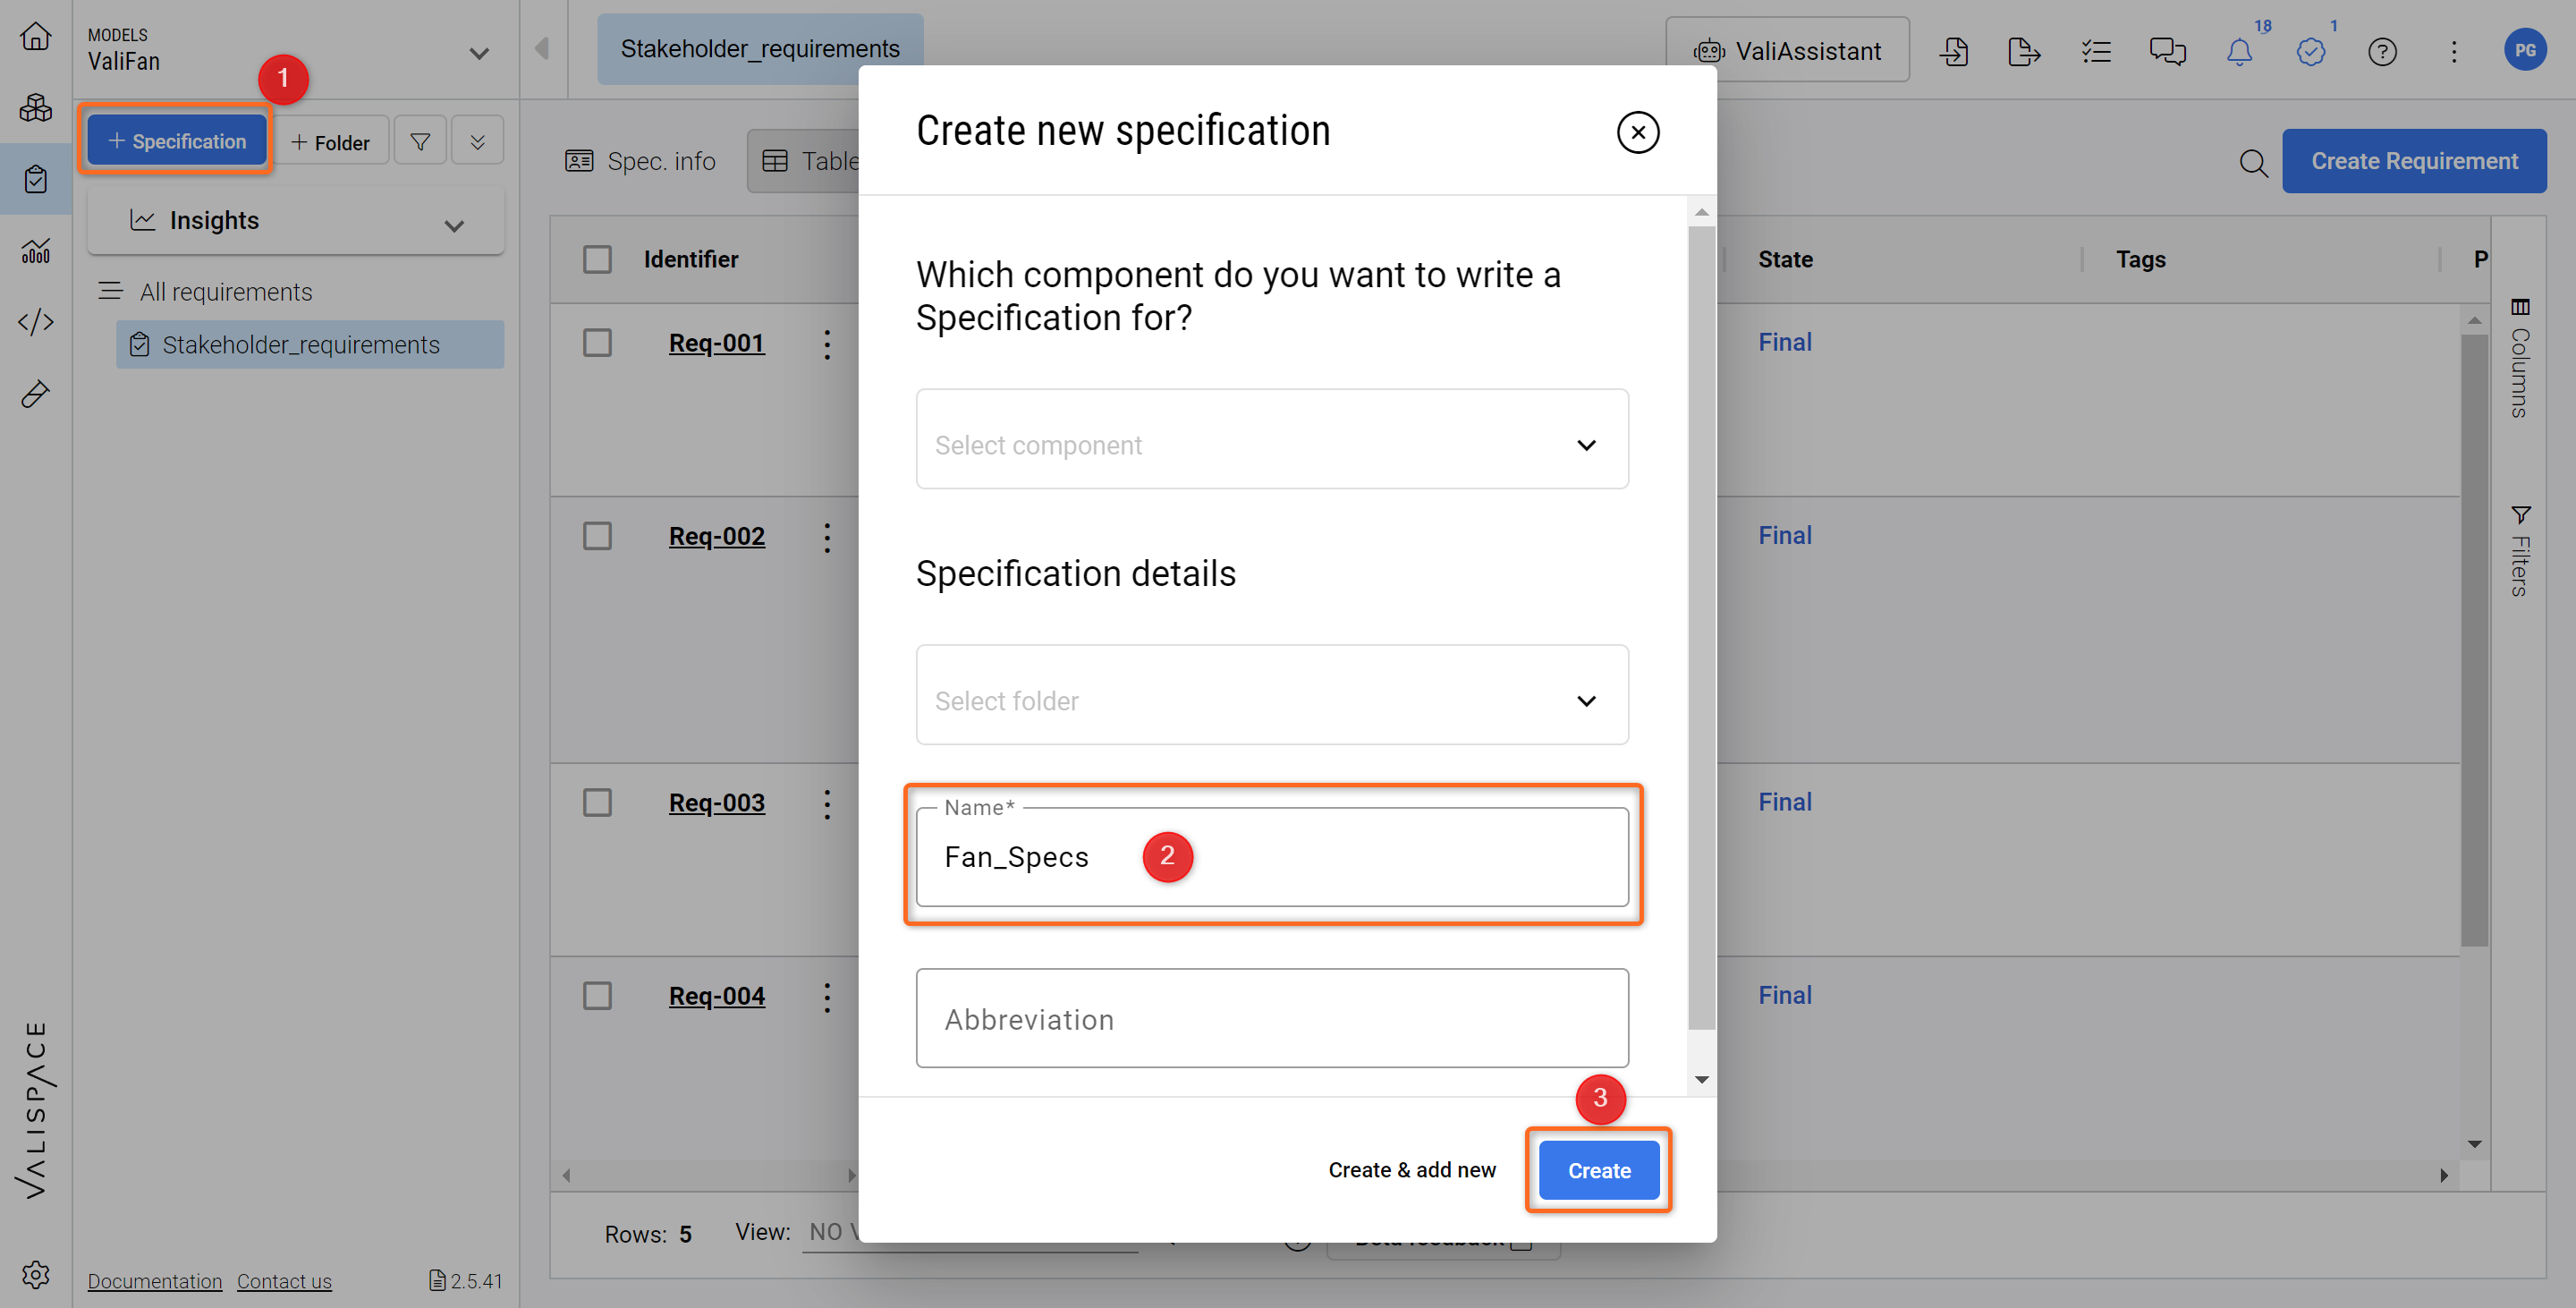
Creating the Fan Specification - Manually creating a Specification in the Requirements and Systems Portal is easy.
In Figure, Create a new requirement manually. Click on
Fan_Specs(1). Within this specification, click onCreate Requirements(2). Alternatively, you can also click on the blue “Add requirement” button in the upper right-hand cornerAdd Requirement(3)
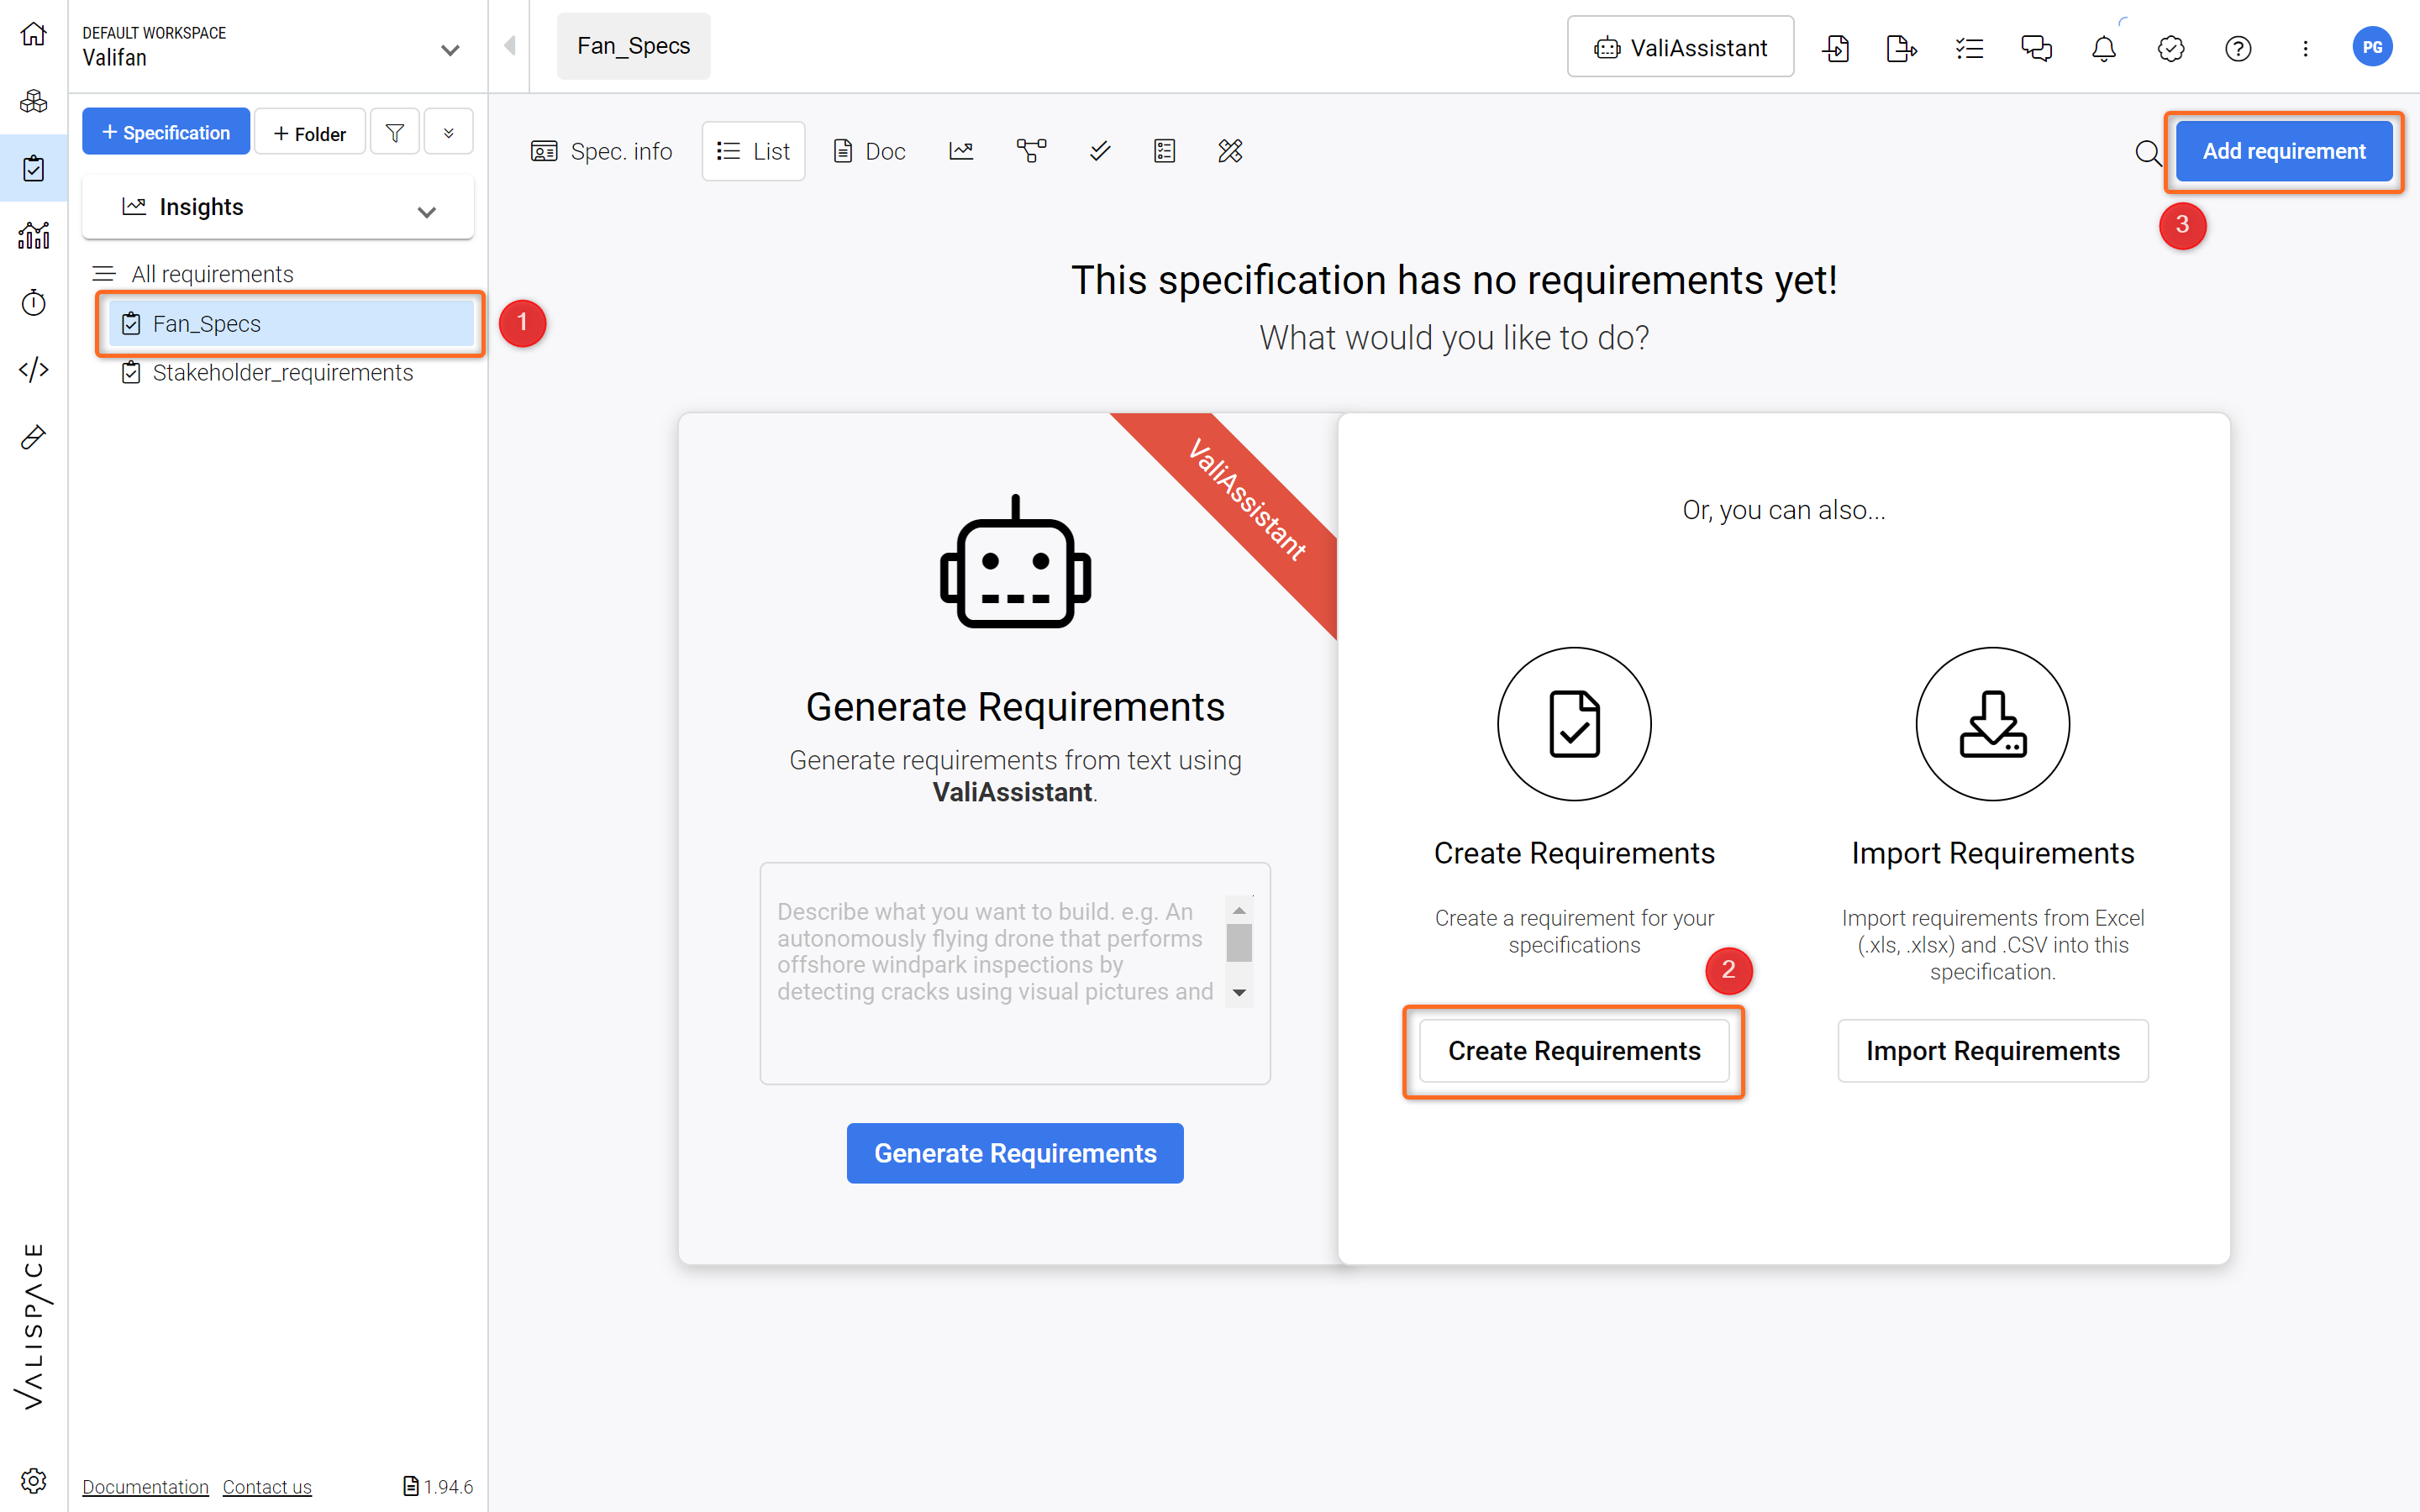
Create a new requirement manually.
In the pop-up menu, verify that you have selected the correct specification. Then, add a unique identifier (1), e.g.
R-Fan-001and typeThe Mass of the fan shall not exceed 300gunder “Requirement text” (2)
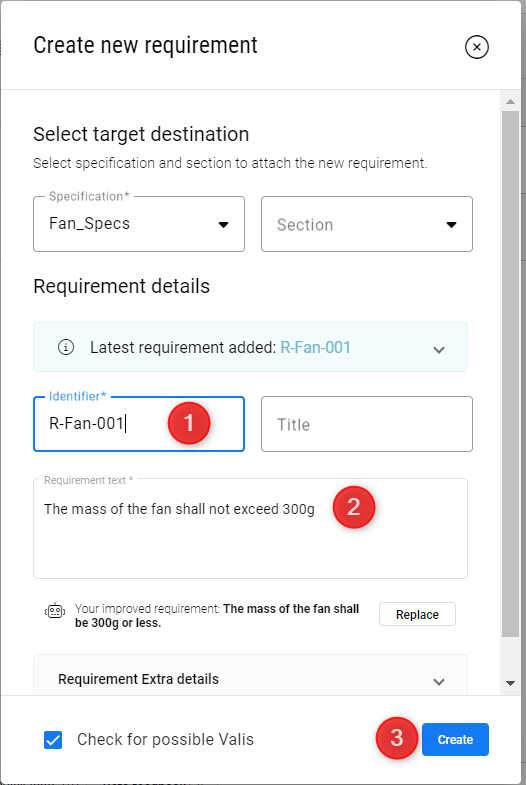
Create a new requirement manually - Here, you can add the Identifier, Title, Text and even Rationale for your Requirement.
Having the tick mark on Check for possible Valis checks for the numeric values within the requirement and converts it directly into valis through the Valify feature.
Using the same method but without ticking
Check for possible Valis, create another requirement calledR-Fan-002with the requirement text:The Mass of the propeller shall not exceed 50g.
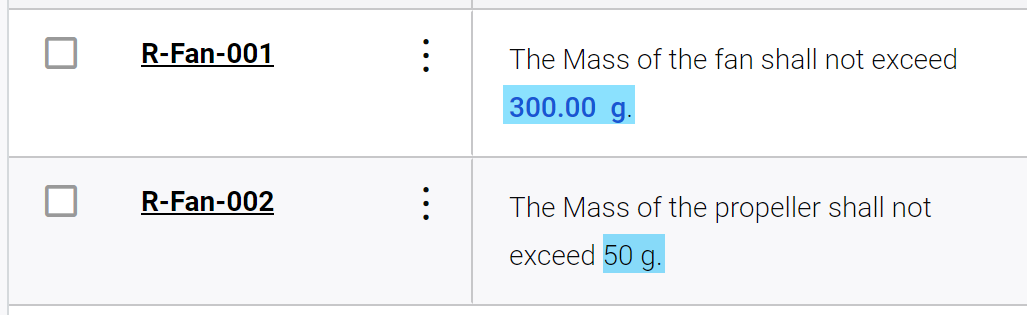
The two Fan Spec Requirements R-Fan-001 has a Vali, and R-Fan-002 does not yet have a Vali.
For the second requirement, during the creation, we did not use the “Valify” feature. In case, you don't want to Valify automatically, you have the option to create valis within requirement manually. Lets see how we can do that.
Creating Requirement Valis within a Requirement
Double-click on the text column of the Requirement
R-Fan-002and delete 50g.Type
$and a popup showing the list of valis/objects inside the project opens.On the top right corner of the dialog box, select the
+icon, to create a Vali.Input the following details.
Name:req_mass_propeller,Formula and unit: 50g and Display unit: g
See how this is done in the click-through below.
Creating a Requirement Vali manually - Try it out!
Breakdown Requirements with parent and child relationships
Observe Figure Enable Columns to see how to enable more columns in your Requirements table.
Click on
column(1) on the right side of the tableVerify that the
ParentsandChildrenboxes are checked (2)
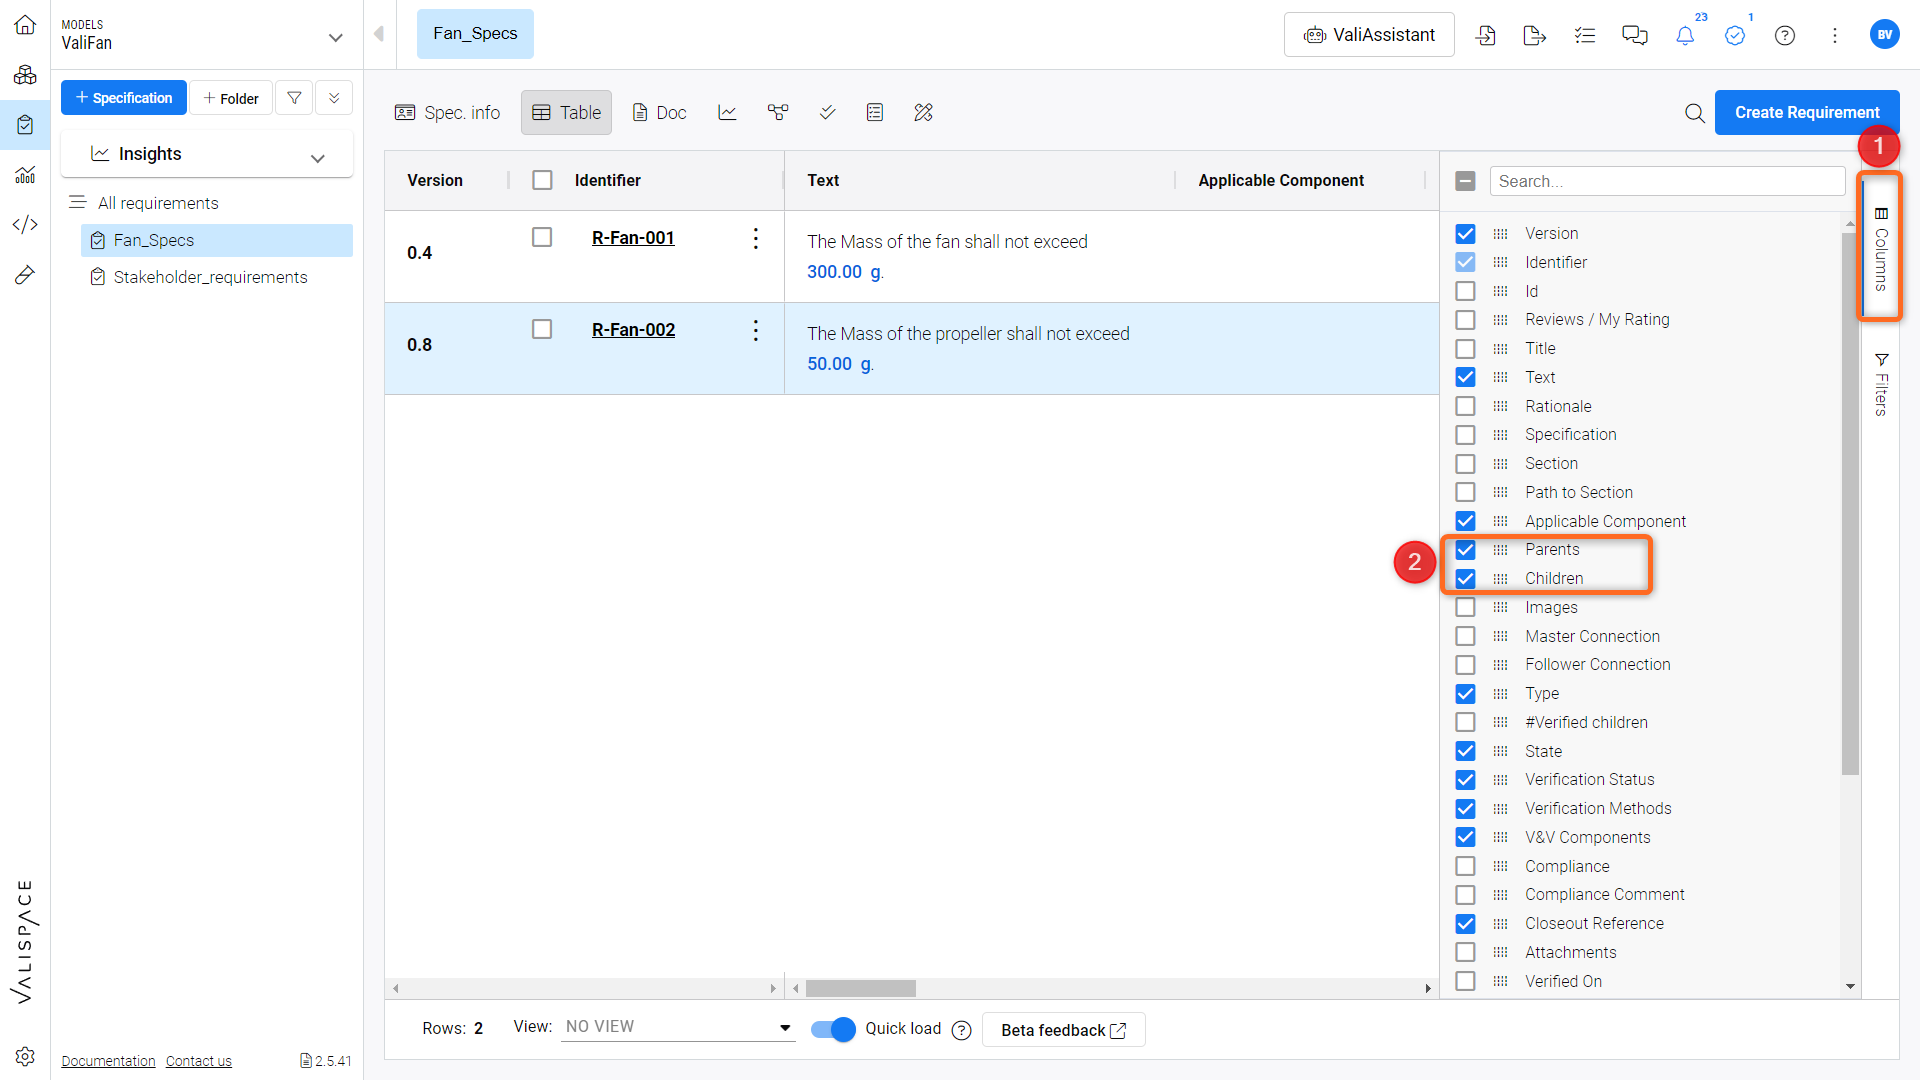
Enable Columns - Verify if the parents and children columns are checked
Enable Columns - Verify if the parents and children columns are checked.
In the requirements table, find the second requirement you created (R-Fan-002). In the
Parentscolumn, double-click on cell (1).In the drop-down menu, type in
R-Fan-001to link both requirements. Note that the children are automatically added to the requirementR-Fan-001
After doing this, your requirements should look like this:
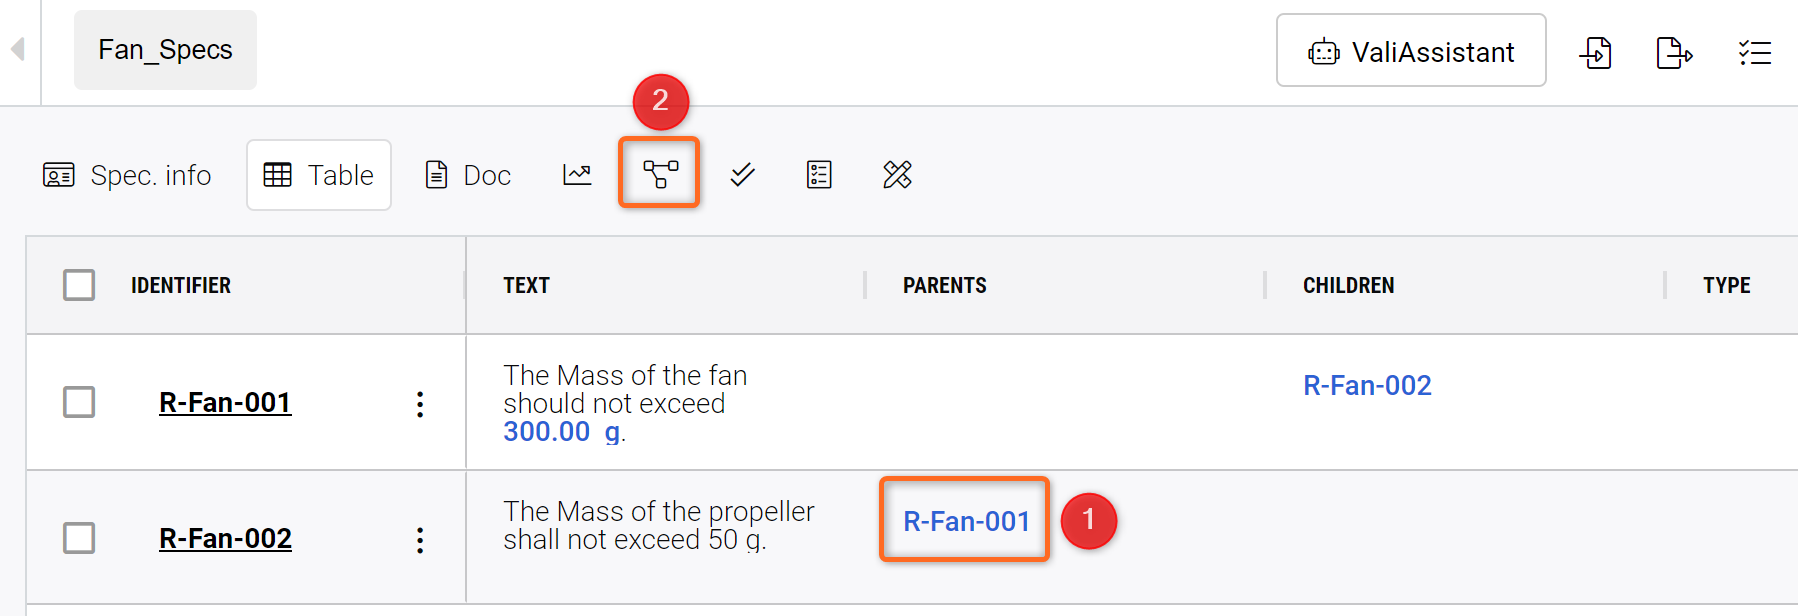
Creating parent-child relationship - By double-clicking on either Parents or Children, you can assign inheritance between requirements.
By clicking on the
Connections Graph(2 in Creating parent_child relationship Figure) tab found at the top centre of the requirements table, you can see and verify this relationship (see Figure Connection Graph)
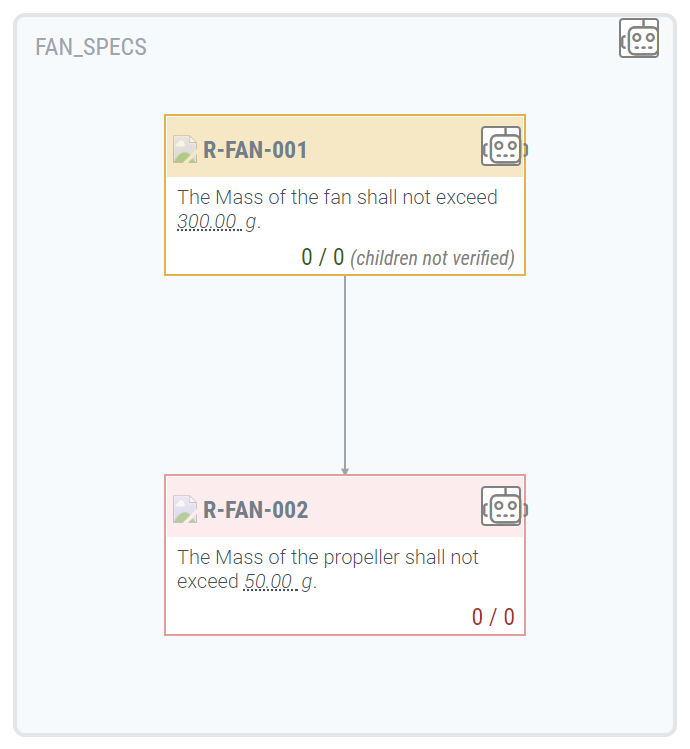
Connections Graph - The Connection Graph shows the parent-child relationship of the selected Specification. Blue boxes around the Requirements indicated the Specification they are in.
Try this : You can generate requirements/breakdown requirements through the ValiAssistant. For example, Click on the ValiAssitant, choose the option Generate Requirements, and type a prompt like Create 2 safety requirements for designing a fan.
Remember that ValiAssistant is powered by an LLM (Large Language Model) and results on the generated requirements may vary.
The steps are shown in the click-through below:
Generating Safety Requirements through the Valiassistant with a Prompt.