Load Views / Saved Views
This feature allows users to save and load particular views of the modules. This is particularly helpful when the user works with the Requirements Module as there are many columns/attributes. The view manager provides an option to every user to save the customized view of the tables and columns according to their needs.
Use cases
The typical use cases for Saved Views are explained below.
In the normal ‘Default View’ settings of the requirement table, ‘Text’, ‘Parents’, and ‘Children’ are visible alongside the ‘Identifier’ column and are checked by default. If the user requires these columns as a priority, the user can choose the Default view by either right-clicking anywhere on the table (1) and selecting “Load view“ (2) and then “Default“ (3), or by going into the drop-down at the bottom of the screen (4) (see Figure Views).
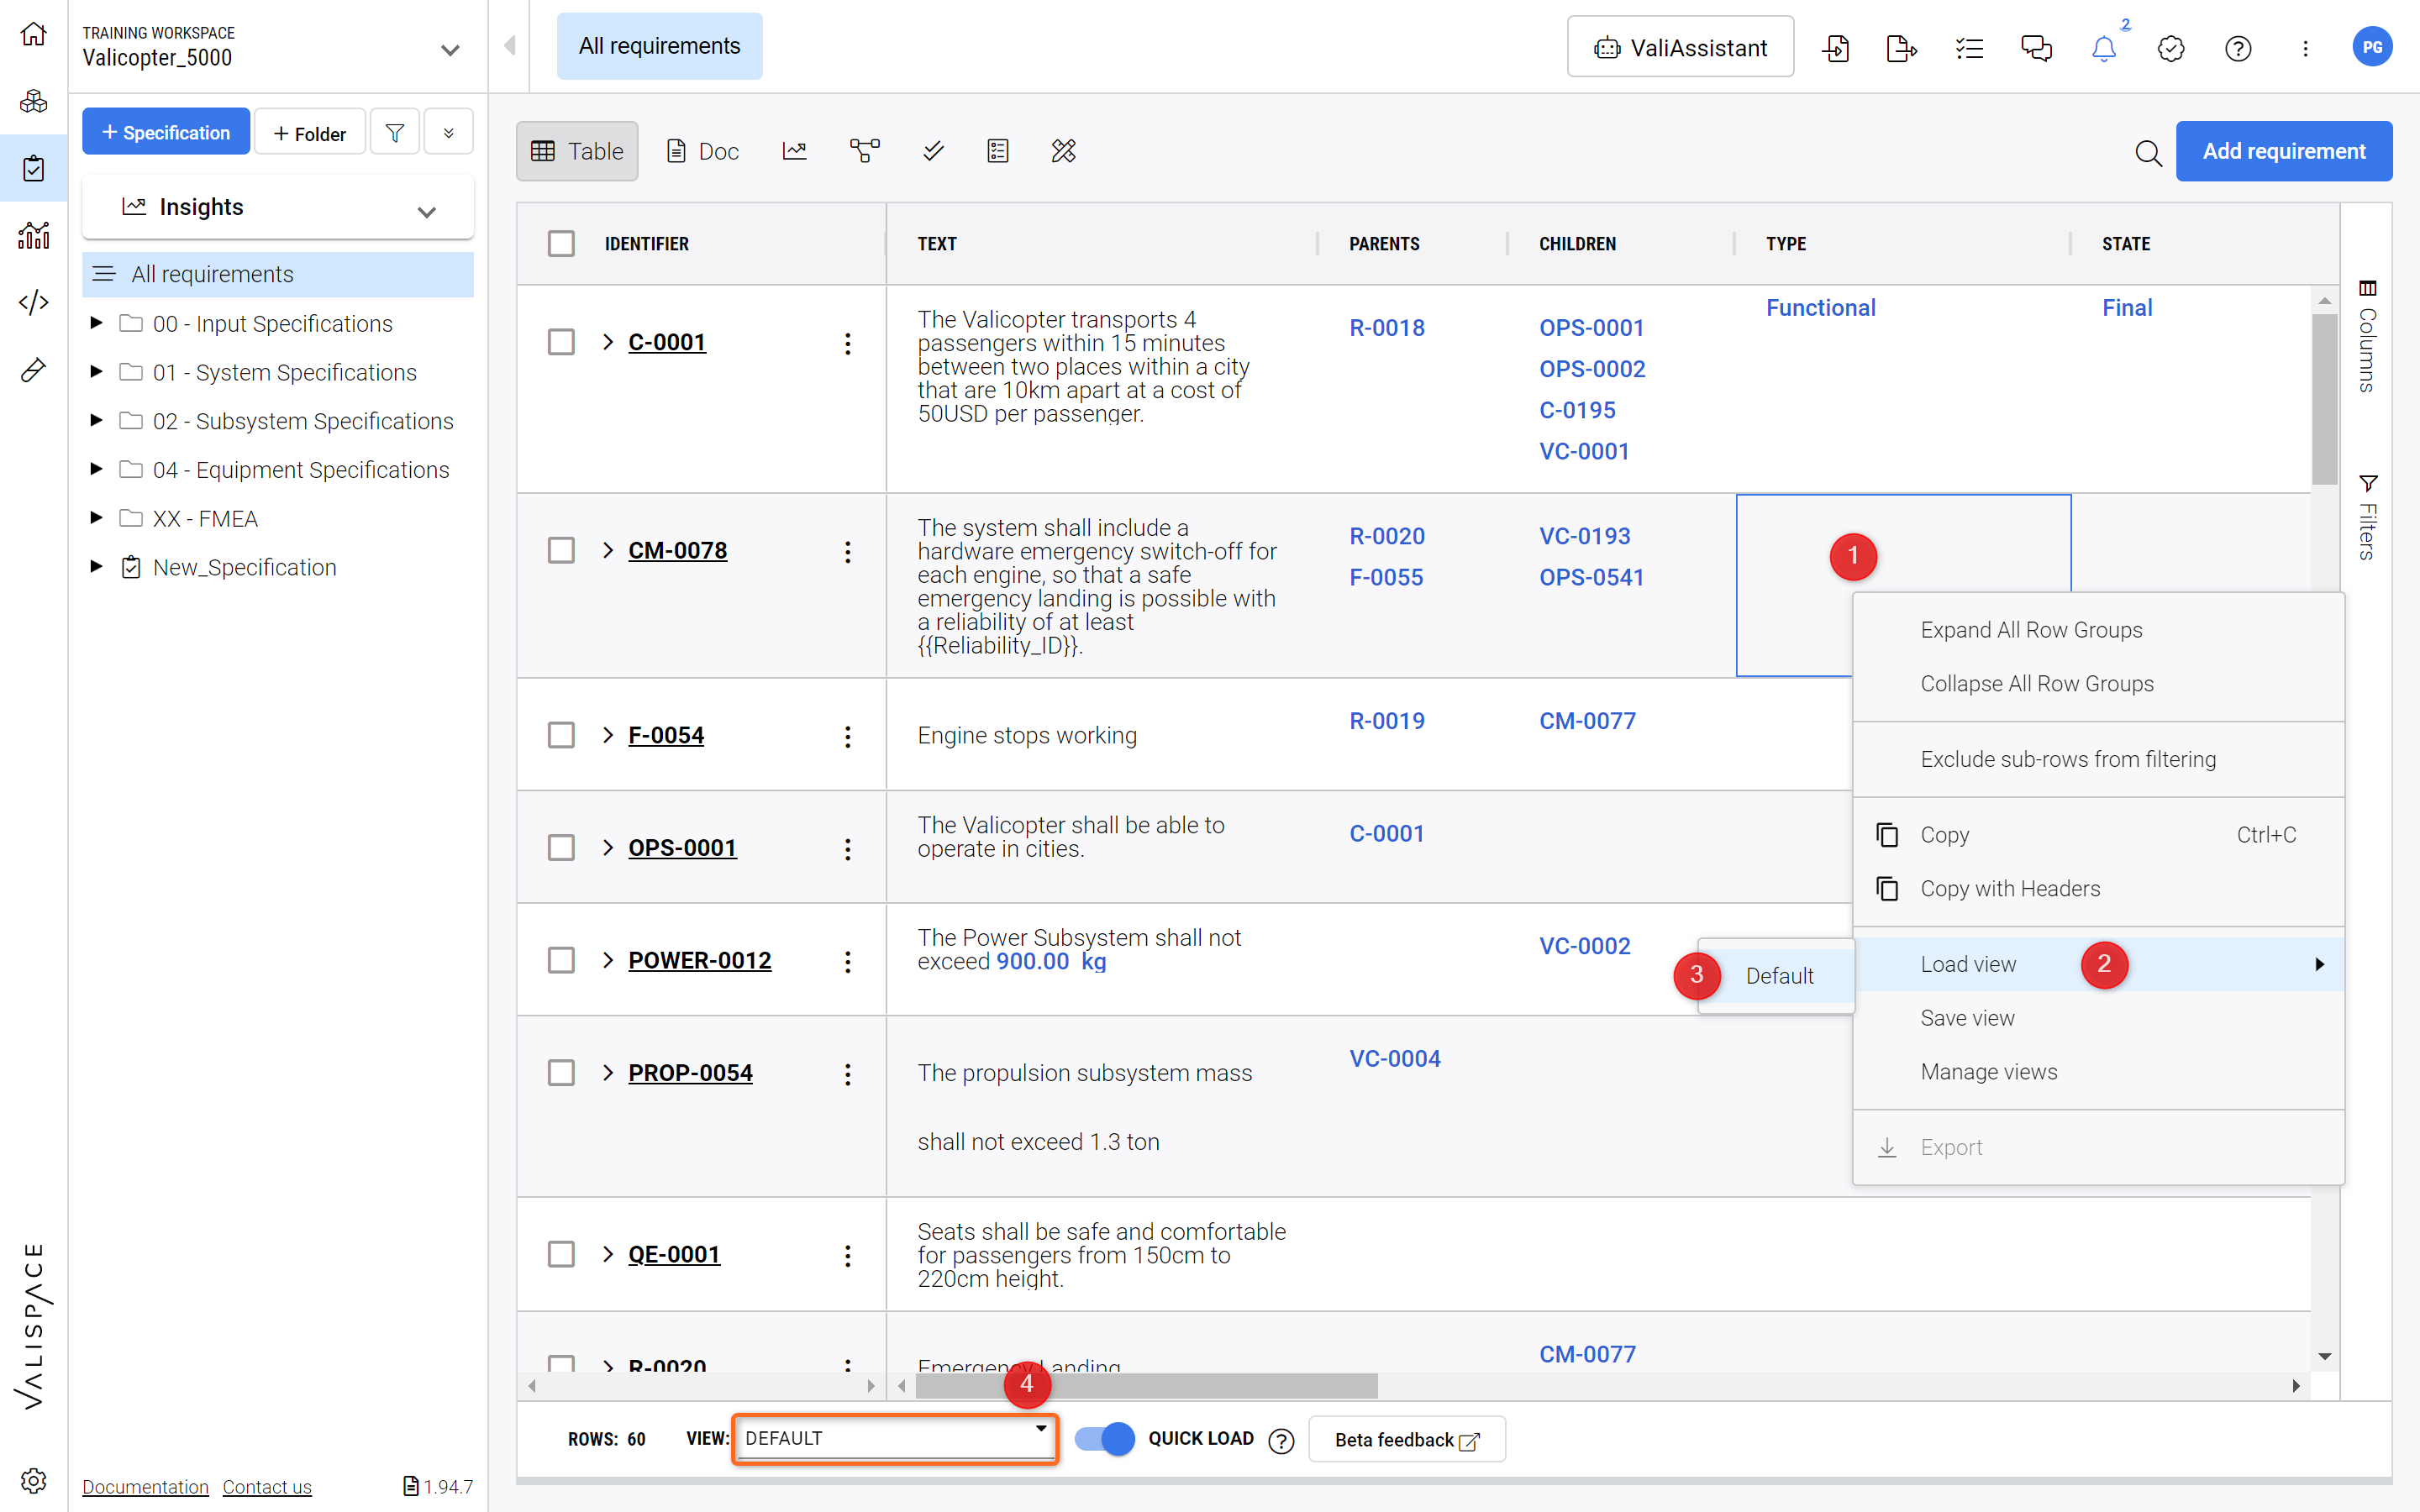
Views - How to load the standard “Defautl“ View.
In case the user wants to work with the verification and validation of the requirements, the user can select the columns which are needed for this process. The typical attributes that are used for this V&V process are the identifier, text, verification methods, verification status, closeout references, verified on, and verified by. The user can select these columns and then save them as a new view by right-clicking anywhere on the table and selecting “Save View“. Once the view is saved, the user can switch/load back to this view with a single click through the views manager. Refer to the image below.
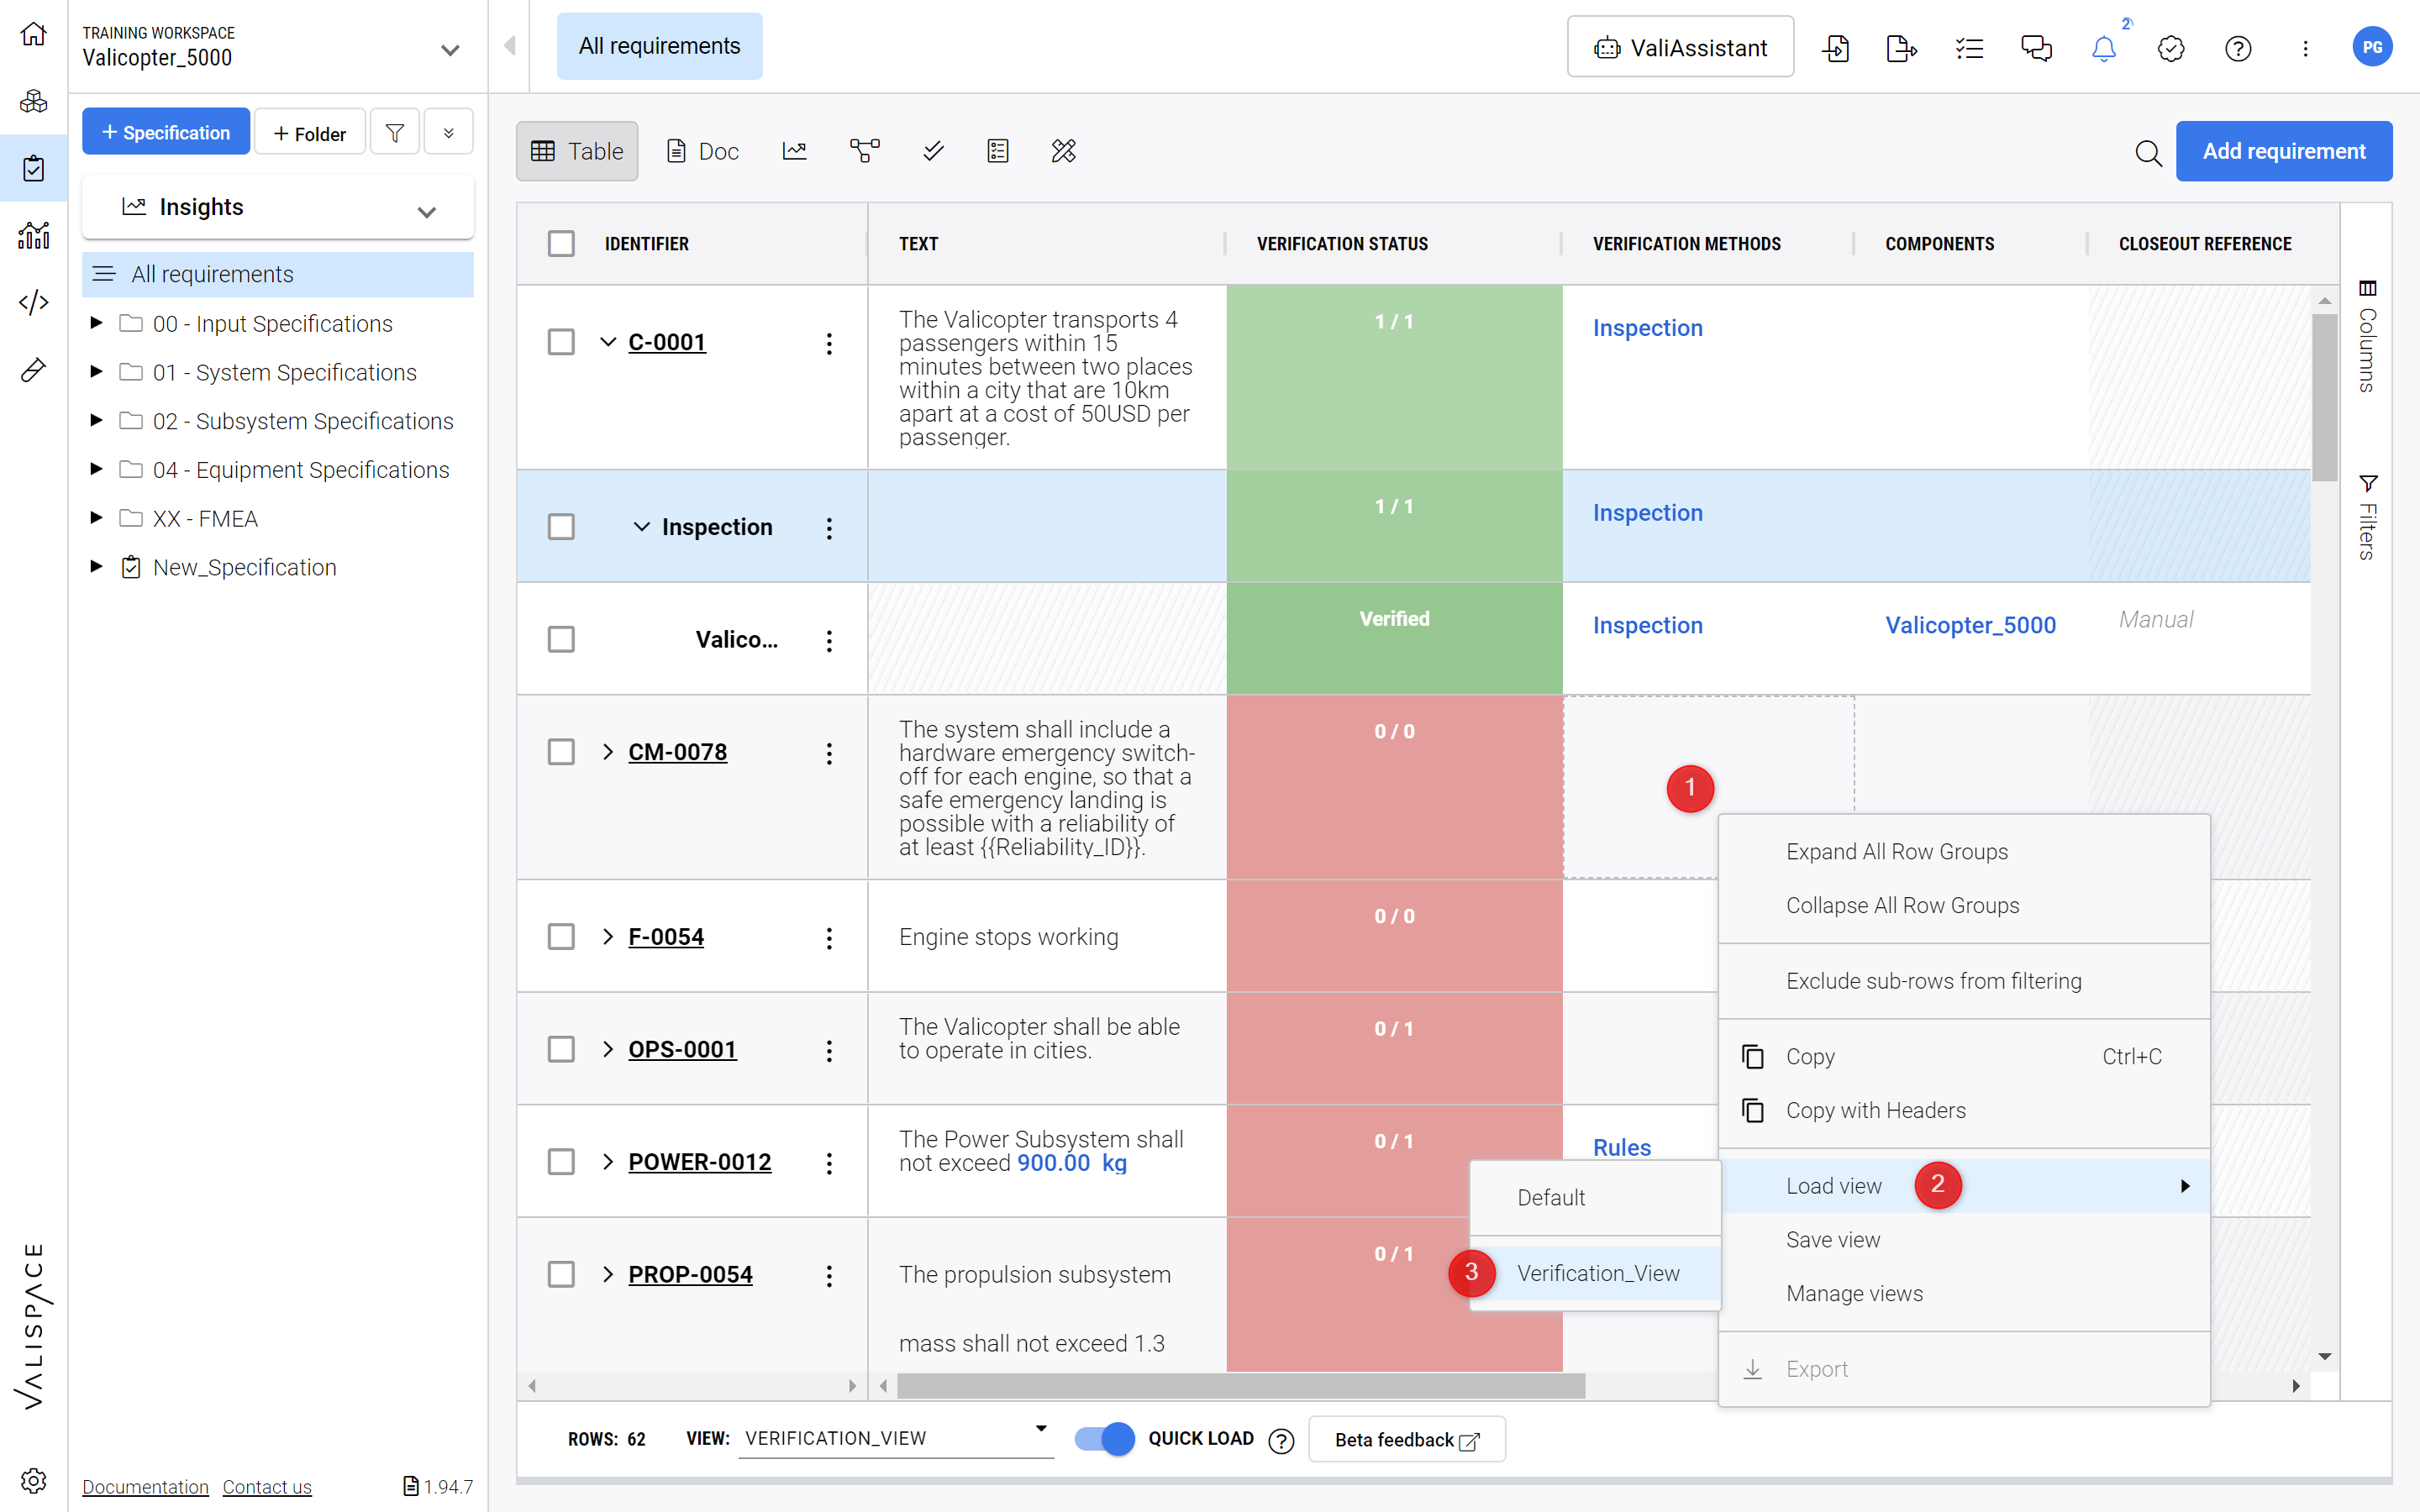
Loading Saved Views - If a View is previously saved it will always appear in the “Load view“ option.
How to Create, Save and Load the view
To create a particular view and save it in the Views Manager, the user has to follow the following steps:
Select a particular requirement specification, for which you would like to create a view
On any header of a column you can find three dashes (see Figure Selecting Columns)
Clicking on the dashes (1) makes a popup appear. Click on the table icon (2) upon which you can find the column names with checkboxes
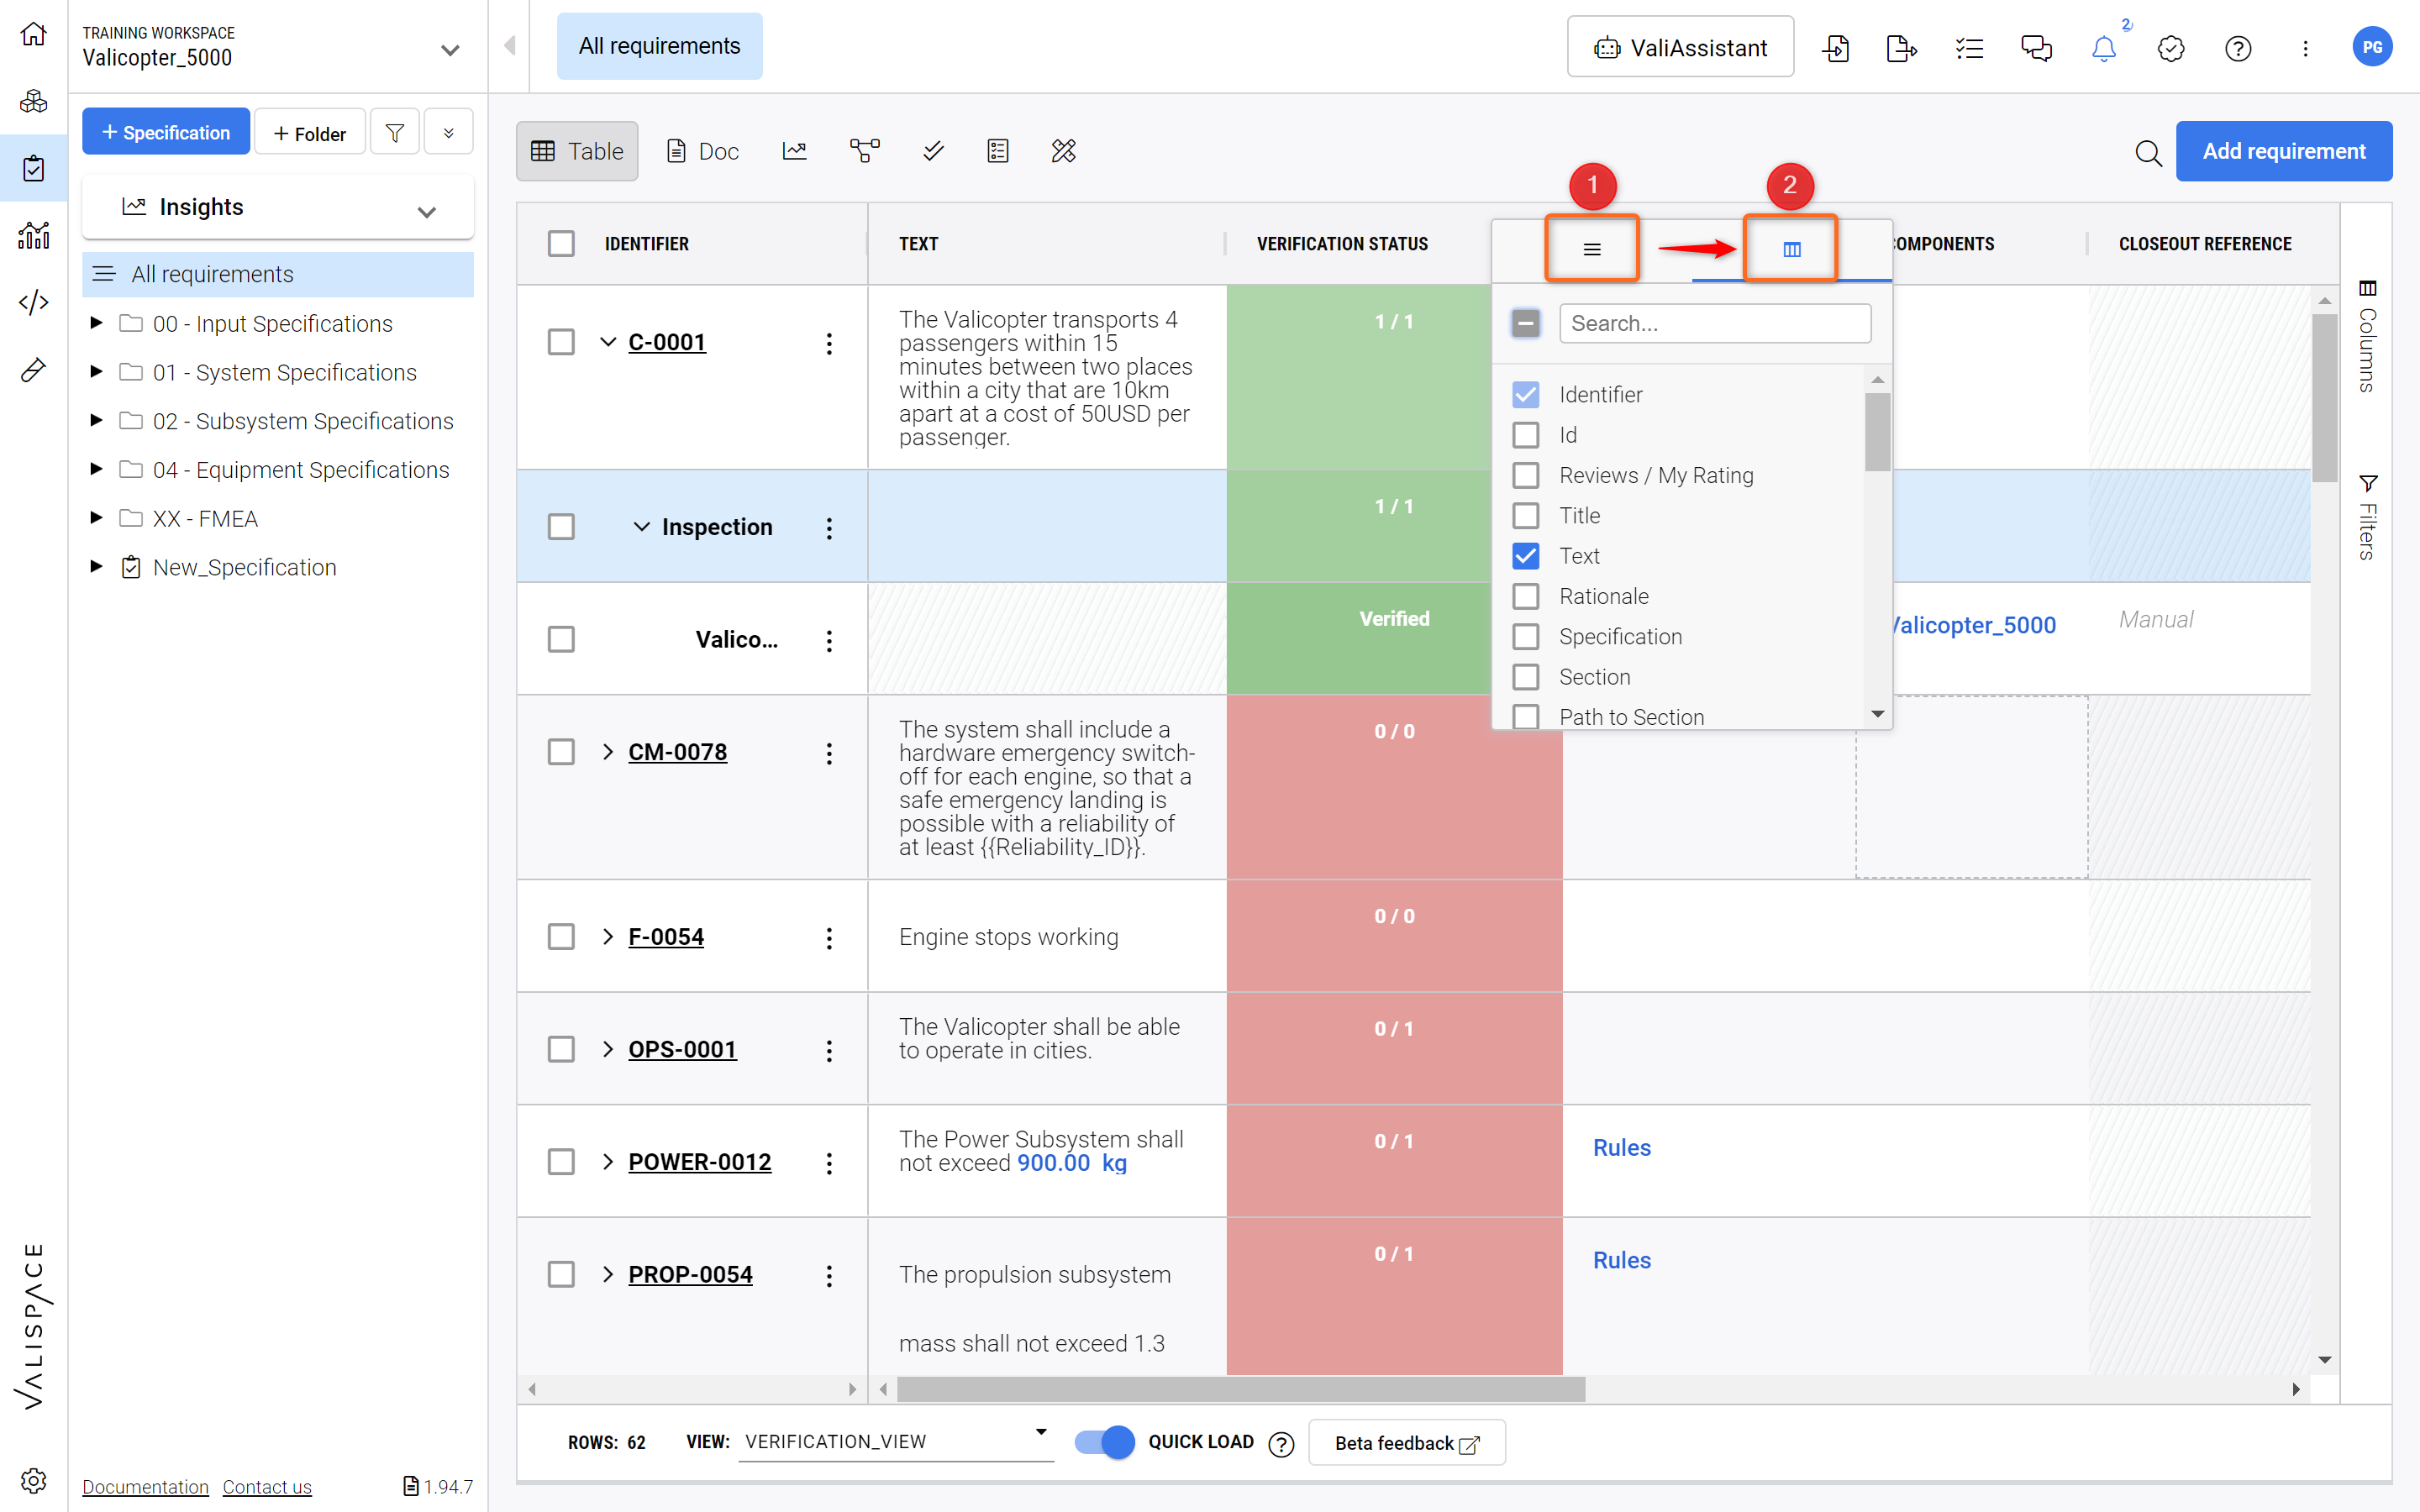
Enabling Columns - By clicking on the three dashes on any header of the Requirement Table the User can then choose the columns that are displayed.
From here select the columns as per your preference, creating a particular view. Note that by changing the columns, their widths and any filters the select View on the bottom of the Requirement table changes to “No View”, indicating that the current setup corresponds to no saved View.
After setting everything up, right-click anywhere on the Requirement table and select “Save view“. This opens a popup: “Save Current View” where the user can insert a name for the view and save it.
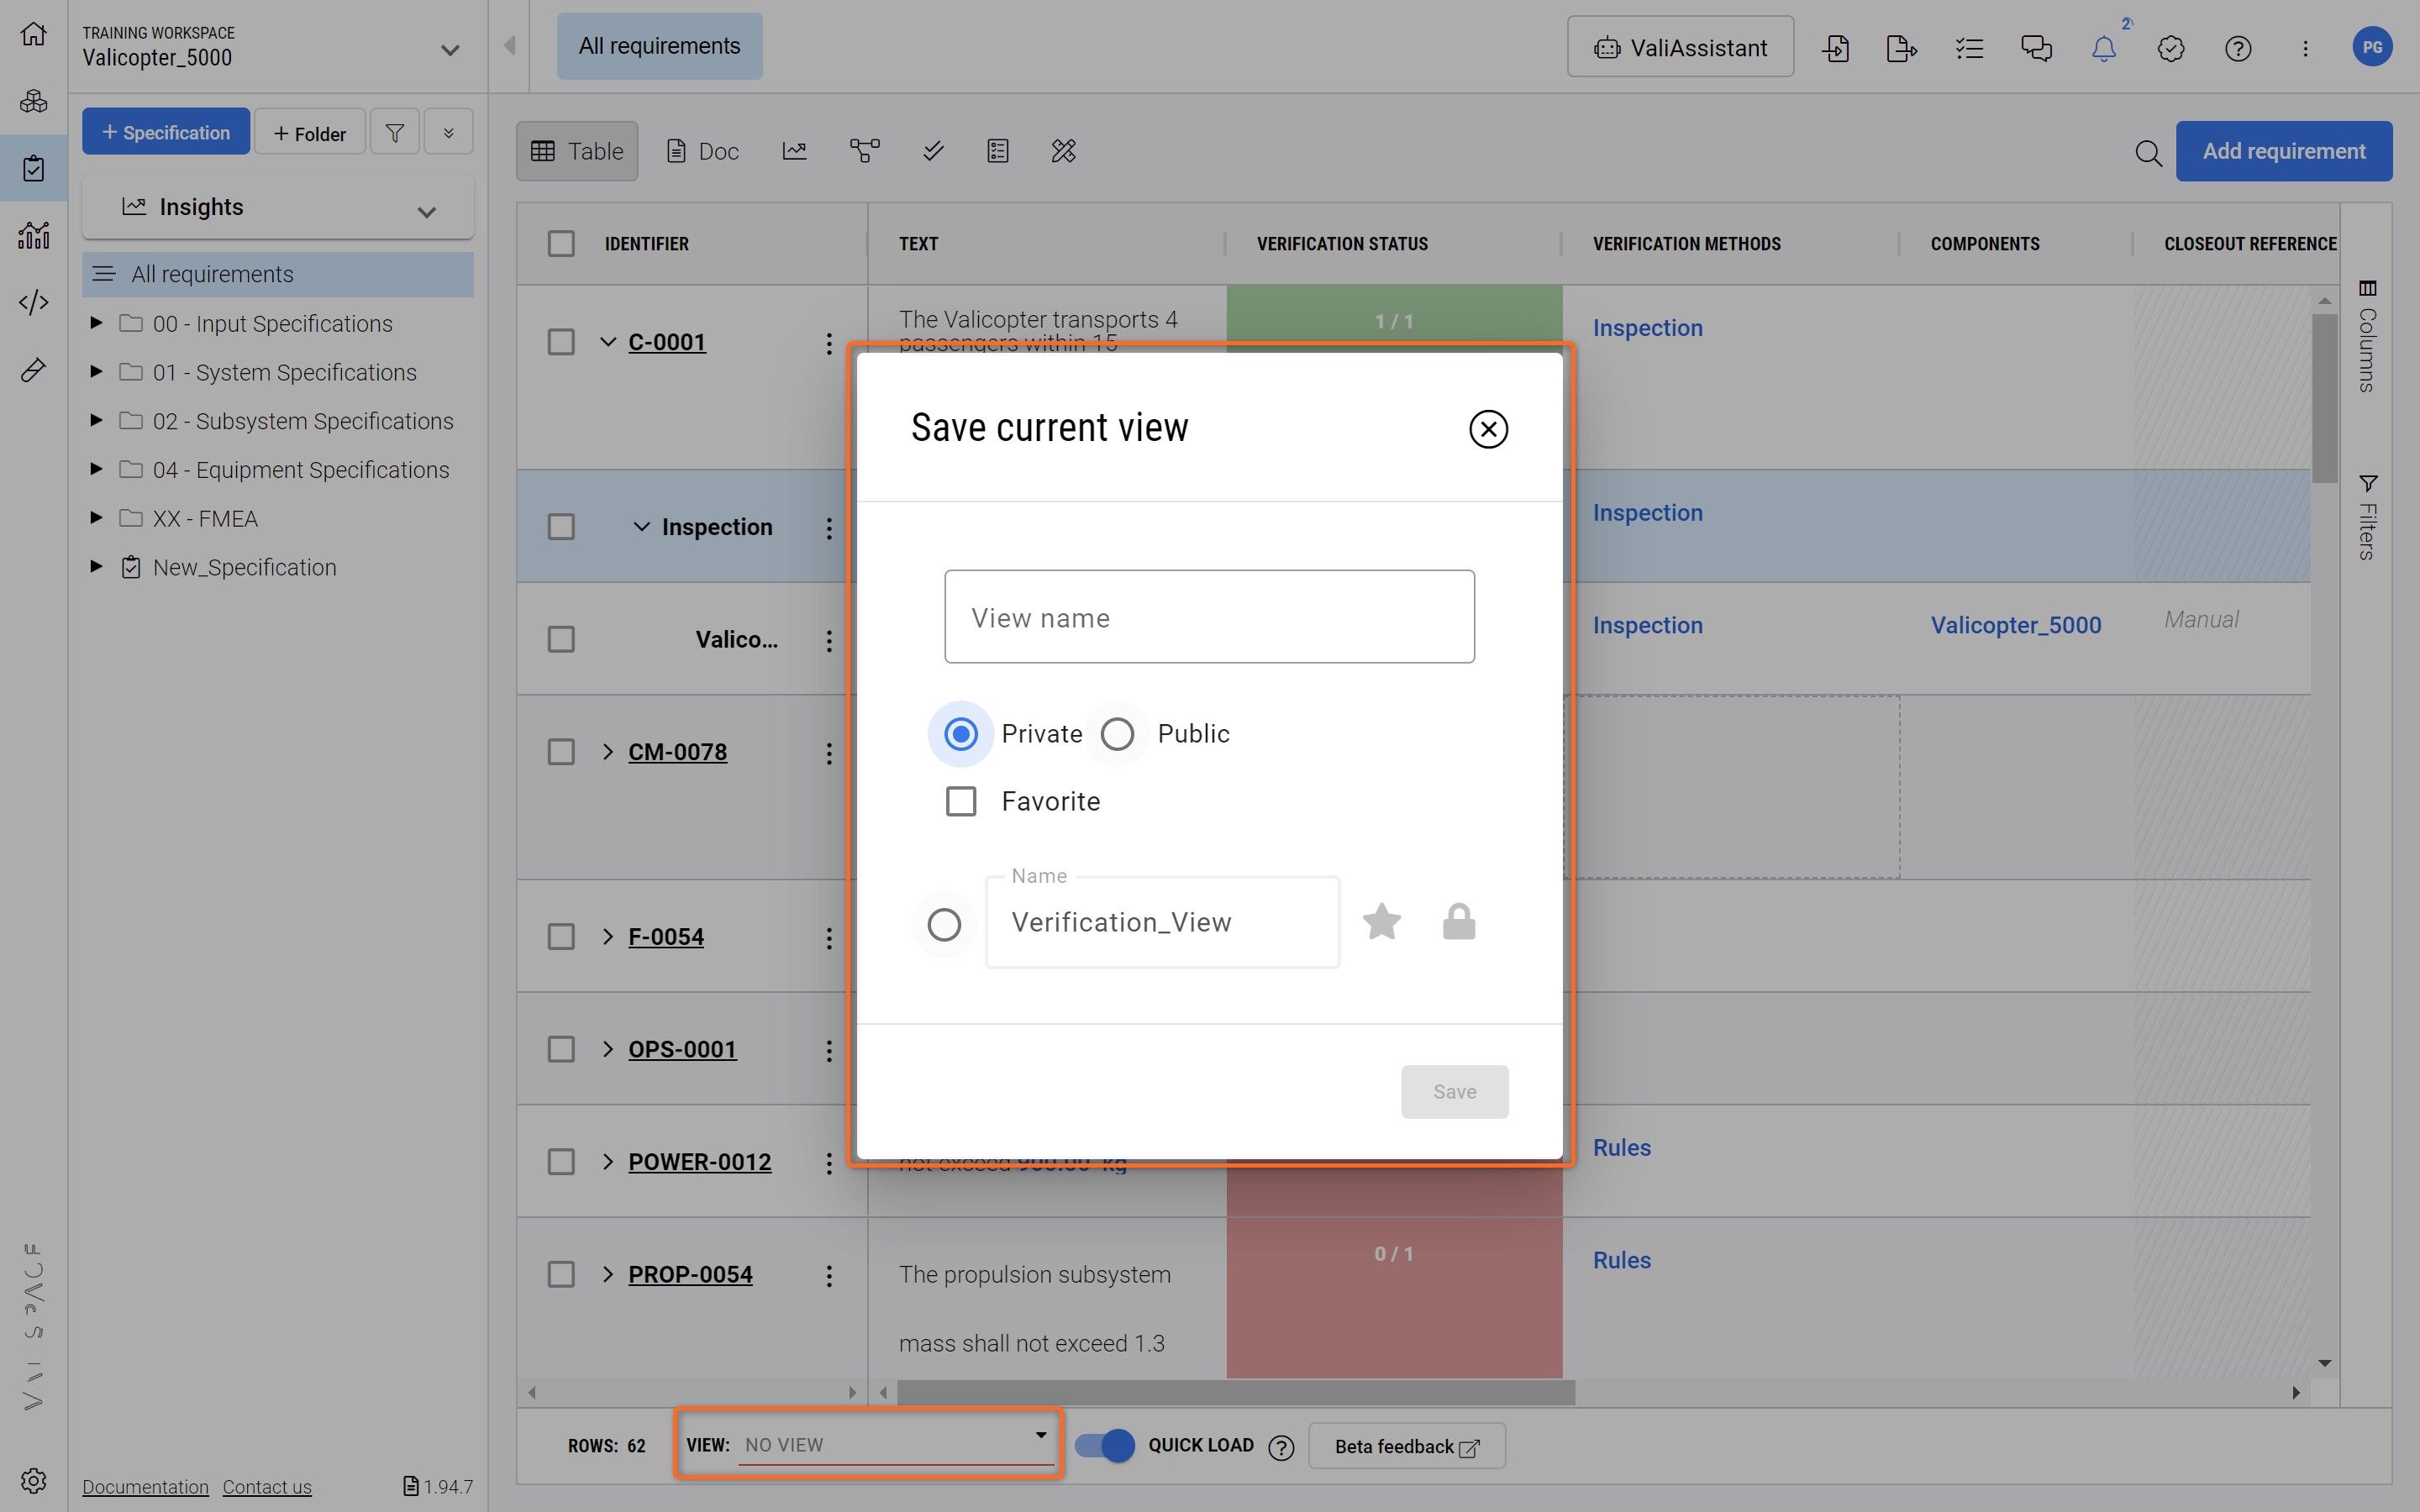
Saving Views - The pop up window that appears when a View is saved.
The user can set the view to Public (every collaborator can see the view), Private (only the user can see the view) or Favorite (appears on top of the list at the bottom of the Requirement table) while saving the view
To load any view, right-click anywhere on the table got to “Load view“ and select your View.
The video below illustrates the above steps:
Setting up Views - A short Video on how Views are set up.
ProTipp: Apply Filters as explained here and create specific Views for all Requirements in a defined State e.g. “Final“ or “Draft“ and add those Filters to your Views.
Public, Private, and Favorite view
Public, Private, and Favorite views lets you control who has access to your views.
Public: when a saved view is set to Public by the user, any user who has access to this project can access this view
Private: if the saved view is set to Private, only the user who created the view can access it
Favourite: the saved view can be set to Favorite for quick access of the users as they appear at the info bar below the Requirement Table. The ‘Favorite' saved view appears on the quick access bar for all users if the view is set to public, otherwise it only appears on the access bar of the 'Owner’ who created the view (see Figure Favorite View).

Favorite Views - Favorite Views appear on top of the Views list.
To set the view to Public or Private and Favorite, the user can follow one of the two steps below:
While creating a new view, the user can select if the view is set to Public or Private and Favorite and then save the view
Alternatively, the user can also choose his options using Manage views in the Views Manager by right-clicking anywhere on the Requirements Table and selecting “Manage views“. The following pop-up show all the saved views. Here the user can change the names and set if the view is public, private or favorite.
It is also here where Views can be deleted by clicking on the “Bin“ icon.
How to manage Views - Right-click anywhere on the Requirements Table and select “Manage views“.