Creating Requirements
There are 3 ways to Create Requirements in the Requirements and Systems Portal:
Creating Manually
Use AI to Generate Requirements based on a prompt
In this section we will concentrate on how to create Requirements by manually adding the necessary information. To get more insights on the other two options please use the links to get to the corresponding documentation.
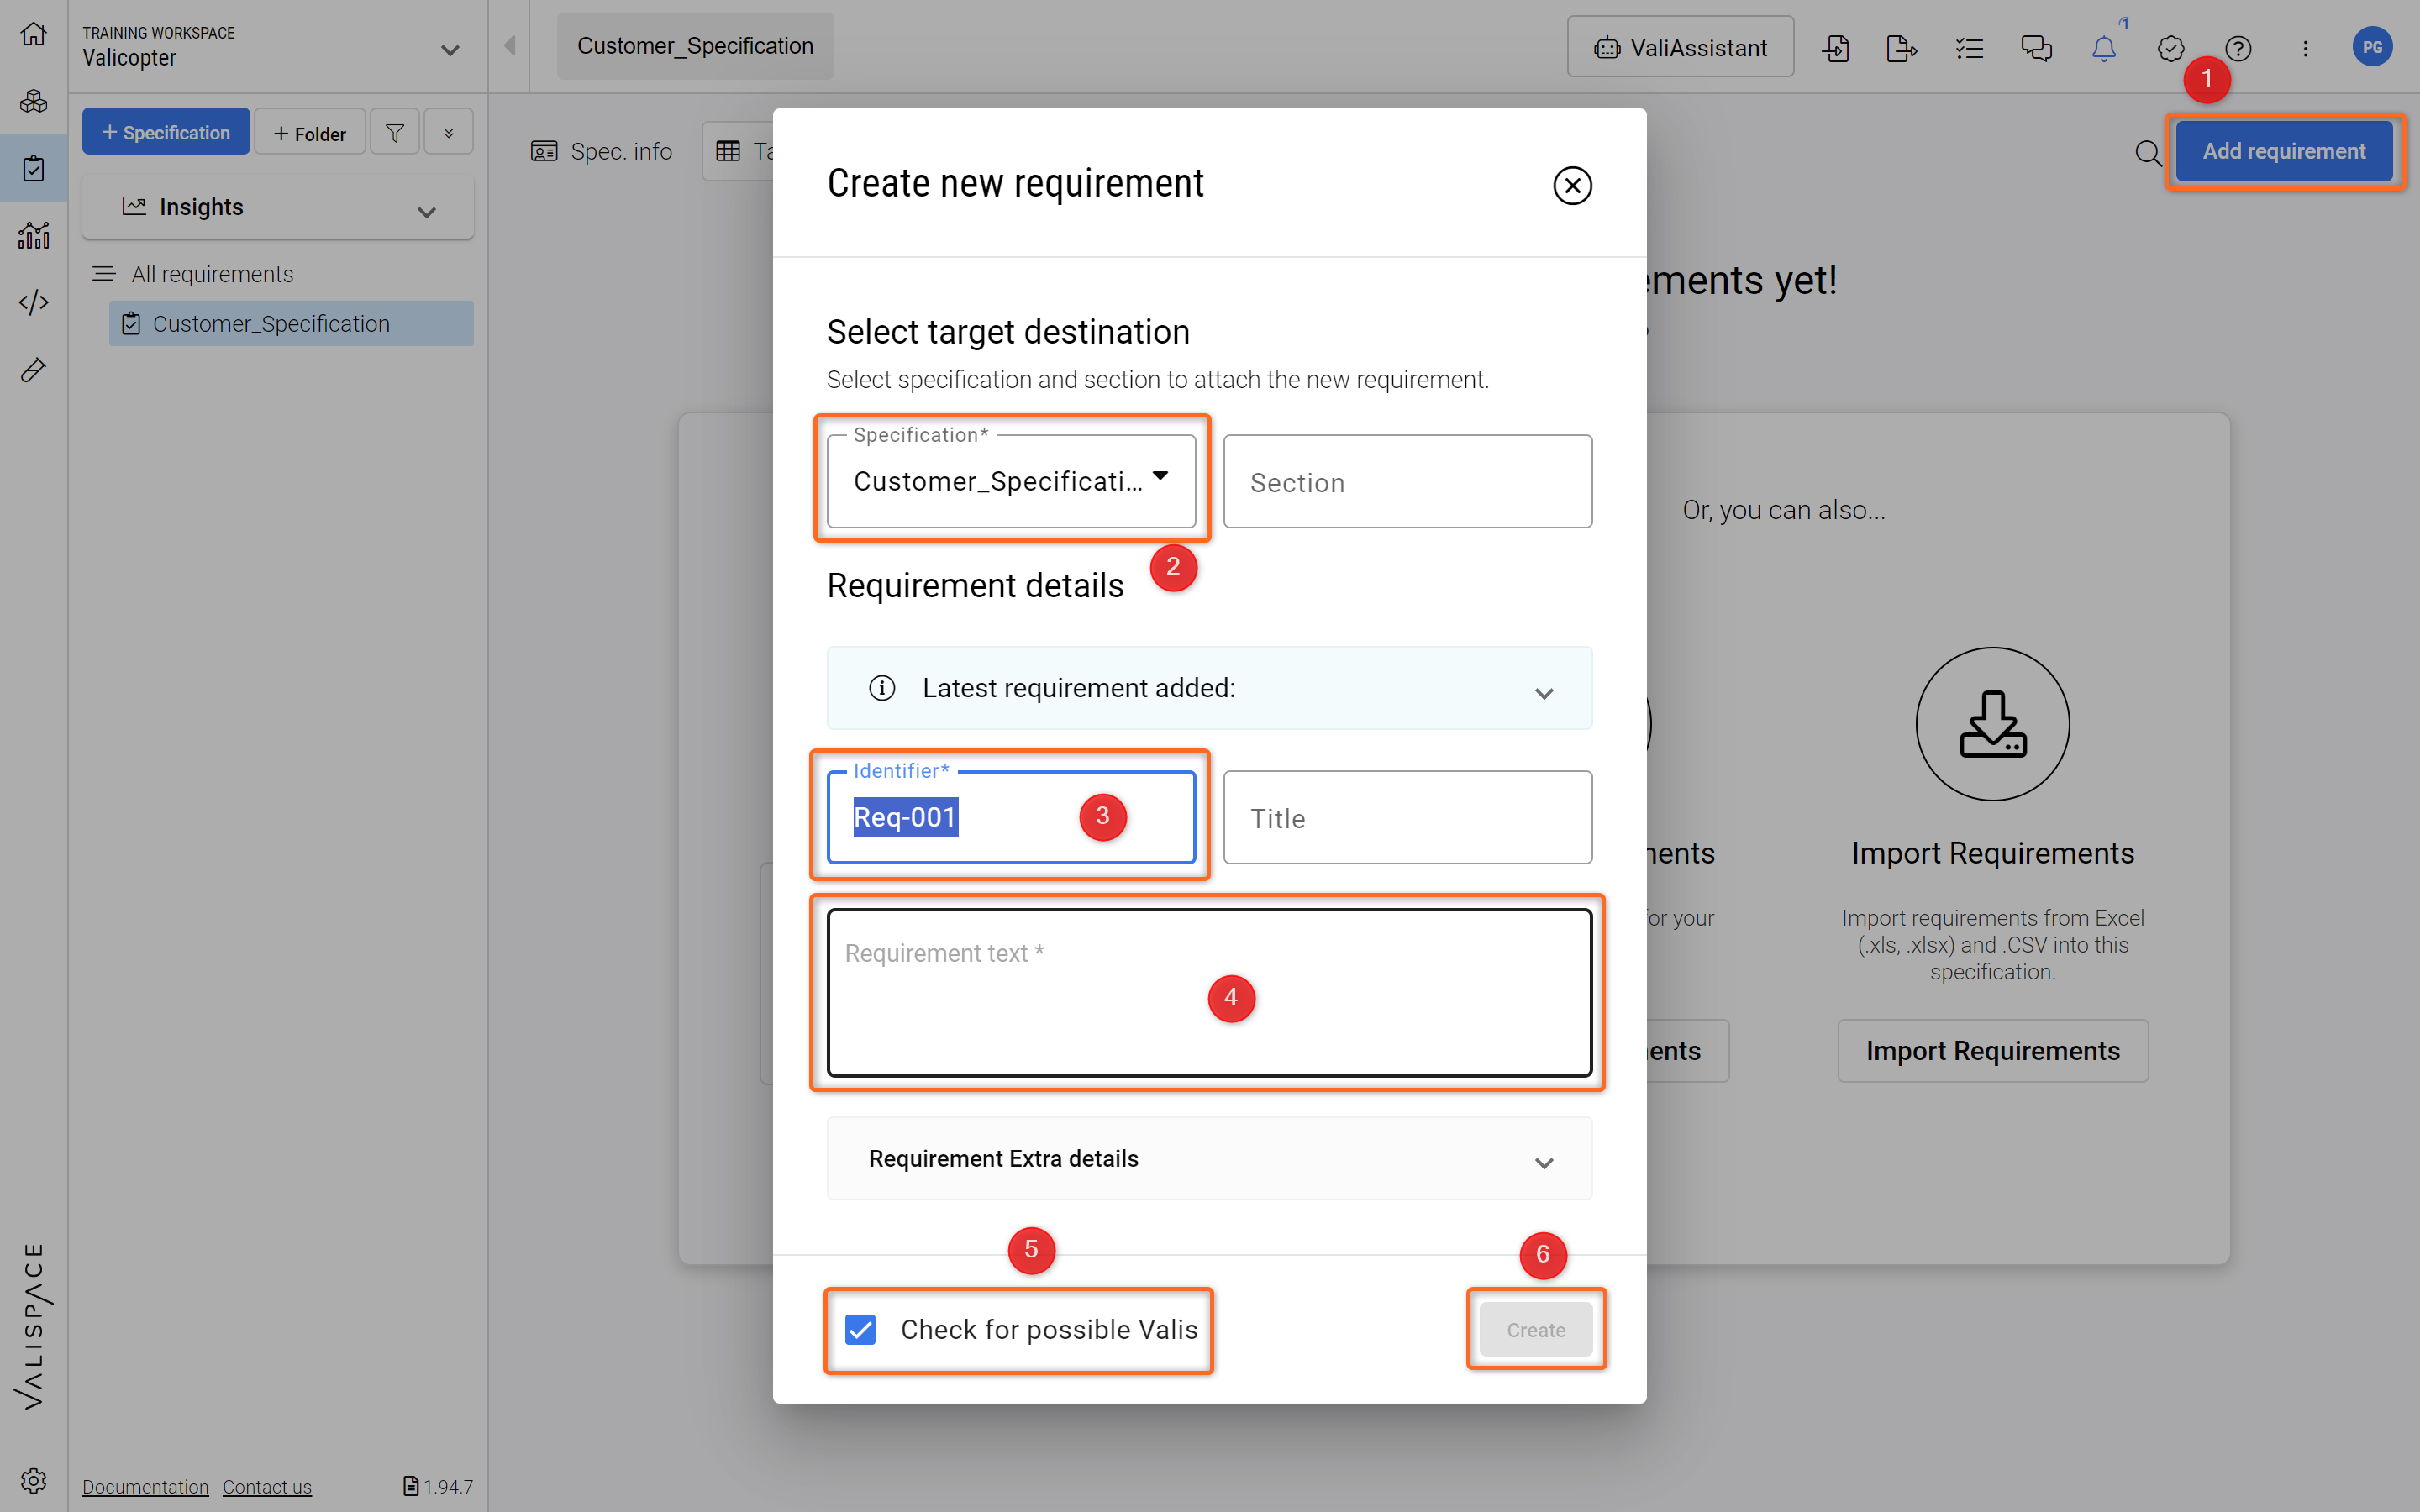
To add a new requirement manually to a specification (see Figure Add Requirement), click on the blue “Add requirement“ button in the upper right-hand corner of the page (1). A popup will appear where you can specify the specification (2) and the group (or section) that the requirement will belong to, as well as a unique identifier (3) and the requirement text (4). Furthermore, you can check on possible Values + Units (Valis) that can be transformed into parameters (5) before creating the Requirement (6).
While you type, the ValiAssistant (if enabled) will suggest improvements to your Requirement below the Text box. If you accept them you can click on “Replace“.

Add Requirement - How to manually create a Requirement in the Requirements and Systems Portal.
Valis in requirements
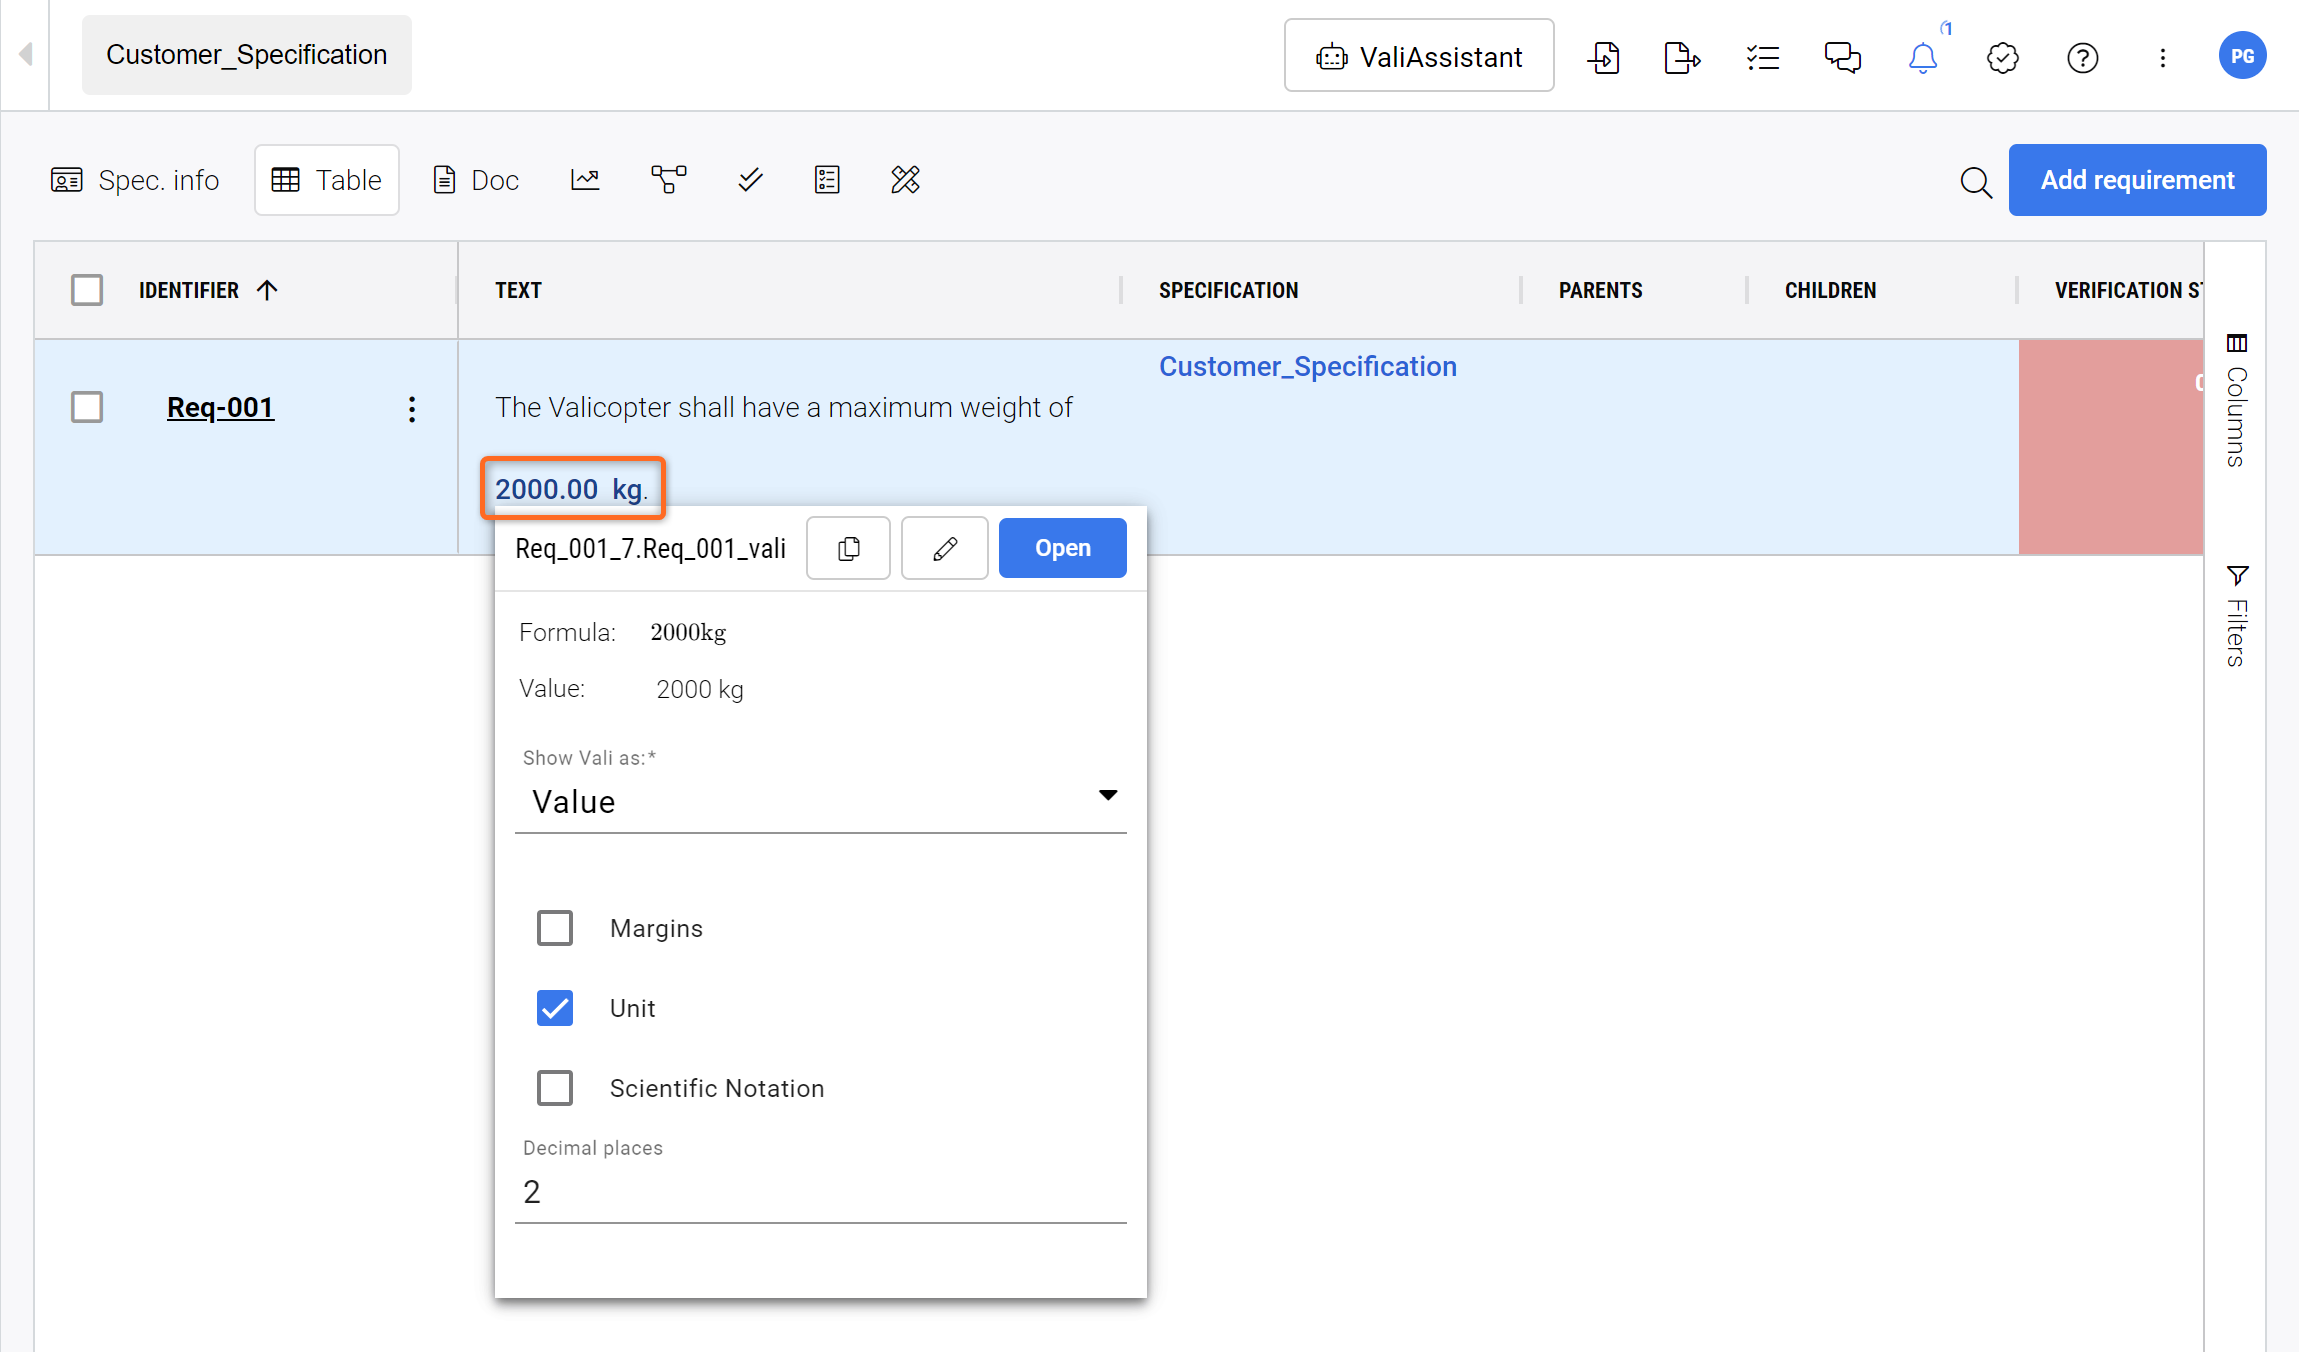
Valis can be displayed in a requirement text to specify numerical values with their corresponding unit. These Valis are automatically updated in the text when the value changes. To manually add a Vali to the requirements text, type a dollar sign $ to open a dropdown to select a pre-existing Vali. After selecting a Vali it will be displayed in the Requirement’s Text with as a Bold Blue Text. If you hover over a pop-up box will show you more information on that parameter (see Figure Vali in Requirement).

Vali in Requirement - After selecting a pre-existing Vali from the dropdown (after typing the dollar sign $) you can visualize more information on that parameter by hovering over it. Valis
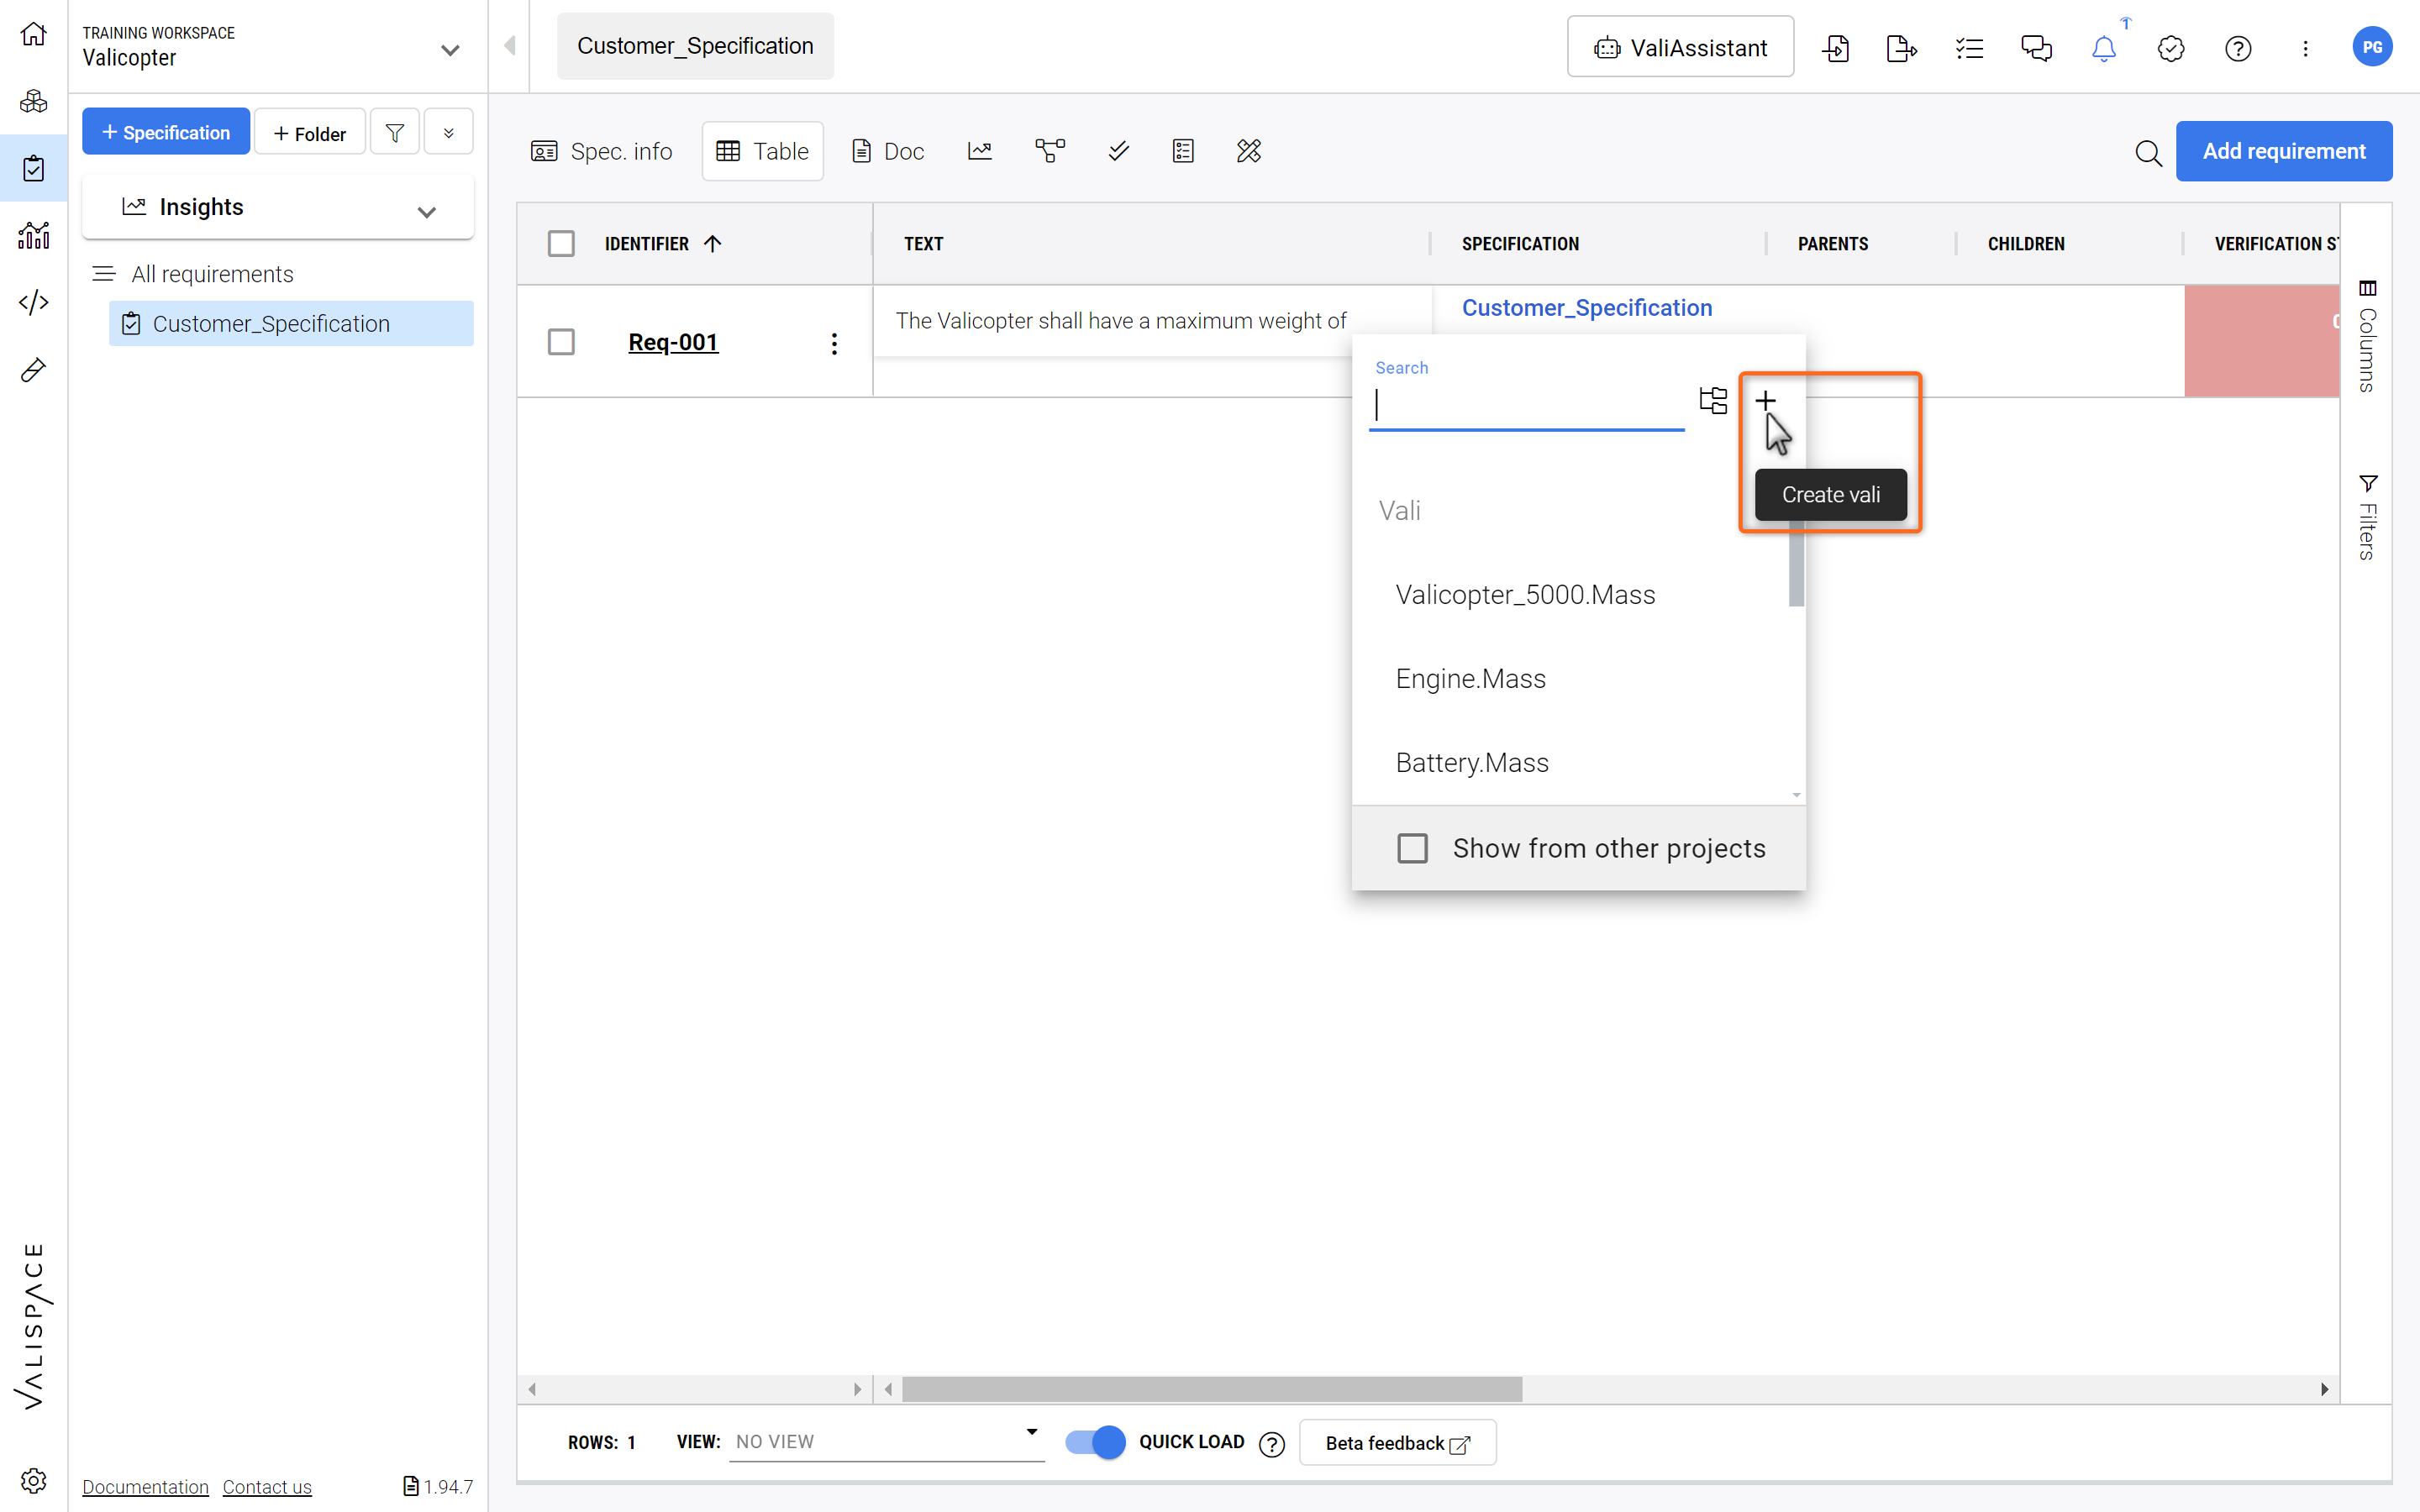
It is also possible to add a new Vali which belongs to a requirement by typing a dollar sign $ and selecting "+" in the top right corner of the popup. After that, you can define the name, formula, and unit of the new Vali similar to creating a Vali procedure. These Valis in the requirement help you to automatically compare with the system design Valis when used in the “Rules” Verification method (explained in Verification within the Requirement section).

Creating a Vali - Creating a Vali on the Requirement text is very easy just type the dollar-sign $ and select the + icon.
.png)