Fan Tutorial - Desktop Fan Modes
In the context of this documentation “Valispace“ will be called “Requirements and Systems Portal“.
Did you complete our Beginner Tutorial Part I and our Beginner Tutorial Part II?
Congratulations, you will now learn how to create mode dependent properties of the Fan in only a few steps.
This tutorial will take approx. 15 minutes to complete.
(1) Add Modes
Some values are not static but depend on the state of the product you are building. This is what modes are made for: they track different configurations and their relationships with your product.
Define the modes of your system: different speeds, power modes, and ON/OFF-states.
Our motor can run at 3 discrete speeds which can be modelled by "modes". Therefore, to create these 3 modes, open the Motor (1) Block. Then:
Click on the
Modeliststab (2) in the top bar as shown in Figure Creating Modes.
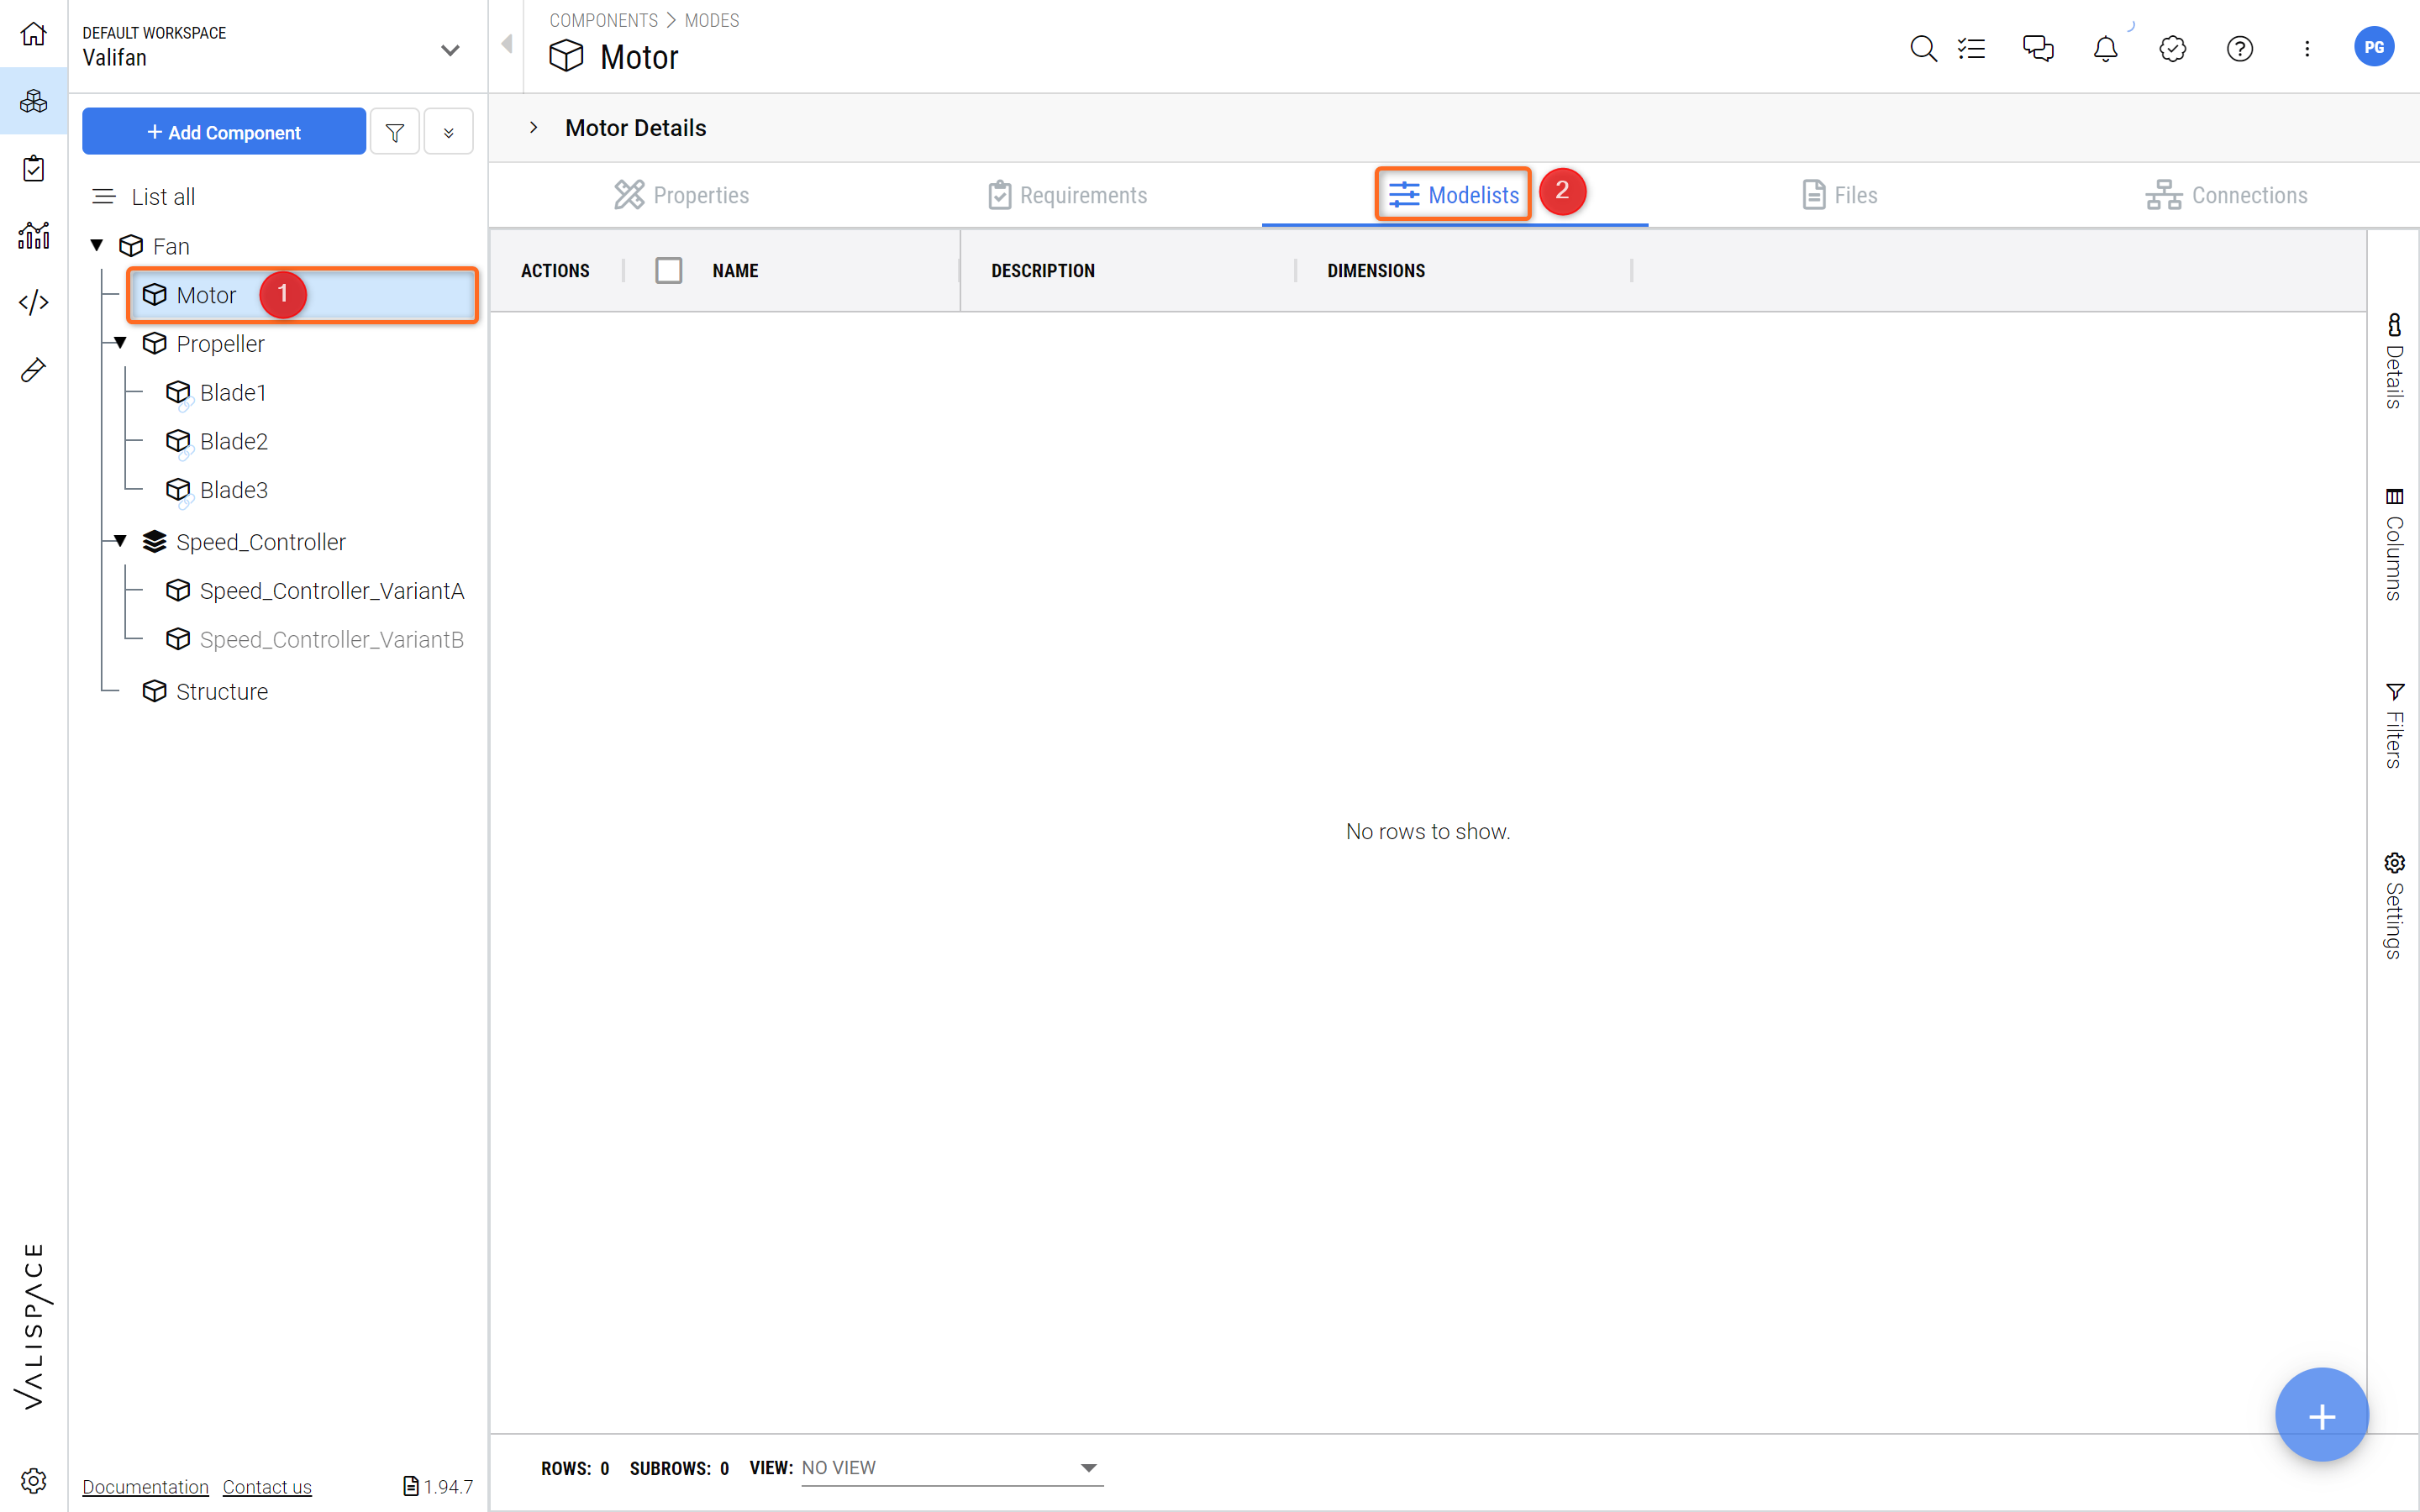
Creating Modes - Modelists serve to model mode dependent properties, such as Power Consumption, Rotational Speed, Thrust etc..
Click on the
+at the bottom right to add a new ModelistsInsert name =
speed_settings(1) and ´#´ number of modes =3(2)Click
Create(3)
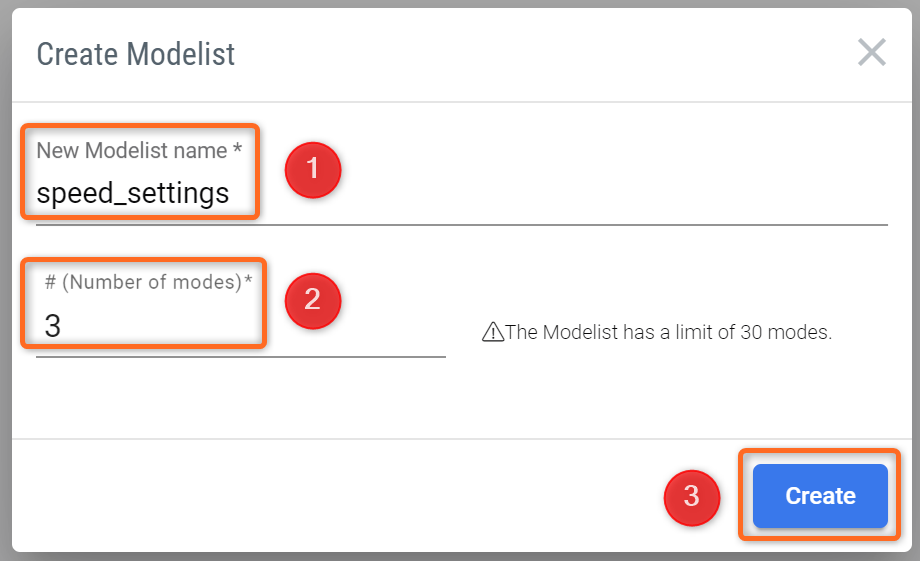
Setting up a Modelist - Here you decide on the name and the number of Modes.
Click on the arrow on the left of the new modelist
Rename the speed_settings field names by clicking on the default names
a,b, andcand change them to:a =
ZEROb =
LOWc =
HIGH
Go back to the Valis page by clicking on the
Propertiestab in the top bar alongside ModelistsClick on the
+button to open the “Create Property” dialogue and chooseMatrix(1). Add the following properties:Name =
rotational_speeds(2)Mode reference =
Motor.speed_settings(3)Unit =
rpm(4)Click
Create(5)
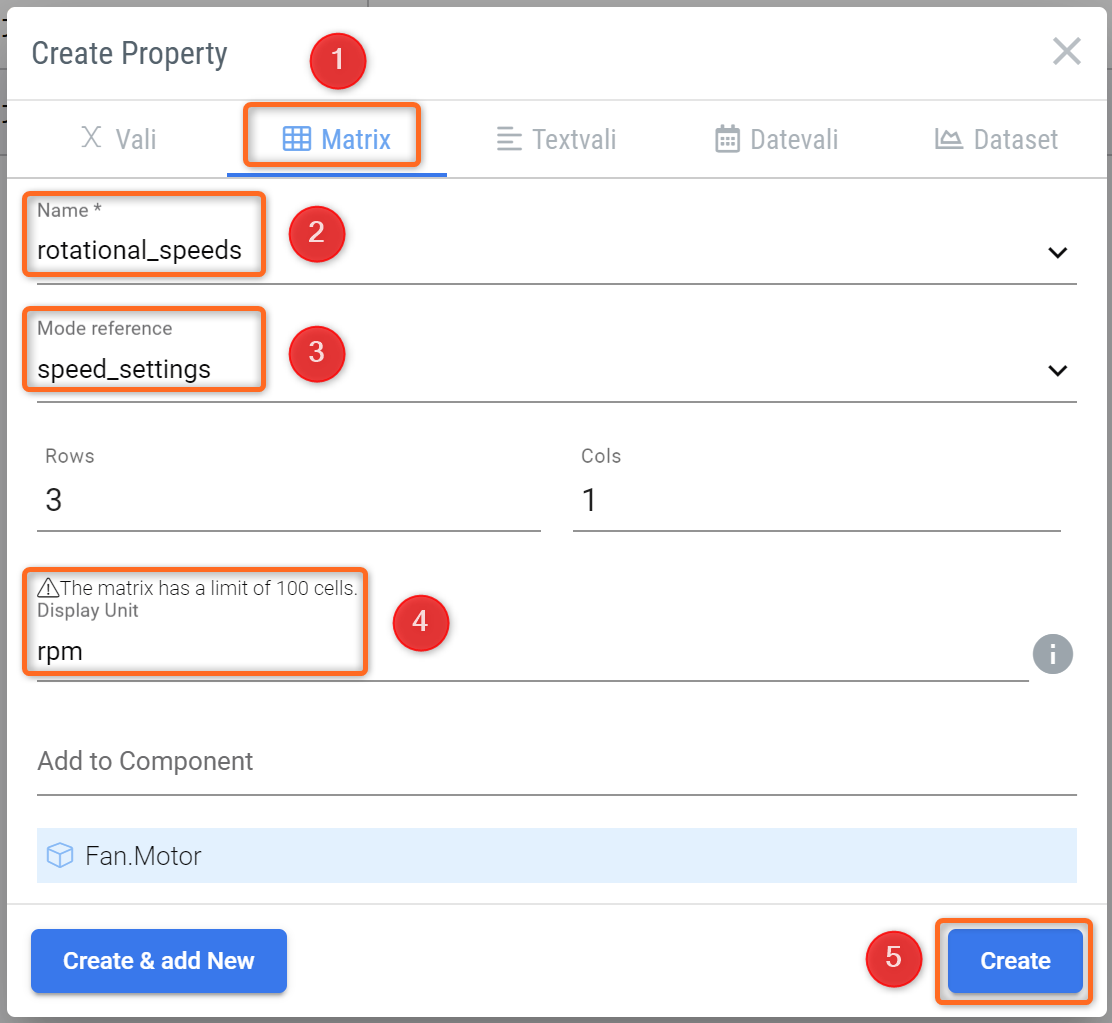
Creating a Mode dependent Matrix - The Matrix is linked to the Modelist in the “Mode reference“.
Note: Since you are adding the “Mode reference”, the number of rows and columns will be automatically taken and filed from the Modelist. Therefore, you do not have to define the rows and columns in the above step.
Expand the properties of the Vali
rotational_speedsby clicking on the arrowChange the values (which currently are
0) by clicking on them. Modify them to the following:ZERO= 0rpmLOW= 2000rpmHIGH= 5000rpm
The matrix properties now shall look like in the following Figure
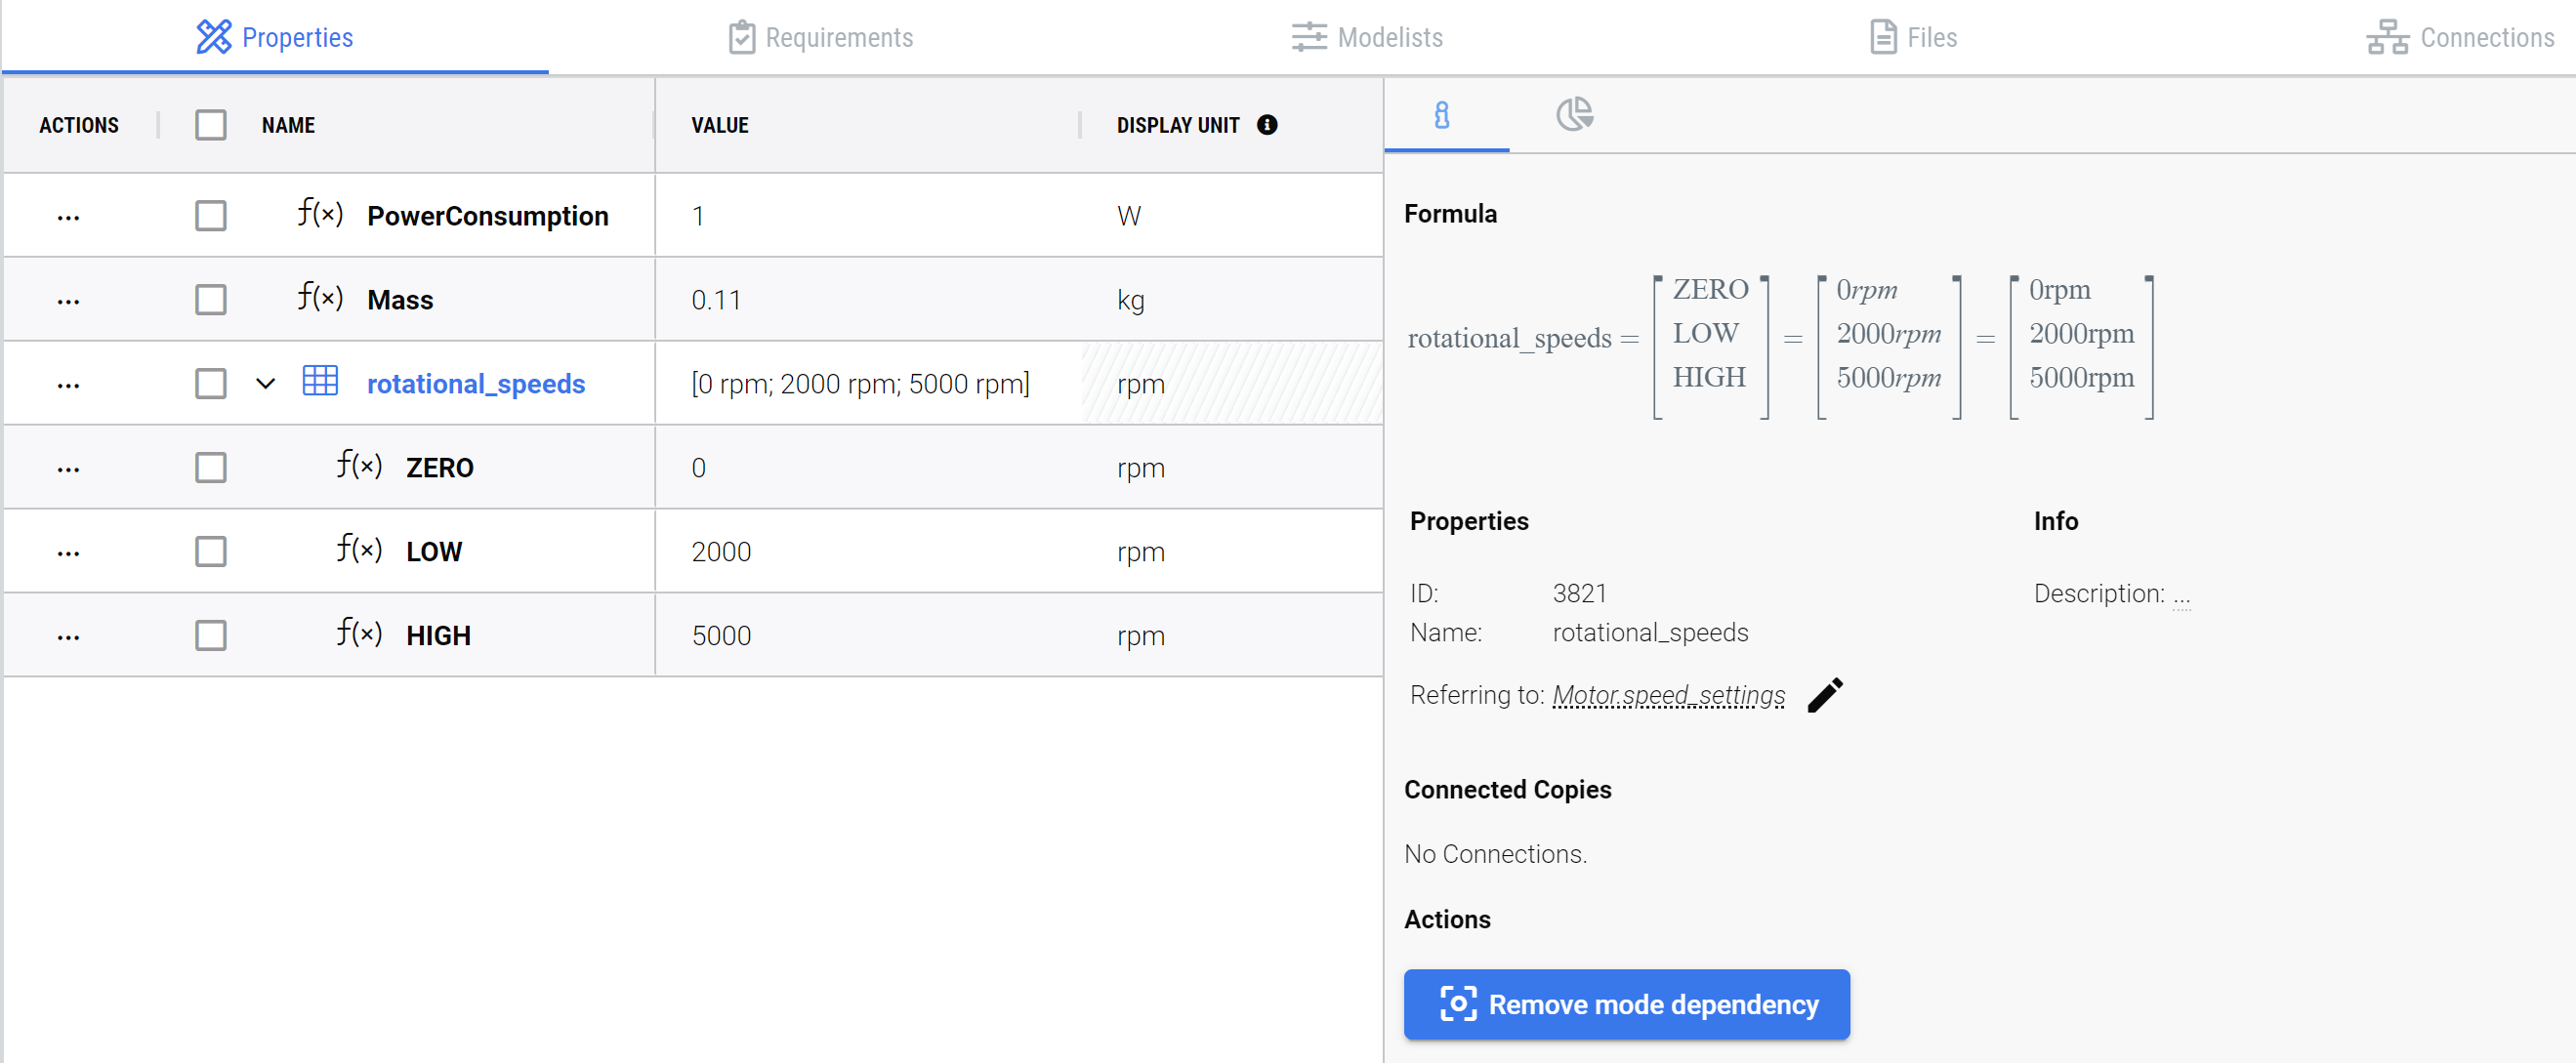
Mode Dependent Matrix - The Rotational Speed Matrix is now linked to the Speed Settings Modelist.
Now create another mode for the speed_controller: click on the Block Speed_controller (1). Go to the Modelists tab (2). Add a new modelist with:
mode name =
power_modesnumber of modes = 2
Rename the names of the fields: a =
ONand b =OFF(3)
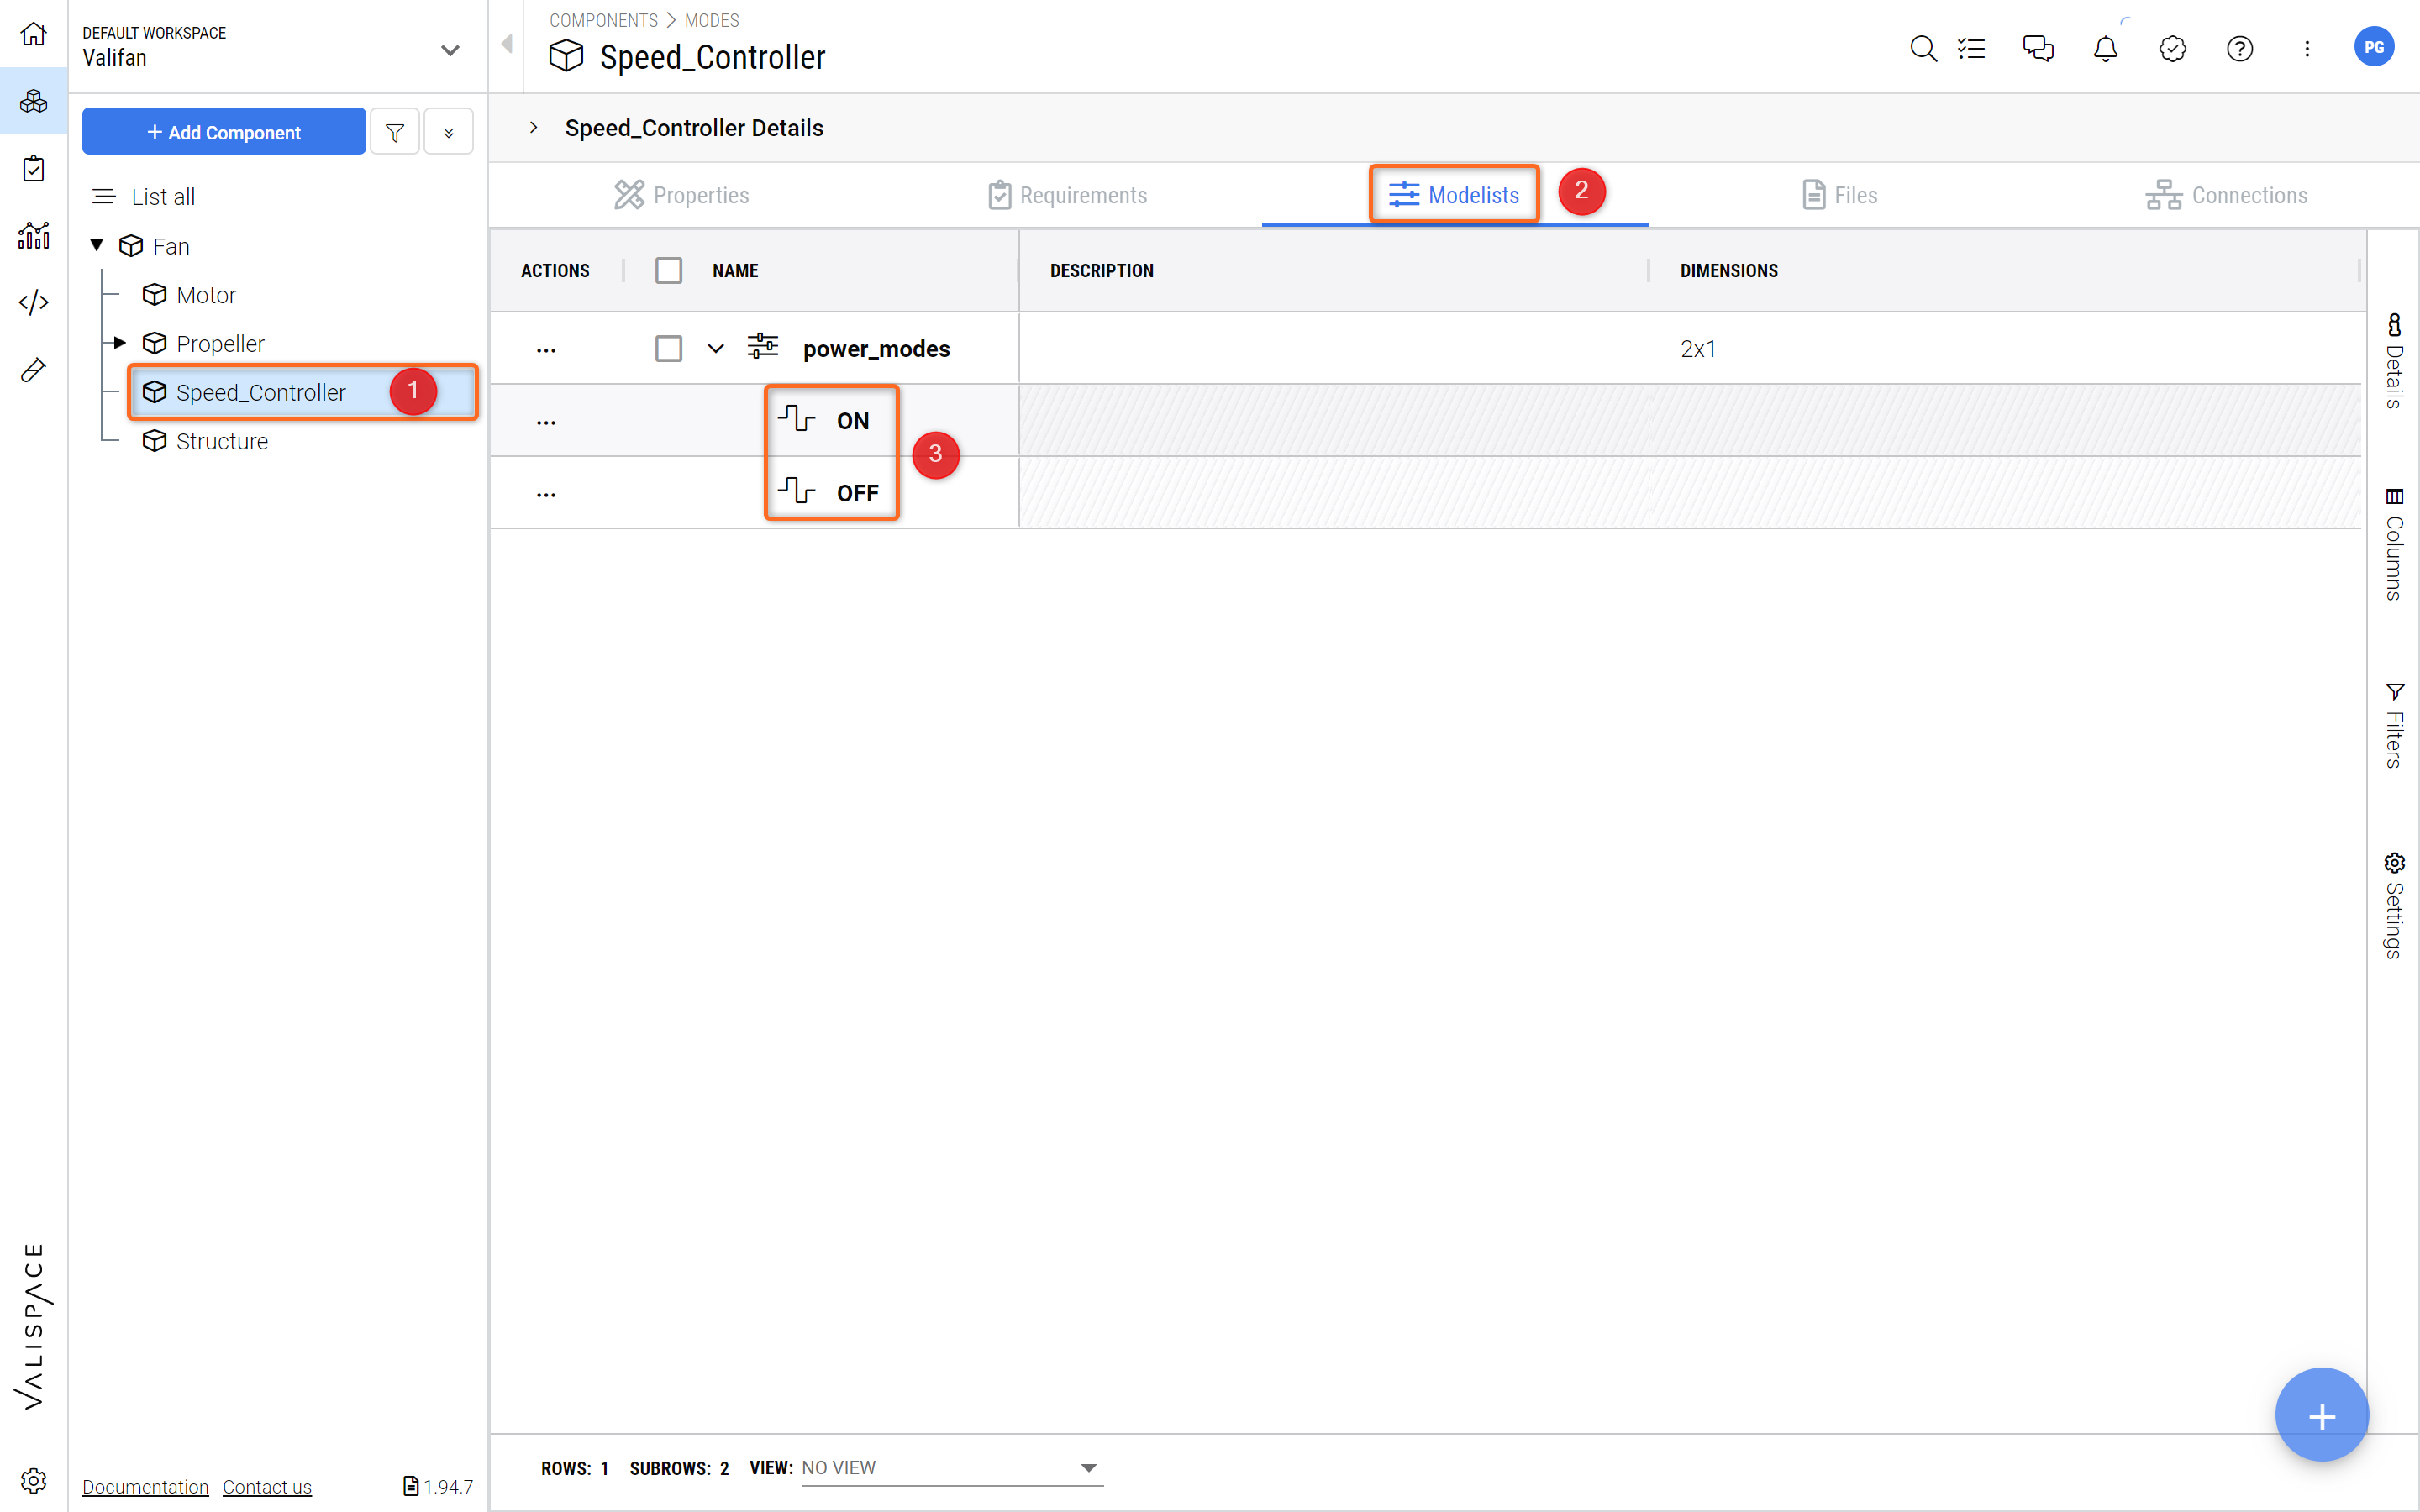
Power Modes Modelist - Create another Modelist but this time for the Speed_Controller System.
Repeat these steps to add a mode for the Block Fan (1) with:
mode name =
state(2)number of modes = 3
fields names
OFF,MIN, andMAX(3)
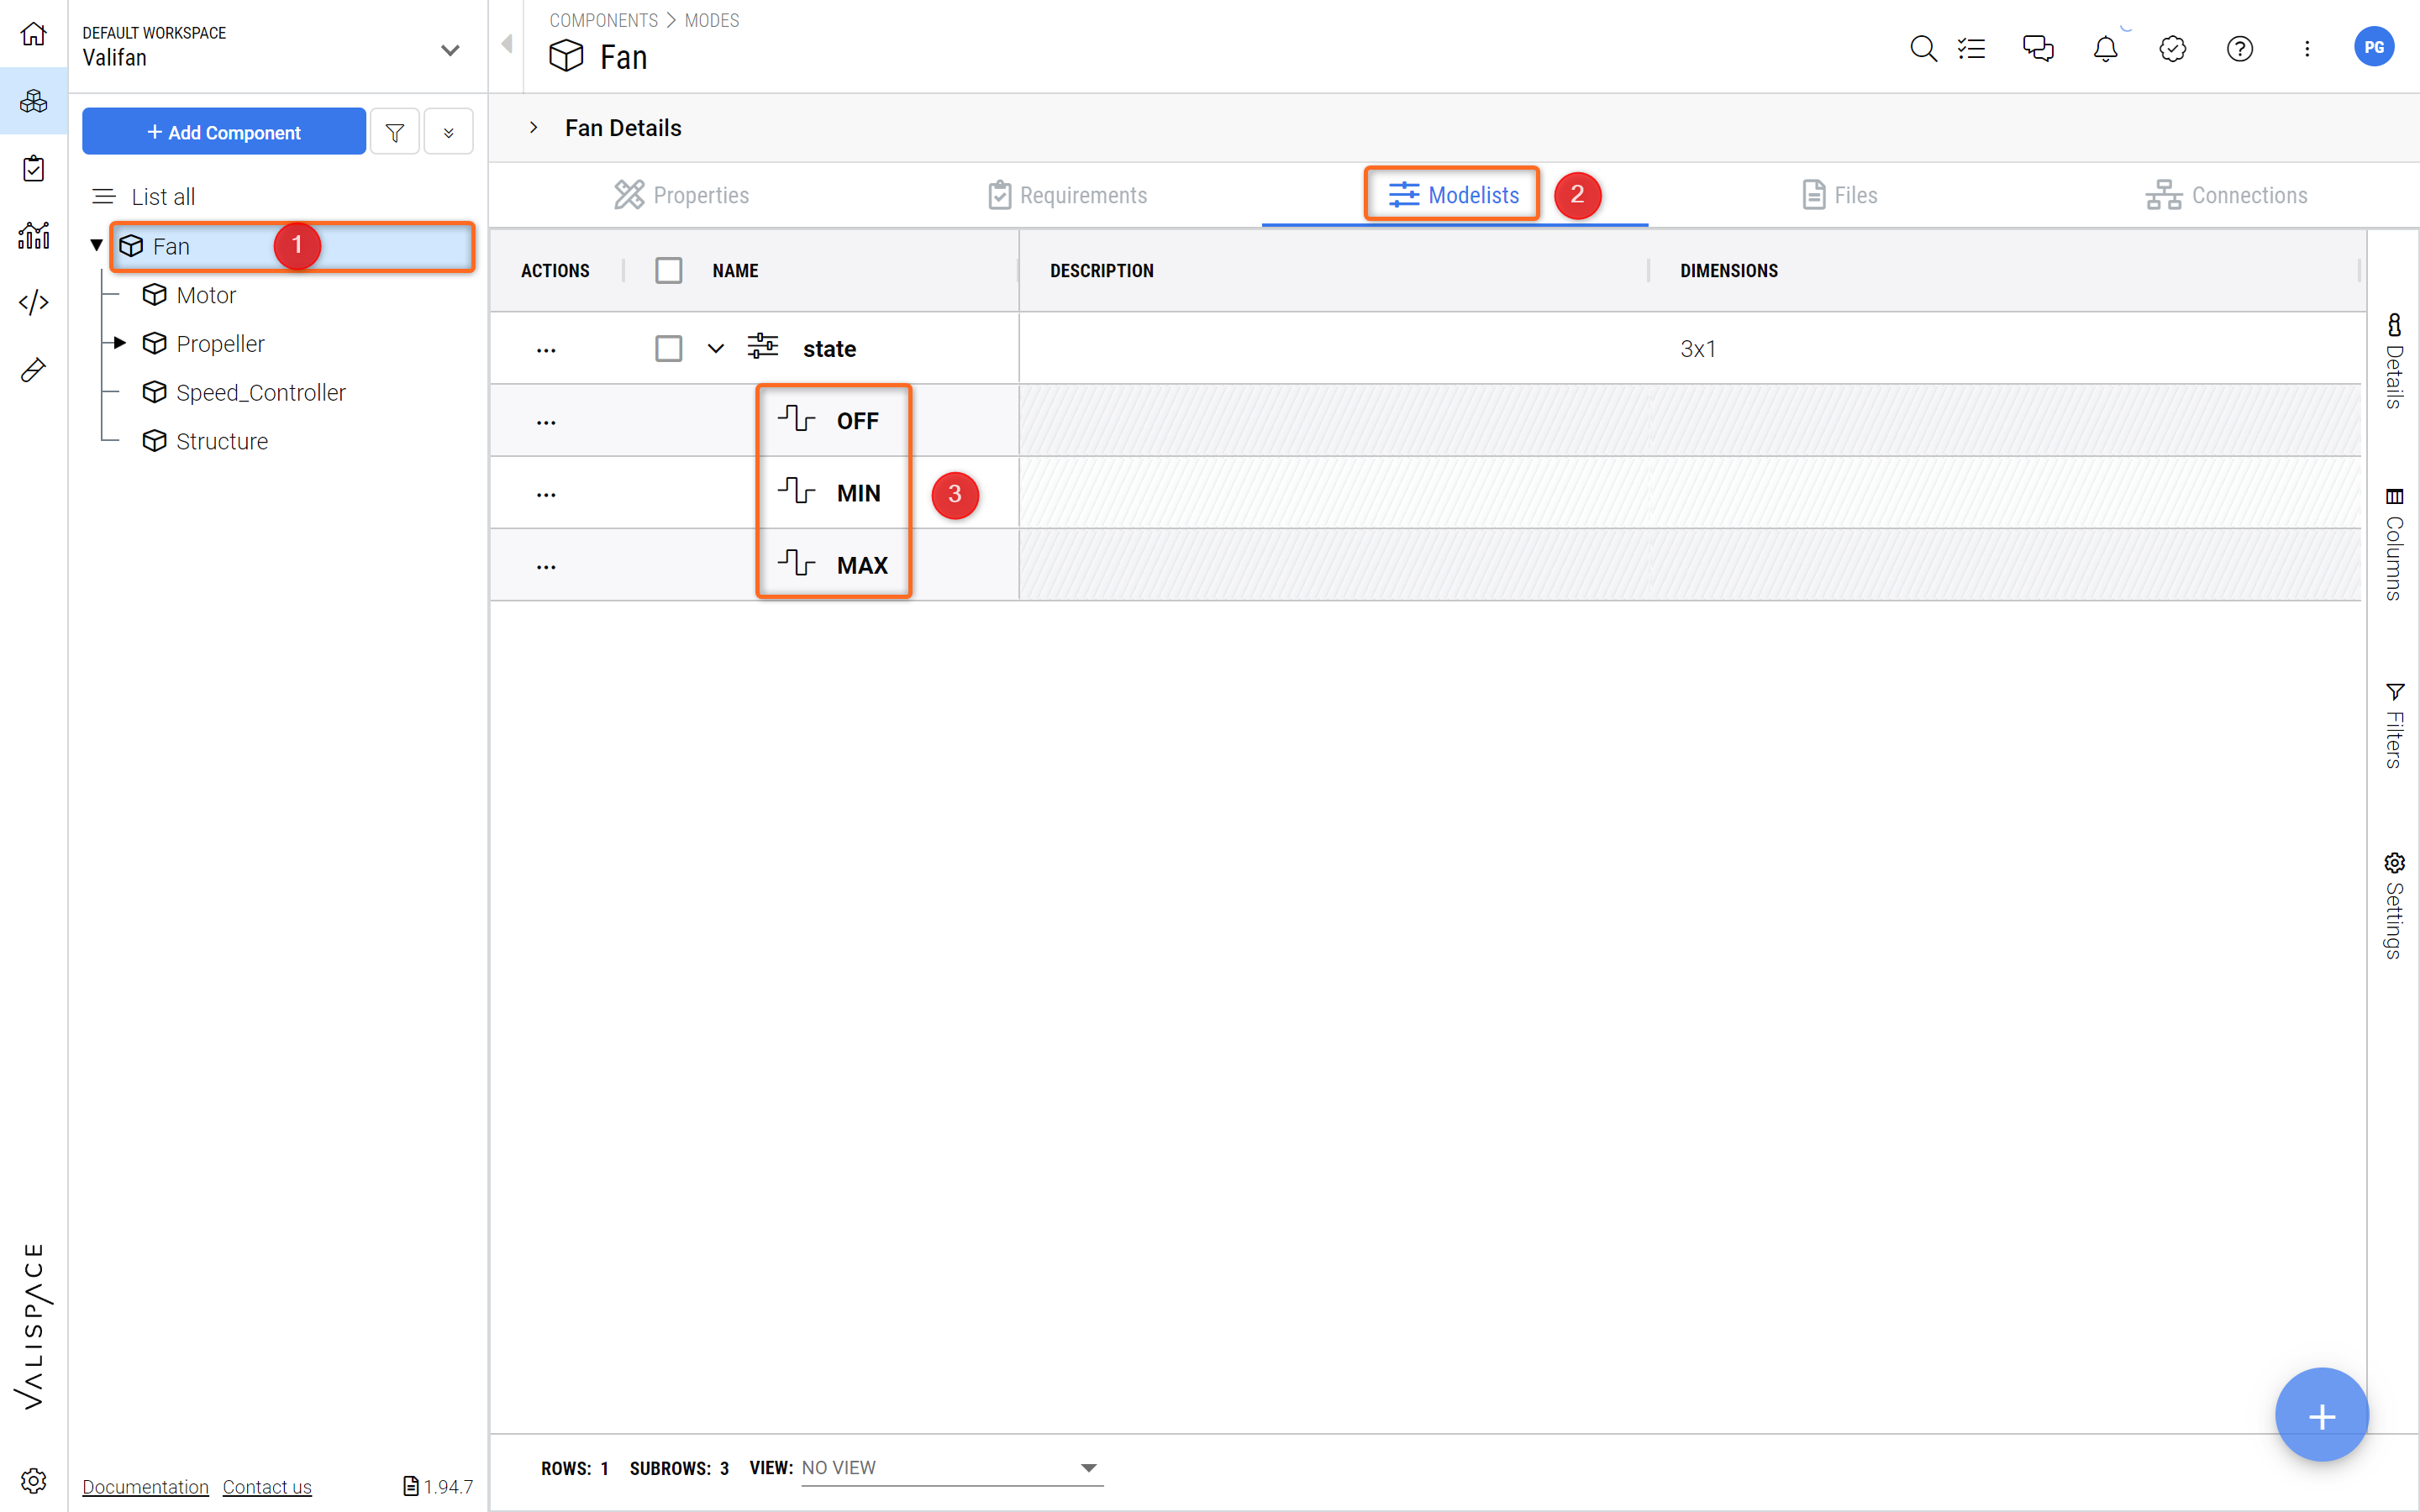
Modelist - Create another Modelist but this time for the whole Fan.
(2) Make Valis Mode-Dependent
Now that you have defined the modes of your system, you can make Valis dependent on them. A Vali might not always have the same value, but a value dependent on a certain mode.
Make your PowerConsumption Mode-Dependent (see Figure Make an existing Vali Mode-dependent)
Open the Block
Fan(1) and go to theProperties(2) in the top barClick on the Vali PowerConsumption (3) to show the Vali description
Click on the button
Make mode dependent(4)
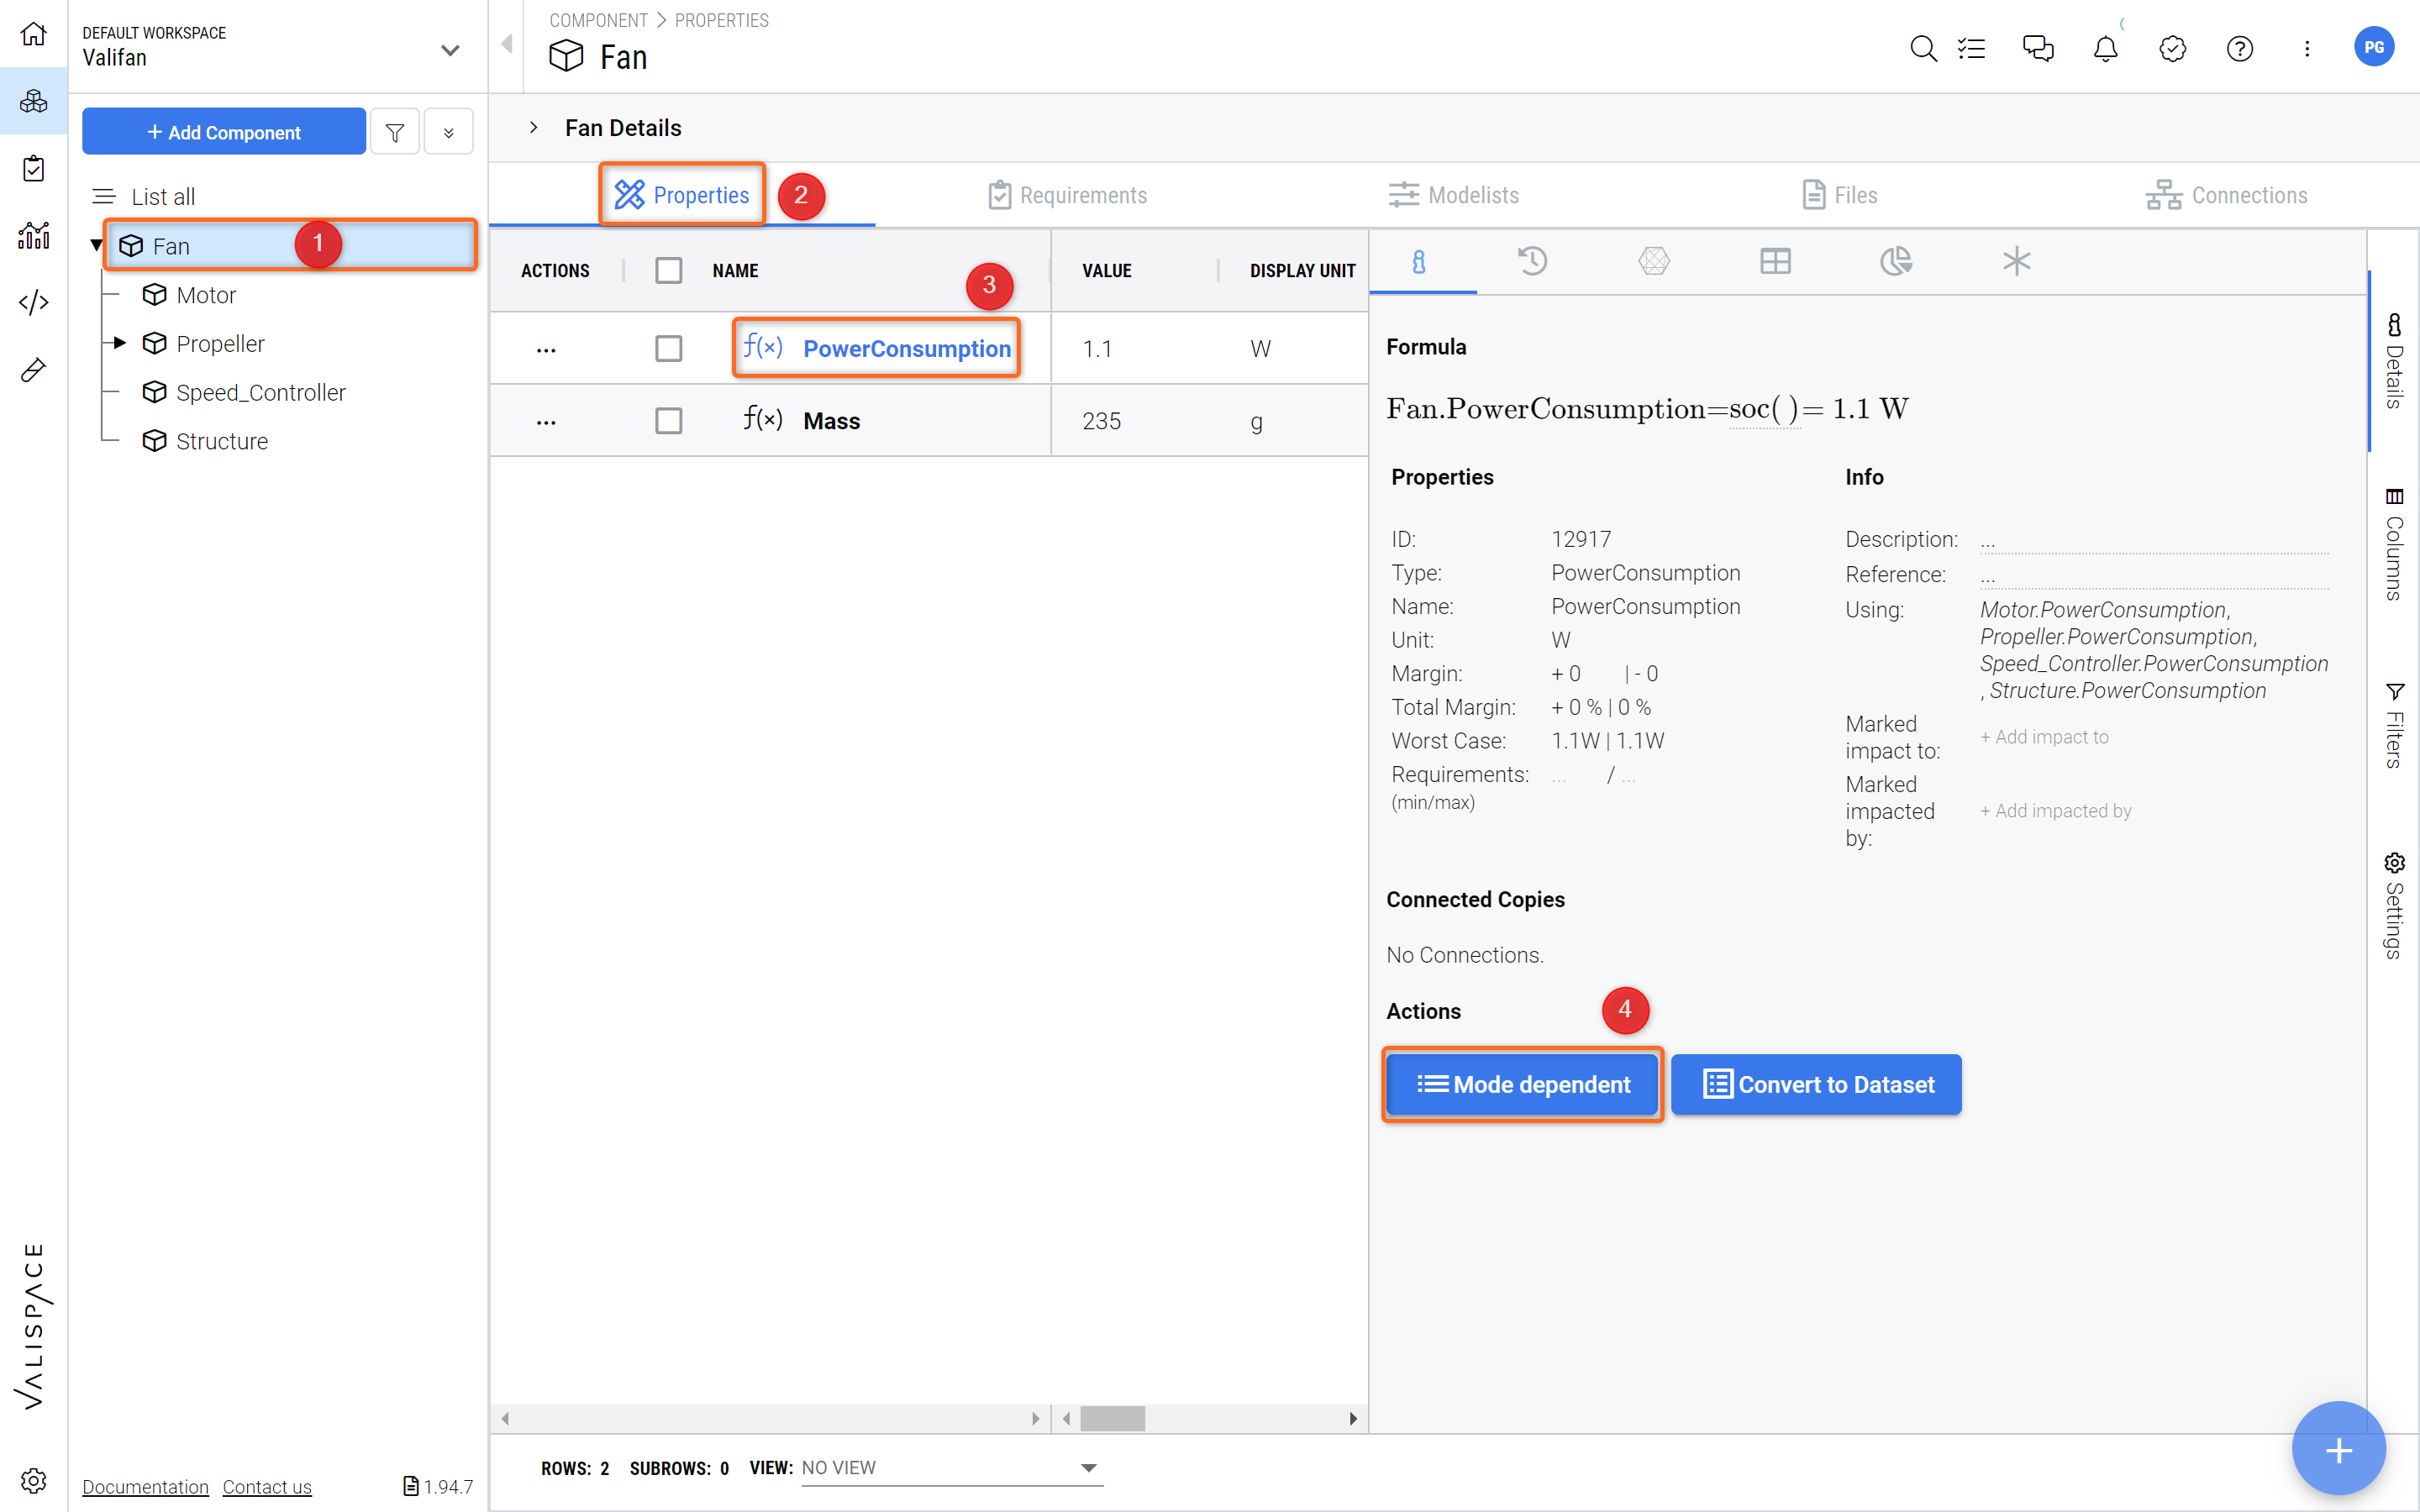
Make an existing Vali Mode-dependent - You can transform an already existing Vali into a Mode-dependent Vali.
In the pop-up, select mode =
Fan.stateand confirm withUpdateRepeat the same procedure for Motor and Speed_controller:
Go to the
PowerConsumptionof the Motor, click on "make mode dependent" and chooseMotor.speed_settingsin the pop-upGo to the
PowerConsumptionof the Speed_controller, click on "make mode dependent" and chooseSpeed_controller.power_modesin the pop-up
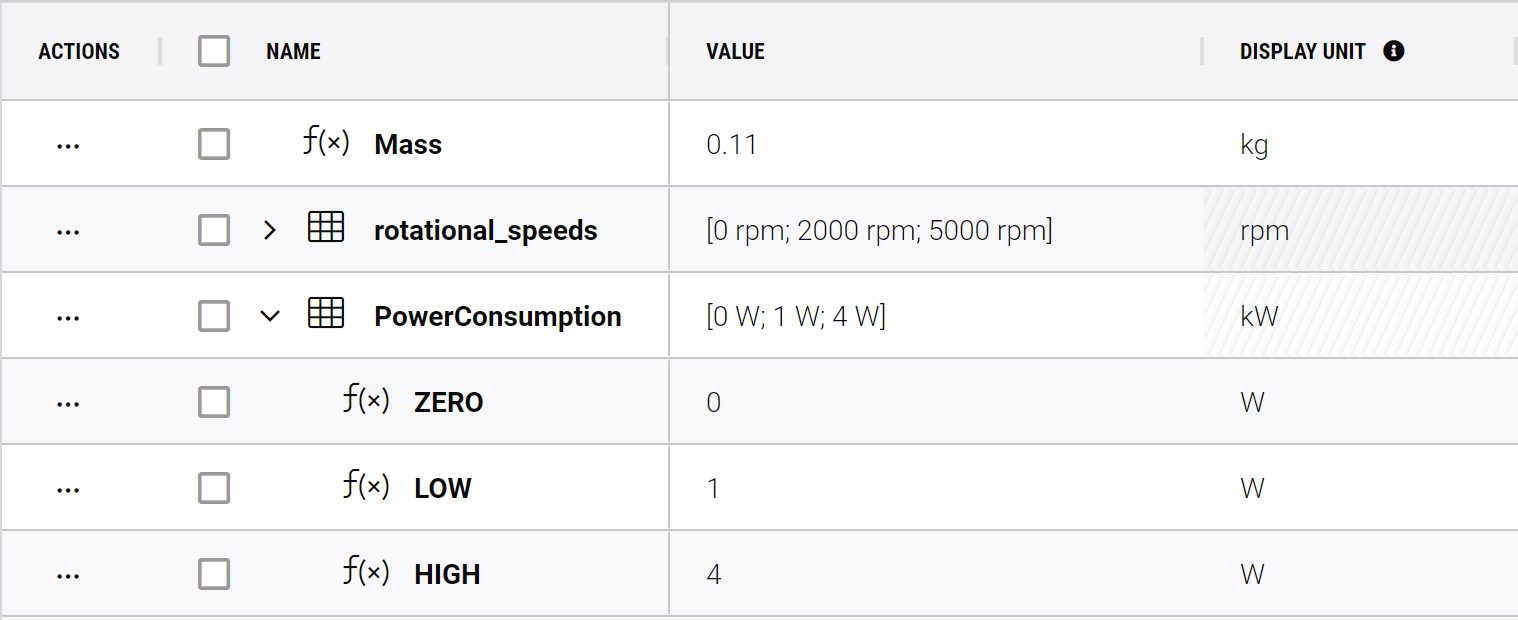
Then, change the values of the power consumption of Motor and Speed_controller in the different modes as shown in Figures PowerConsumption Motor and PowerConsumption Speed_controller.
Motor:
ZERO= 0WLOW= 1.0WHIGH= 4.0W
PowerConsumption Motor
Speed_controller:
ON = 0.1W
OFF = 0W
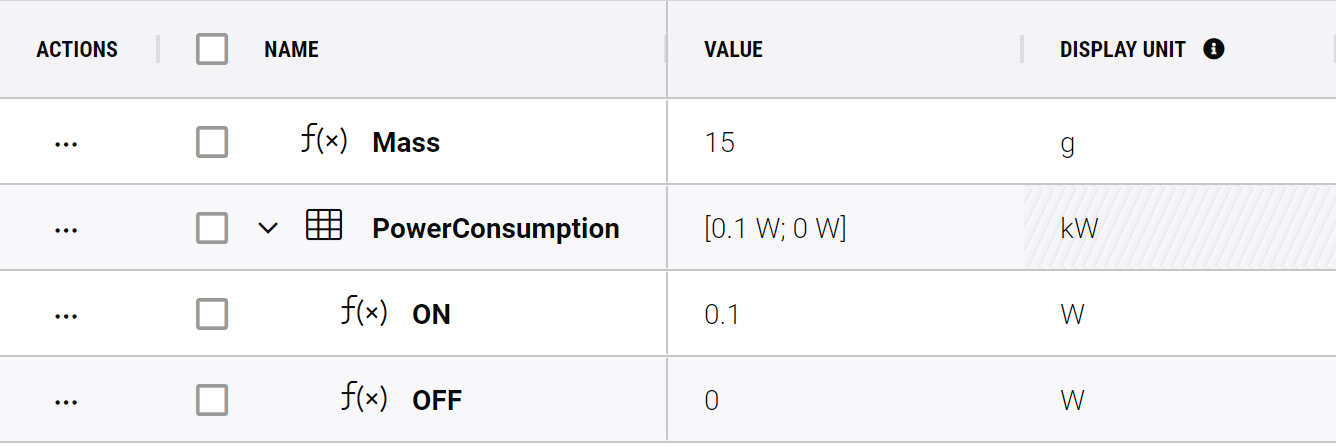
PowerConsumption Speed_controller
(3) Link the Modes
States of a system can depend on each other. This is why in the Requirements and Systems Portal you can link modes that belong together.
Create a connection between Fan-states and the modes of Motor and Speed_controller (see Figure Linking Modes).
Go to the Fan Block (1)
Go to the
Modelists(2) tab from the top bar and click on the modestate(3)Click on the linking symbol (4)
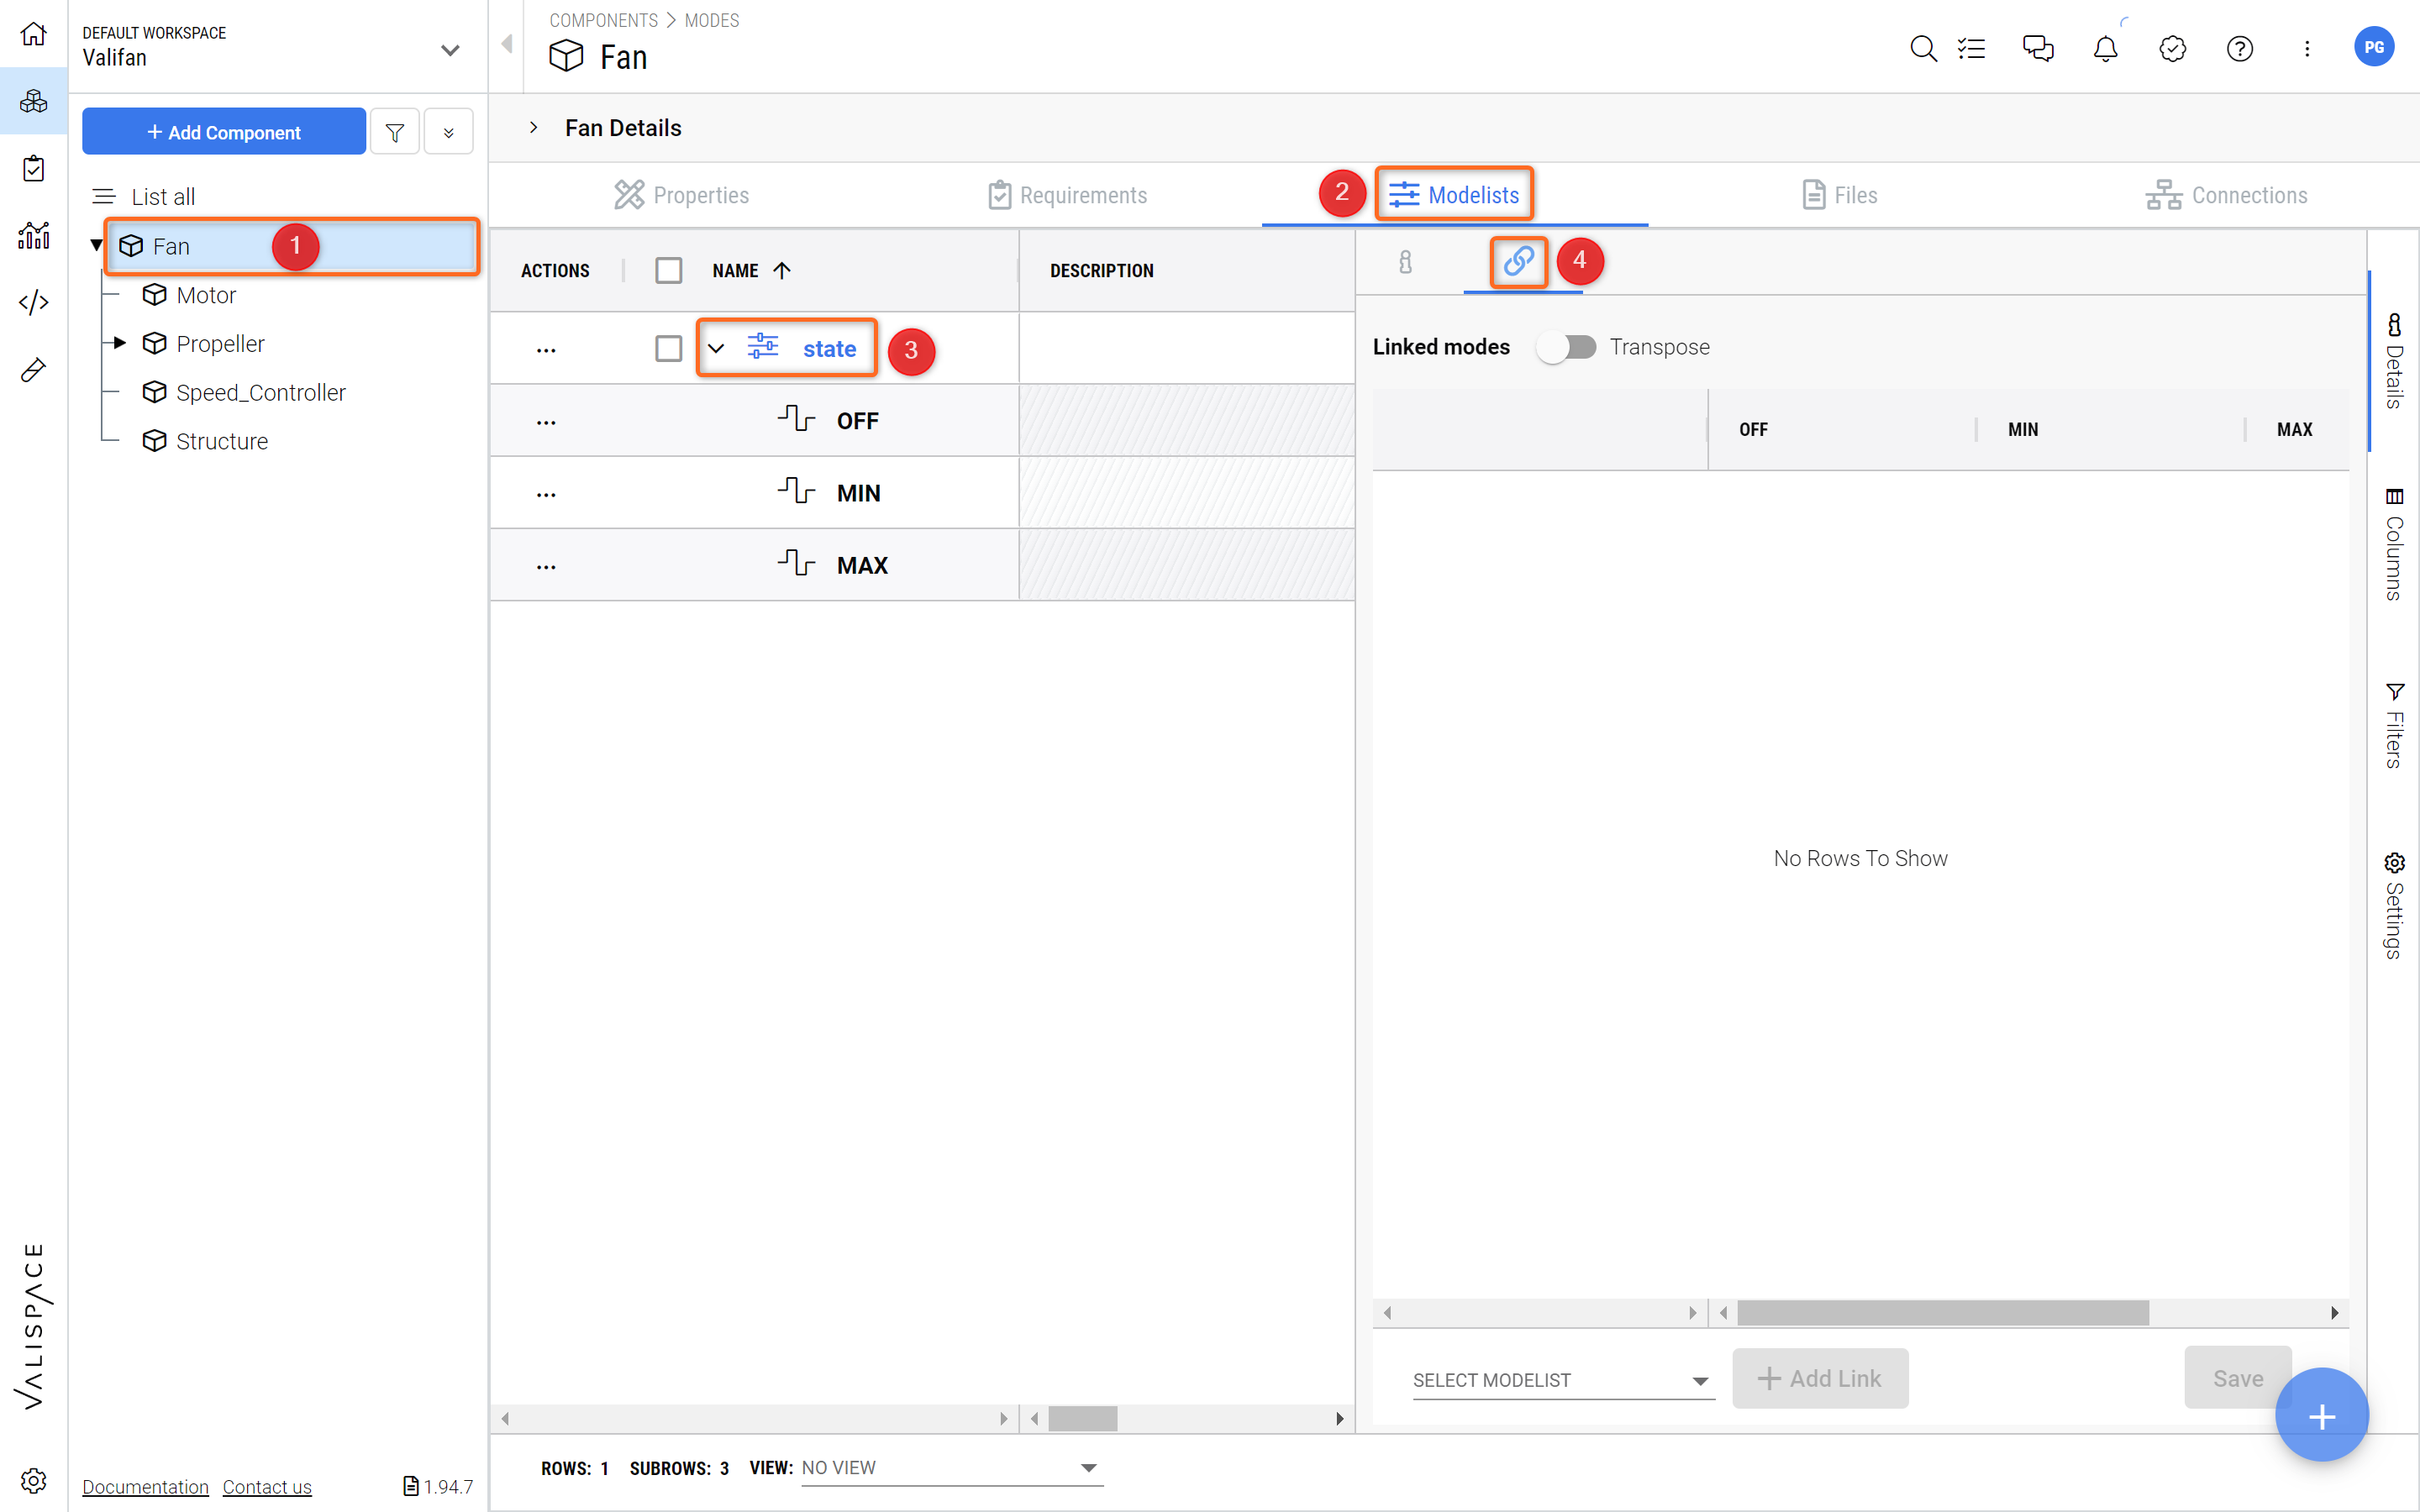
Linking Modes - See how you can link modes between different Blocks.
Click on
Select Modelist, selectSpeed_controller.power_modesand click+ Add LinkClick on
Select Modelist, selectMotor.speed_settingsand click+ Add LinkNow select the links between the Modes as follows and don’t forget to save:
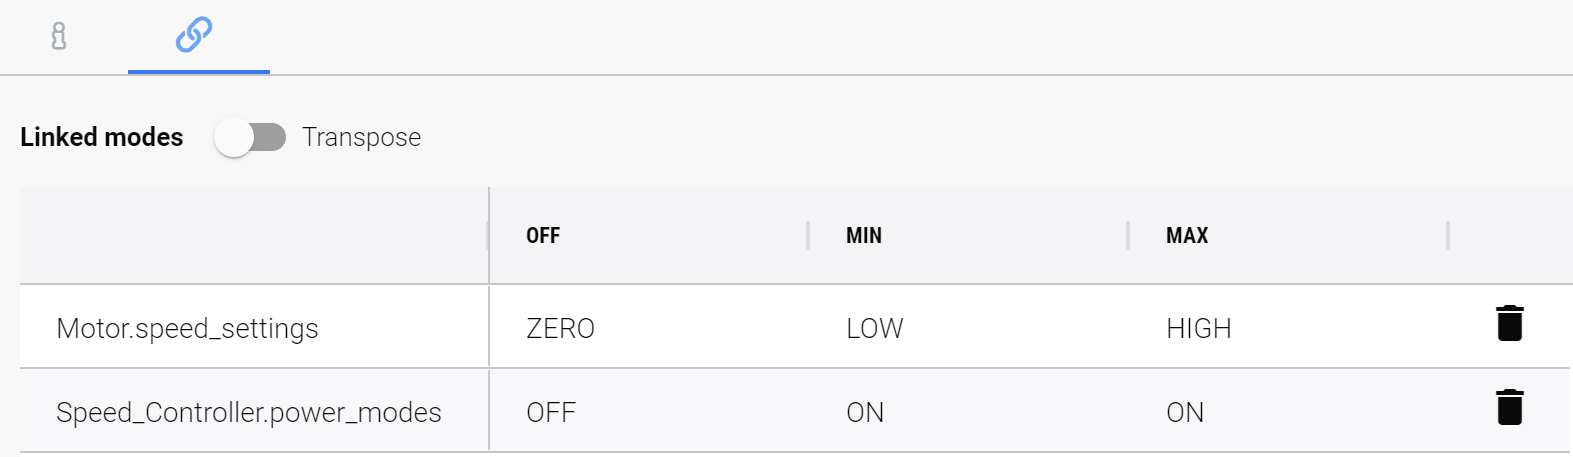
Linked Modes and their States - Here you can set up how the modes are linked and how each property is added up to the main Mode.
Click on the Fan Block. Go to the Properties tab. After the Requirements and Systems Portal has finished its calculations, you can observe that the Fan PowerConsumption has changed to the following values:
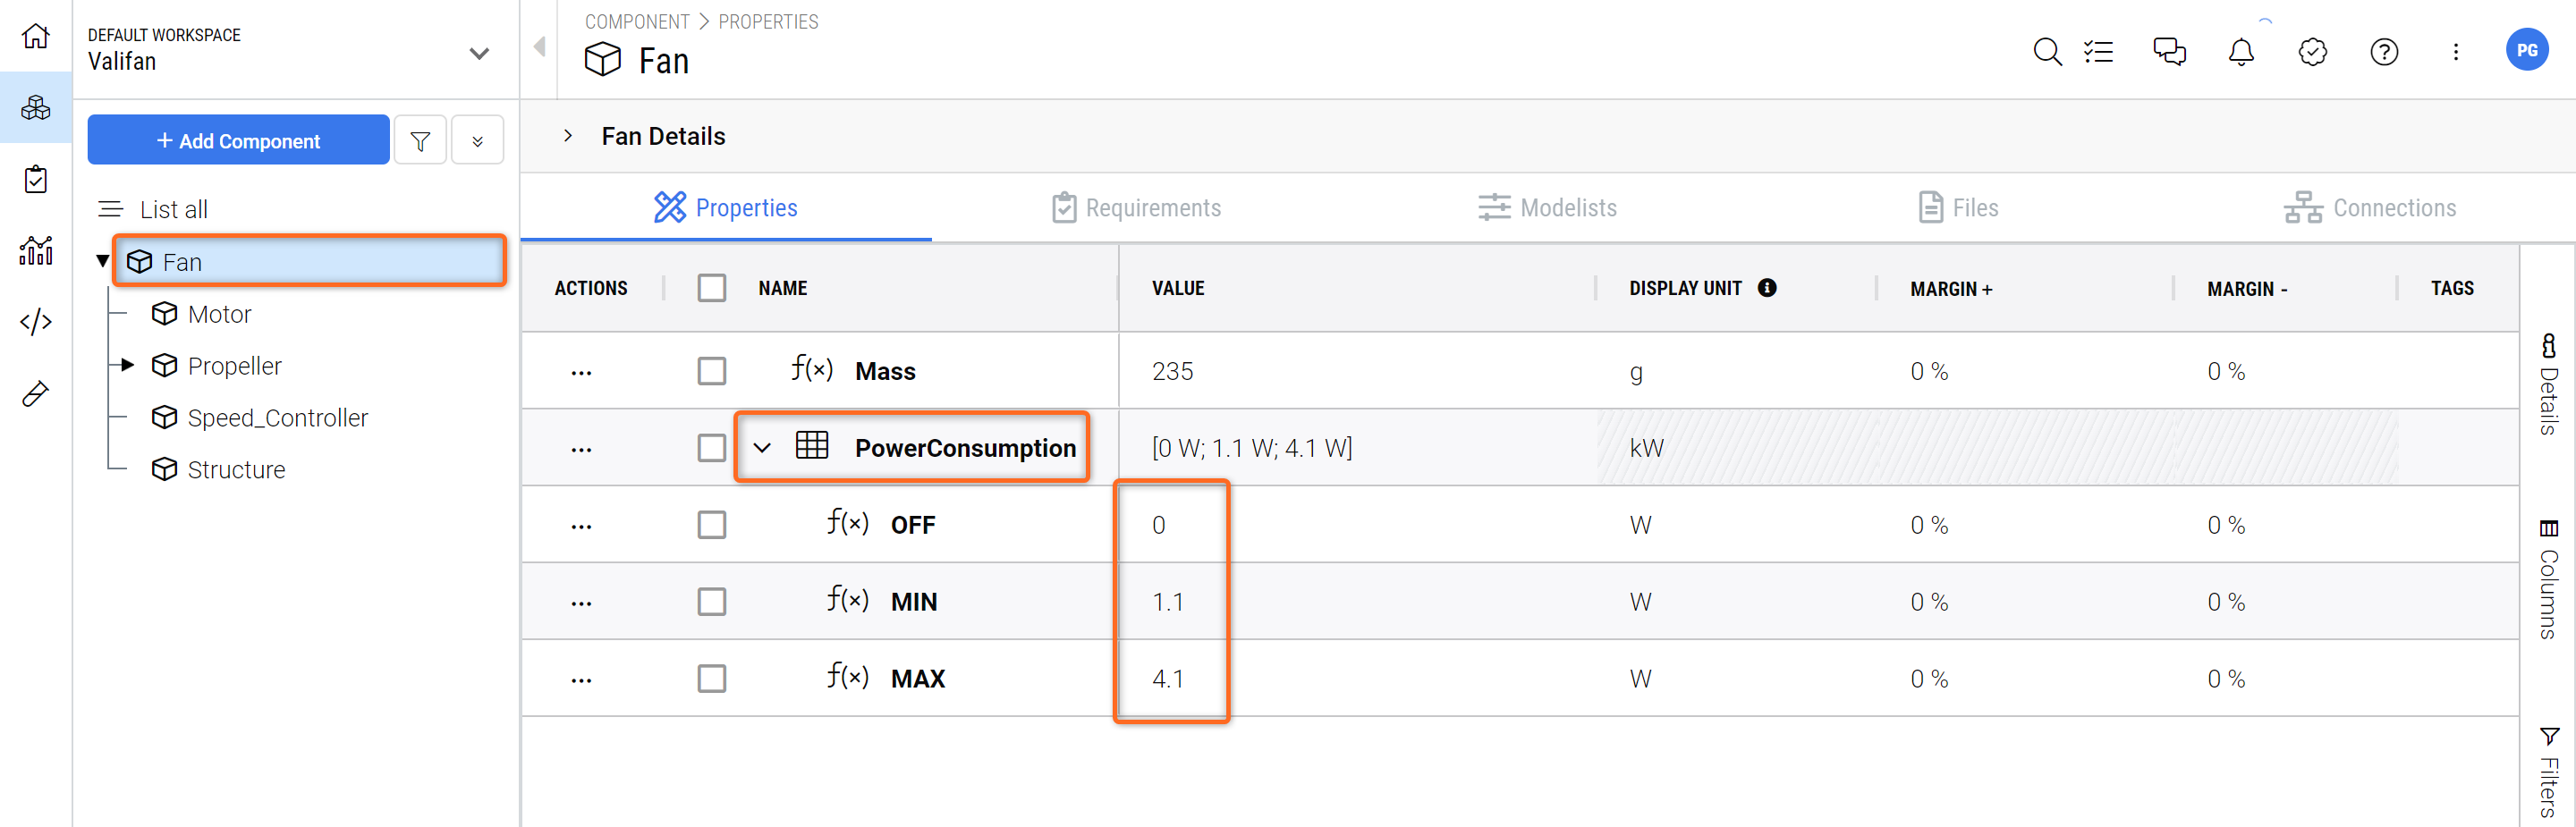
Fan PowerConsumption Values - Depending on the subsystem properties the main PowerConsumption is calculated. Try changing some PowerConsumption values on the Motor and Speed_controller to see this in action.
Next Steps?
Congratulations, you now know your way around the Requirements and Systems Portal!
You can continue improving your Desktop Fan project. Here are some ideas:
How about creating a simulation to calculate the resulting air displacement depending on the fan modes? You can directly access all Valis from Matlab, using the Matlab Toolbox
Add a solar panel Block to make the fan portable. You can make the maximum rotational speed dependent on the sun angle of the solar panel.