Fan Tutorial 3a - Verify System - V&V Module
In the context of this documentation “Valispace“ will be called “Requirements and Systems Portal“.
Before moving on with this part of the Tutorial please check, which type of Verification Flow is active in your Requirements and Systems Portal! There are two ways of verifying Requirements, through Verification and Validation (V&V) Activities and through Verification Methods (VMs). The V&V Activity flow will become the default one, whereas the VMs flow will be deprecated over the next months.
To check which one is active, please hover over the little test tube icon in your Module sidebar on the left:

If what you see looks like this ![]() , your admin has enabled the Verifications & Validations Module. Please continue with the Fan Tutorial 3a - Verify System - V&V Module.
, your admin has enabled the Verifications & Validations Module. Please continue with the Fan Tutorial 3a - Verify System - V&V Module.
If what you see looks like this ![]() , your admin has enabled the Test Module. Please continue with the Fan Tutorial 3b - Verify Fan Tutorial 3b - Verify System - Test Module.
, your admin has enabled the Test Module. Please continue with the Fan Tutorial 3b - Verify Fan Tutorial 3b - Verify System - Test Module.
Both Modules provide similar features but with a different look.
This part of the tutorial will discuss how to conduct Verifications and Validations (V&V) activities using the Requirements and Systems Portal. In our previous tutorials, we created Requirements and Blocks for our ValiFan project (Specify Product and Design System). This tutorial will explain how:
How to create V&V Activities
How to link V&V Activities to Requirements
How to run an Activity
Demonstrate the automatic verification methods in the Requirements and Systems Portal.
This part of the tutorial takes approximately 20 - 35 mins to complete. All the values and the requirements provided are arbitrary.
Before we begin, let's review the basics of Verification & Validation in the Requirements and Systems Portal. Requirements are connected to one or more systems, or subsystems. These systems are verified using V&V Activities. A Block's requirement can be verified with single or multiple V&V Activities. Each Activity can be linked to one or several Requirements and can verify one or more Systems.
(1) Creating and Loading Views for Verification
The Requirements and Systems Portal offers various pre-selected attributes, such as Identifier, Text, Parents, Children, Type, State, V&V Status, V&V Activities, V&V Blocks, Tags, and Properties. However, this may lead to excessive horizontal scrolling on smaller screens. Users can generate custom views with only the essential attributes to streamline the Verification process. Let's create a new view for the Verification and load it.
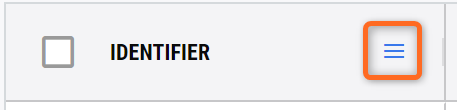
Hover over any one of the attribute name cells. A new icon shows, as shown in the image below. Click on the icon to open the menu.
Once you click on the icon, you have a new dialog box, Select the last icon with three vertical windows.
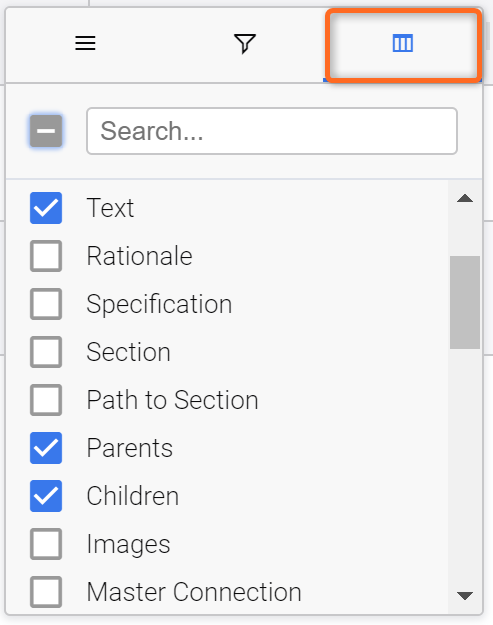
In this box, unselect all the attributes and select only the following attributes: Text, Parents, Children, Applicable Blocks, V&V status, V&V Activities, V&V rules and Tags.
The user can also select/unselect the attributes through the “Columns” on the right side. We have shown this approach to make you also aware of the additional options you have on the column headers, such as Filters and table sizing options. For instance, the funnel symbol provides filtering options for a specific column.
Upon finishing, right-click on the tables to open the tables menu. In the dialog box, select
Save View.
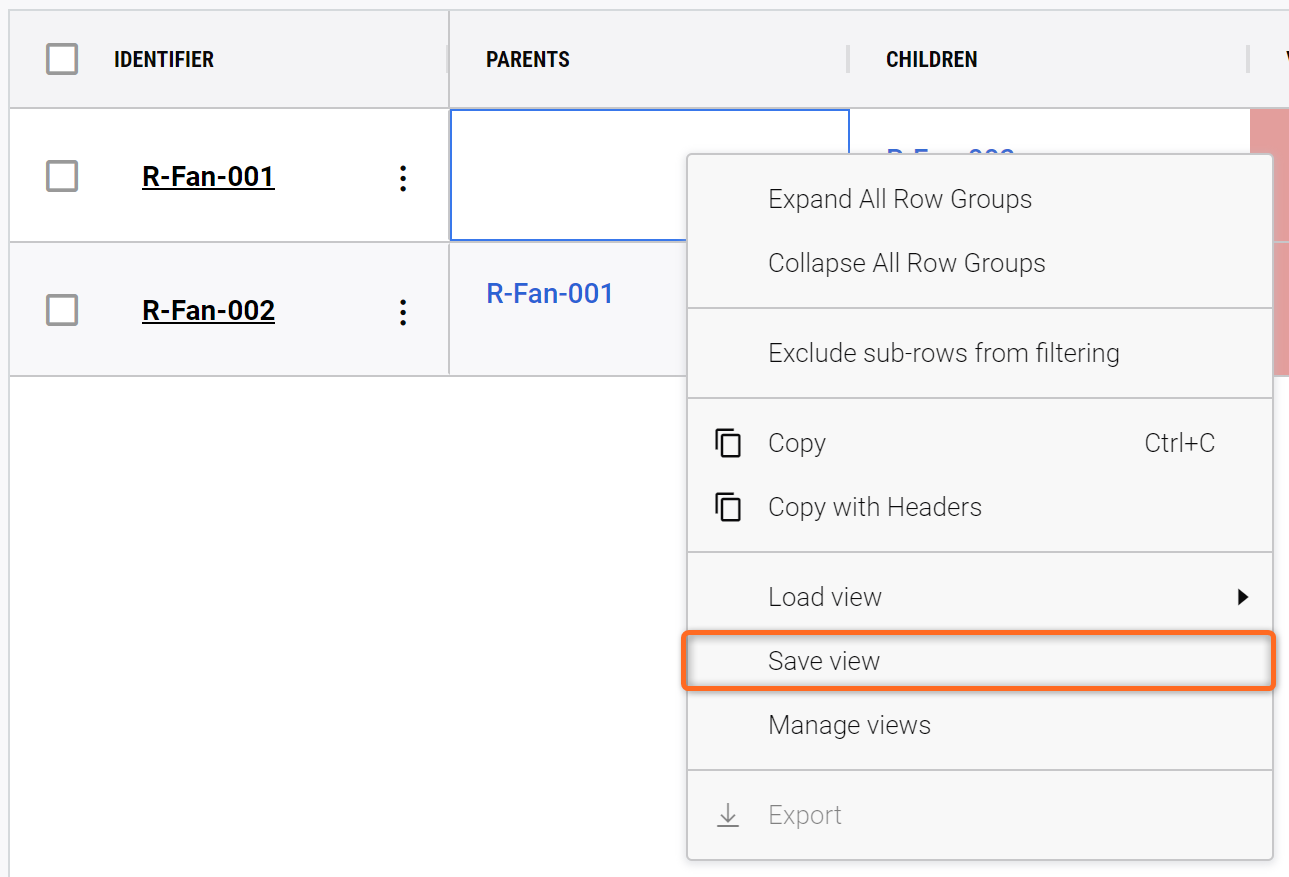
Save View - By saving a View all selected columns, column widths and applied Filters will be saved in a dedicated View.
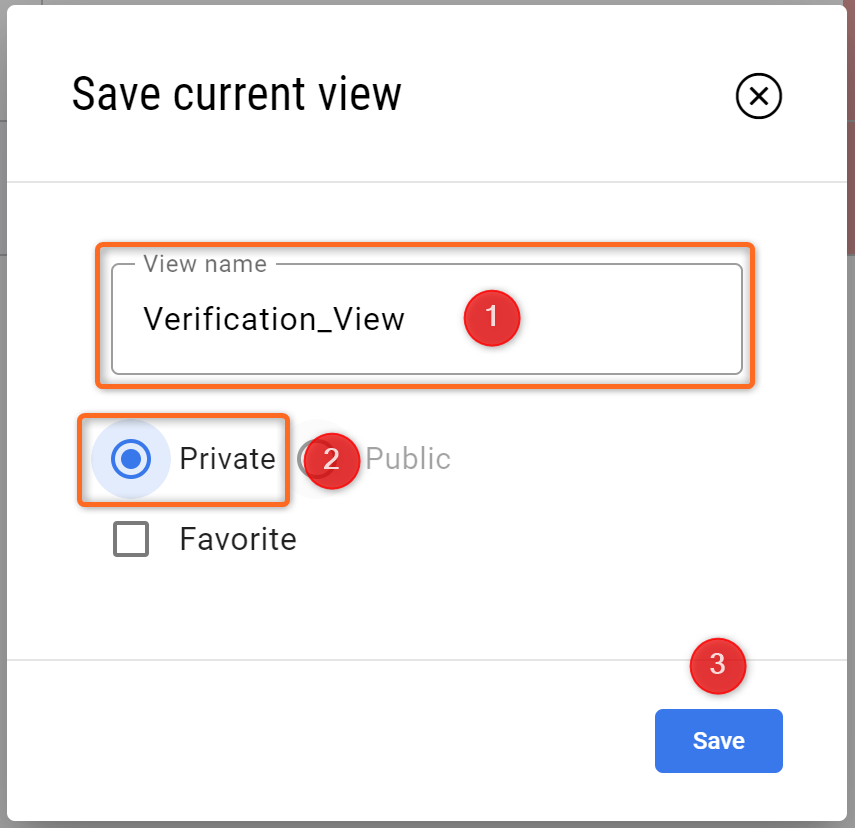
A new dialogue box opens where you can input “Verification_View” in
Save as new(1), selectPrivate(2), and then clickSave(3).
Once the view is saved, the user can now load them by right-clicking on the tables, selecting the option
Load Viewand selecting theVerification_Views.
(2) Adding a Verification & Validation Activity to a Requirement
The Requirements and Systems Portal offers three columns dedicated to the Verification and Validation of Requirements (apart from additional columns like Compliance and Compliance Comment or even Custom Columns related to verification activities):
V&V Status (Indicates the overall status of Verification of the Requirement)
V&V Activities (Displays the associated V&V Activities to the Requirement)
V&V Rules (Automatic Verification based on Vali comparison between Requirement and System Design Module)
Please search for these columns and arrange them so you will see the following in your Requirements Table.
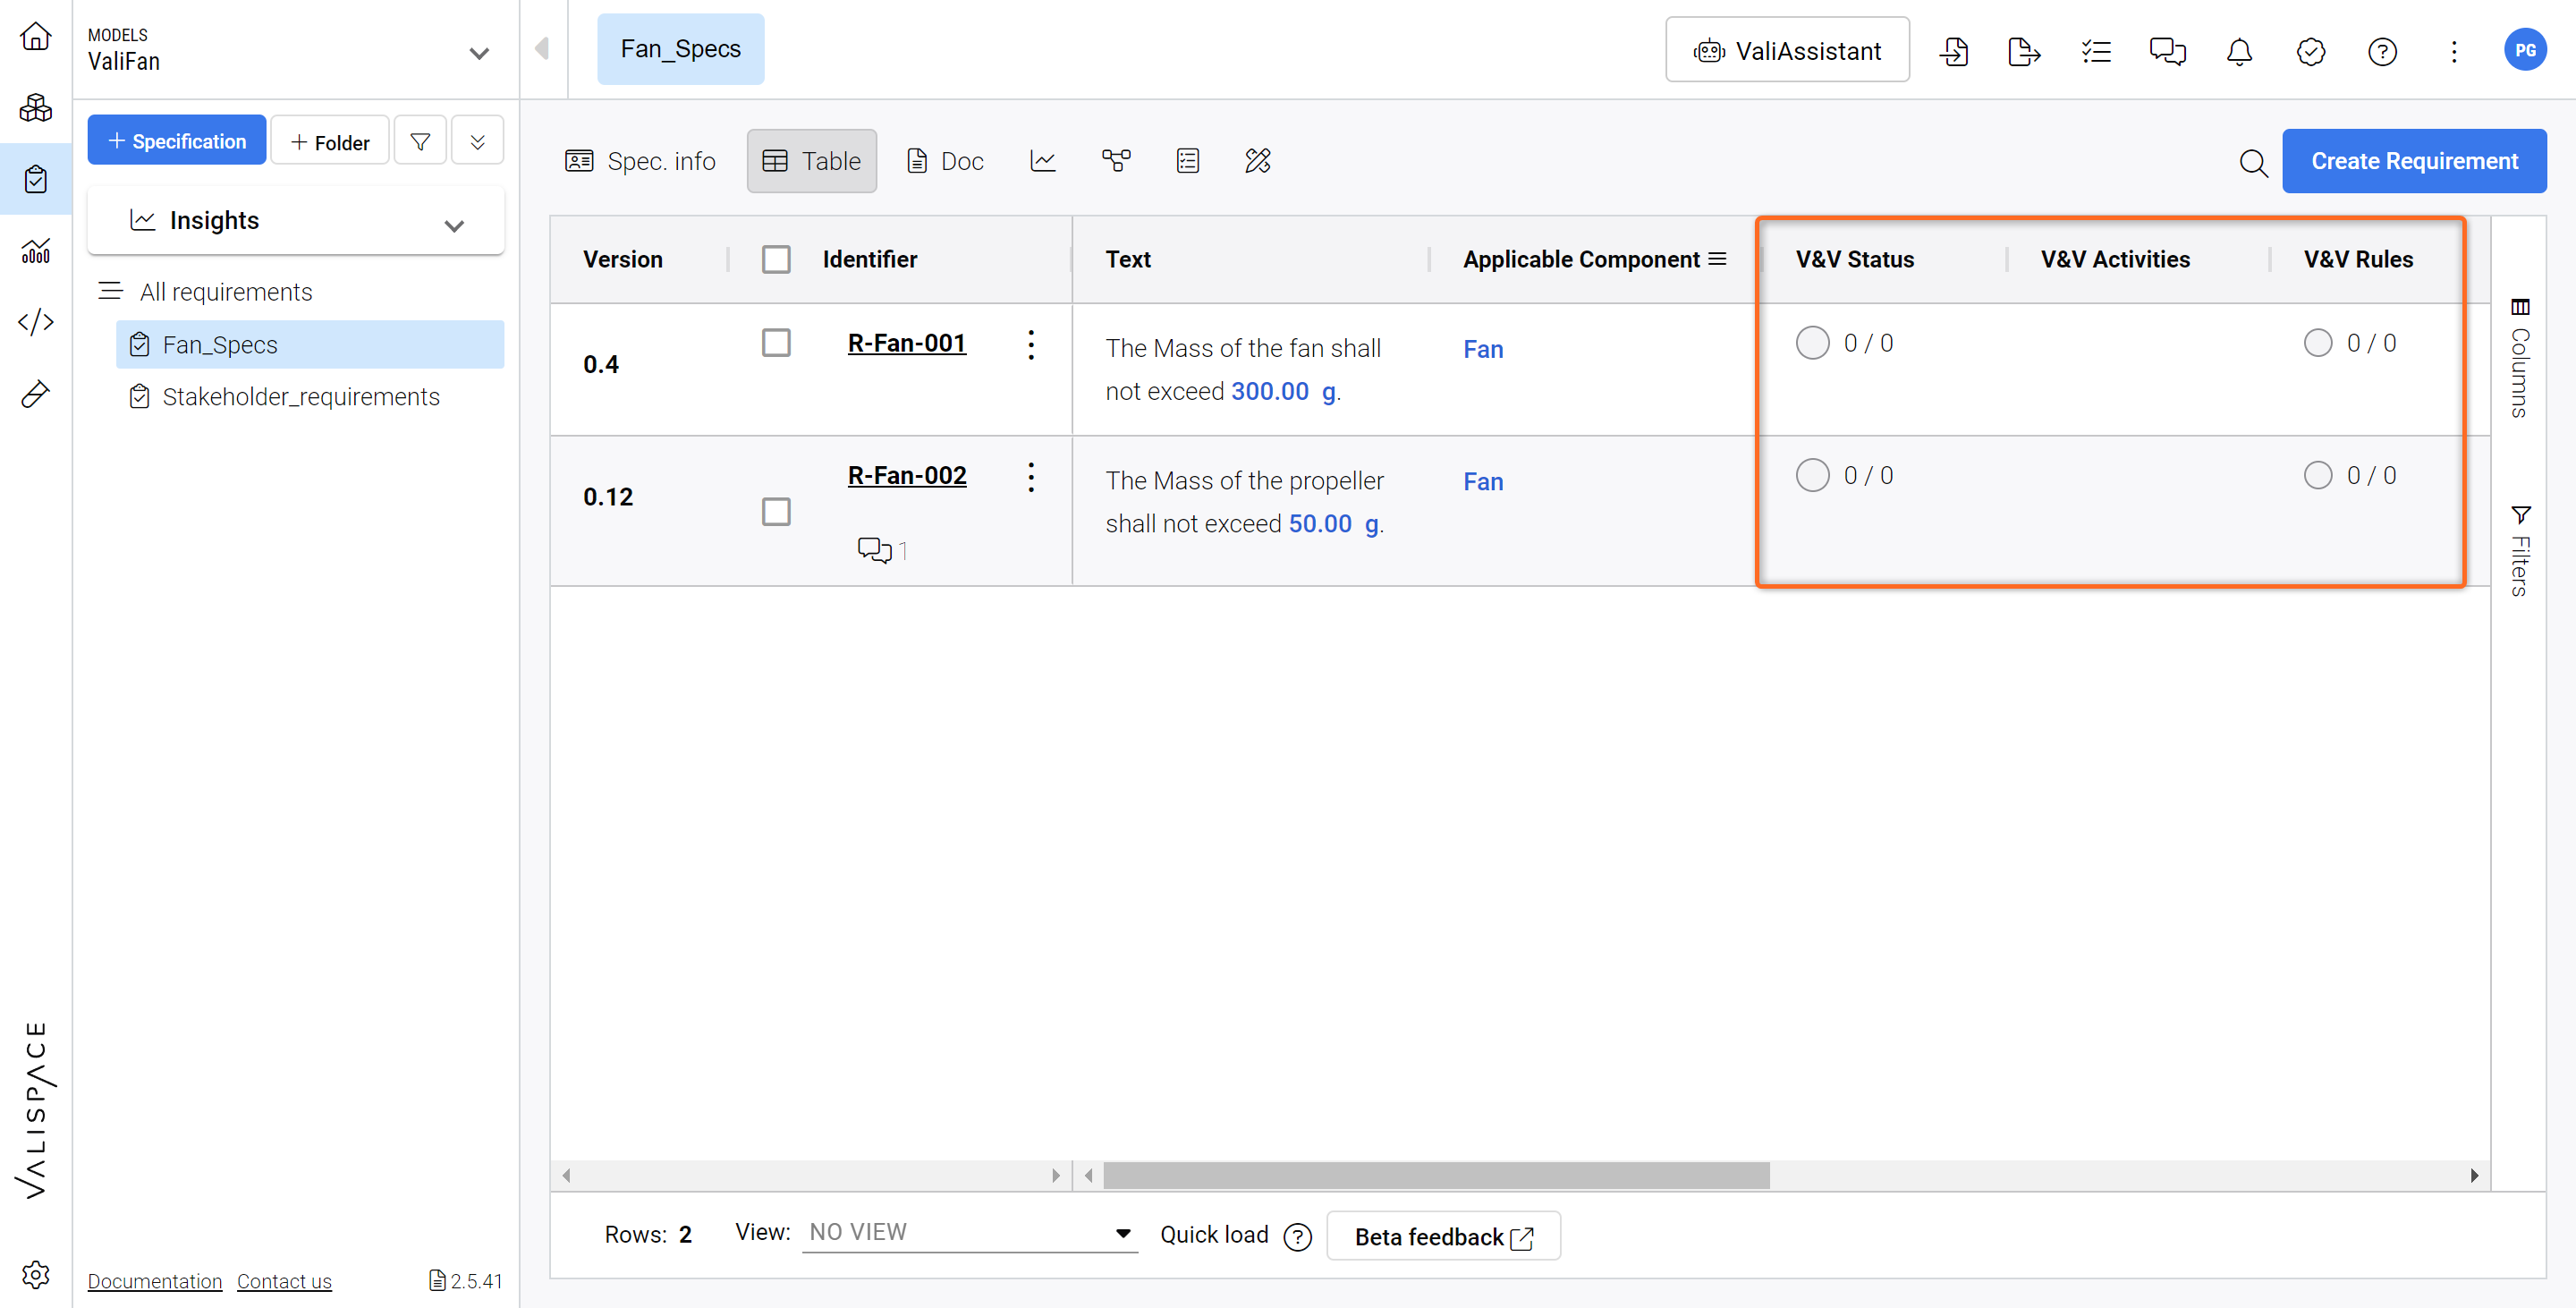
Necessary columns for Verification and Validation
Now, let’s head over to the “Verifications & Validations Module” to set up a new “V&V Activity”. For this, click on the corresponding module icon in your left sidebar (1) and then select “+ V&V Activity“ (2).
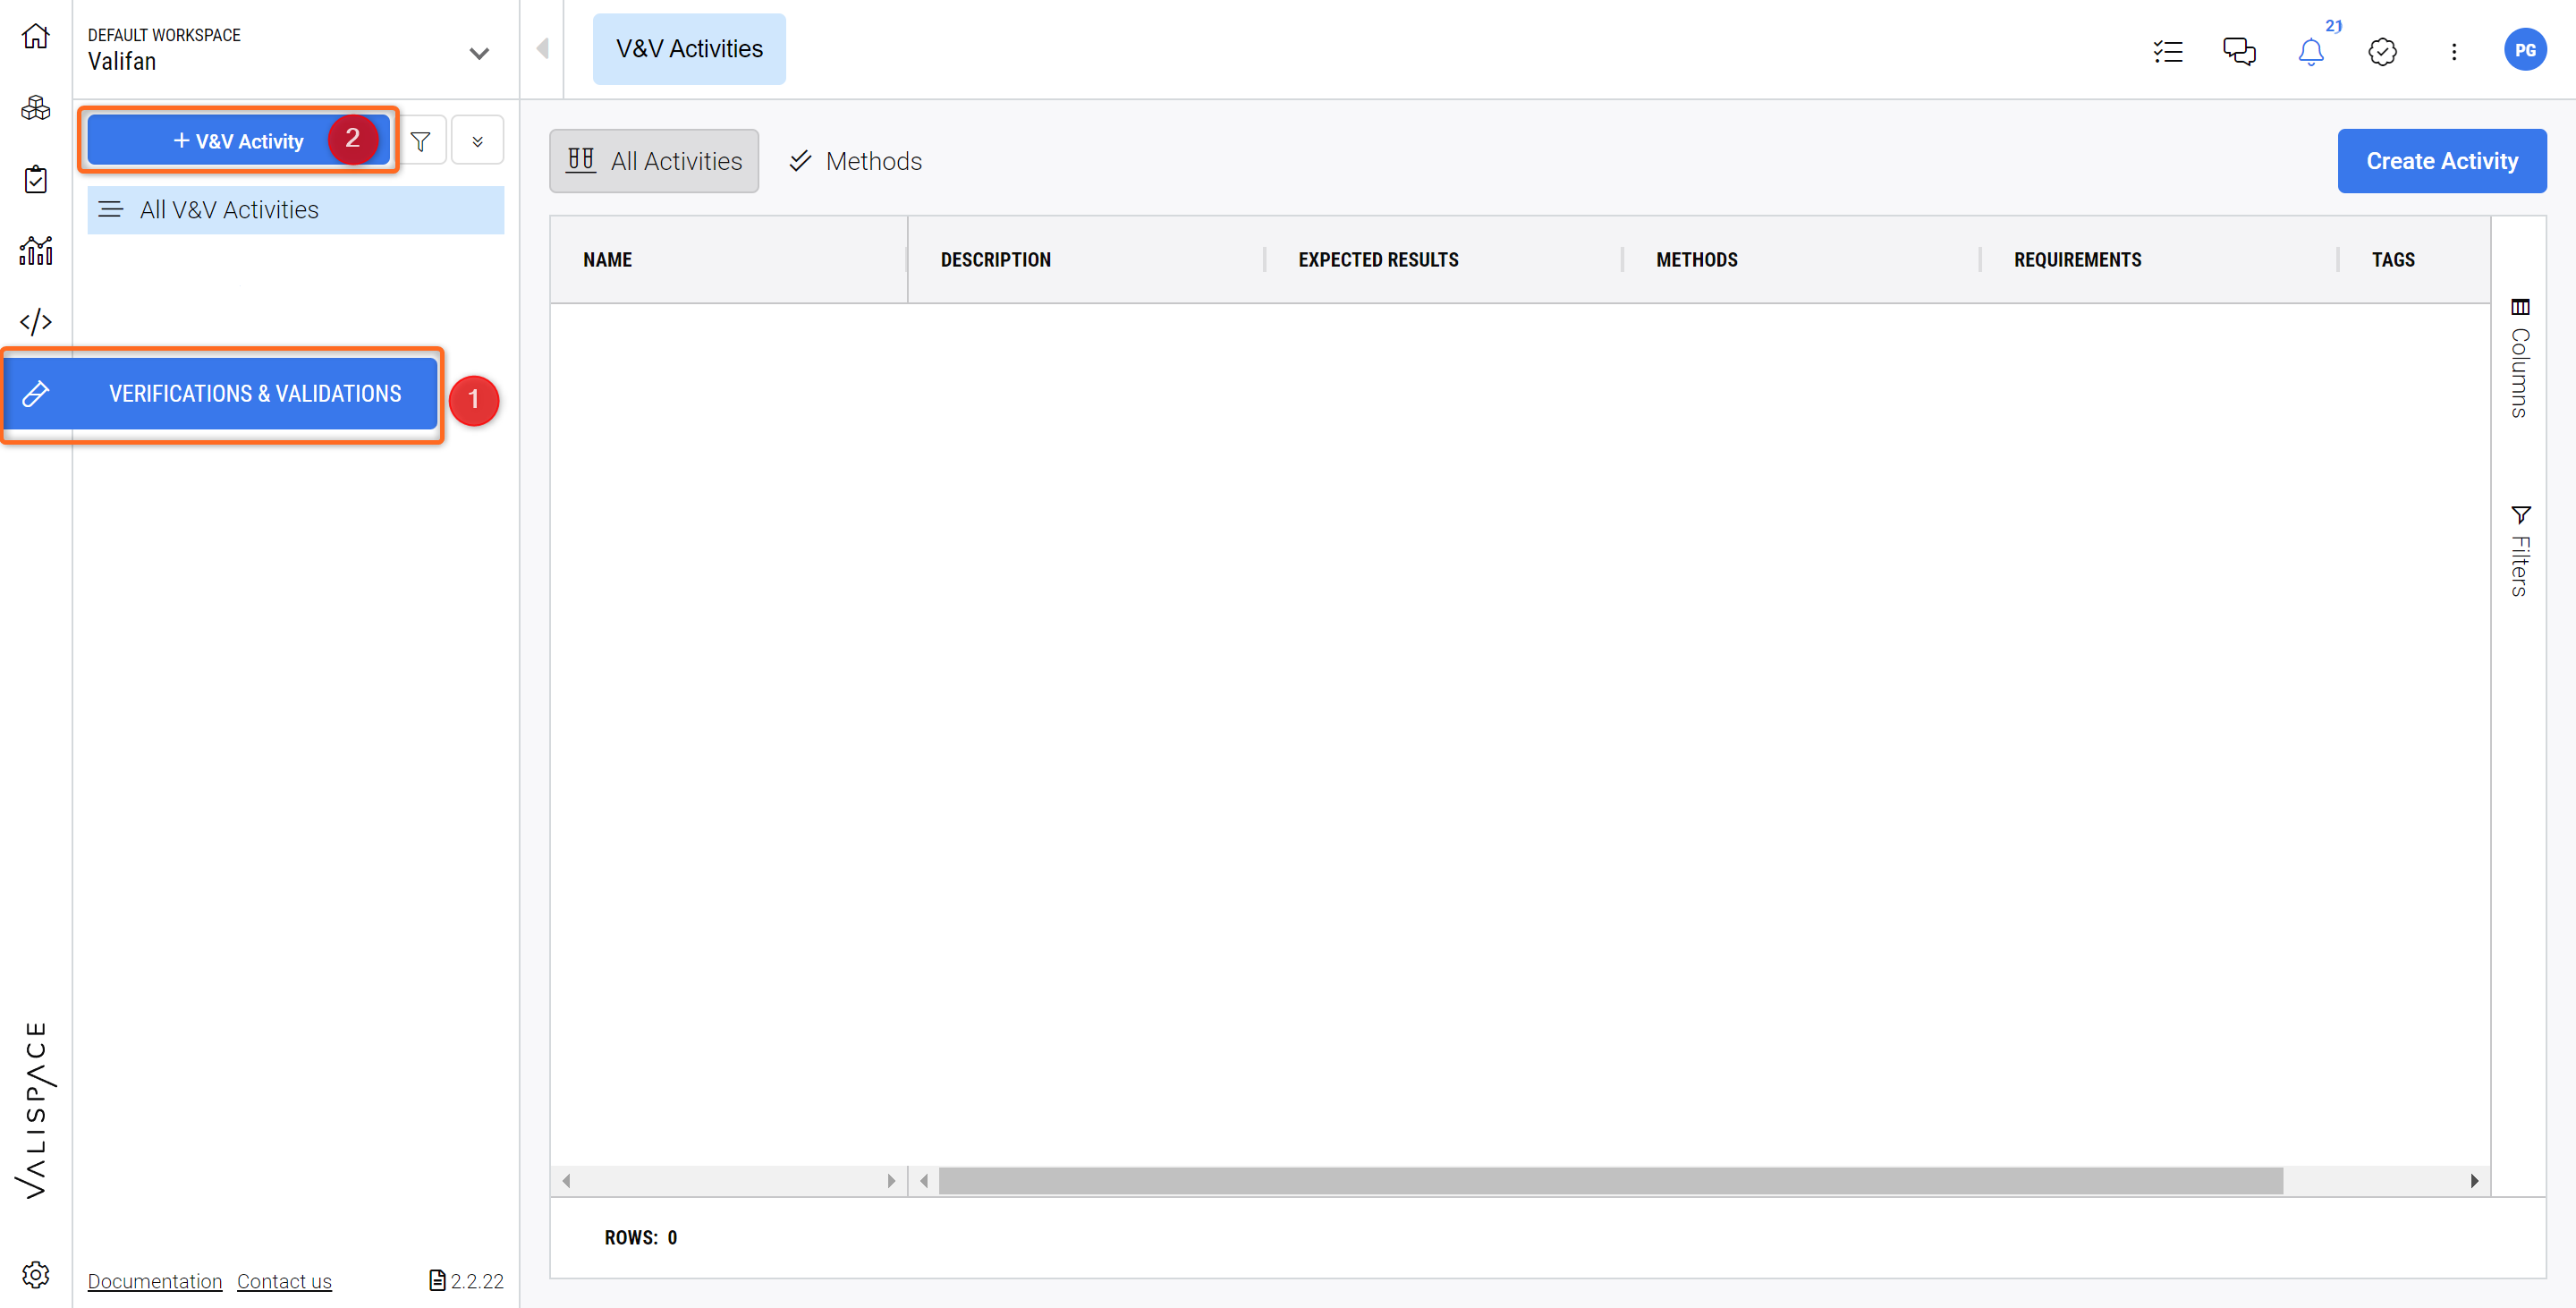
The Verifications and Validations Module
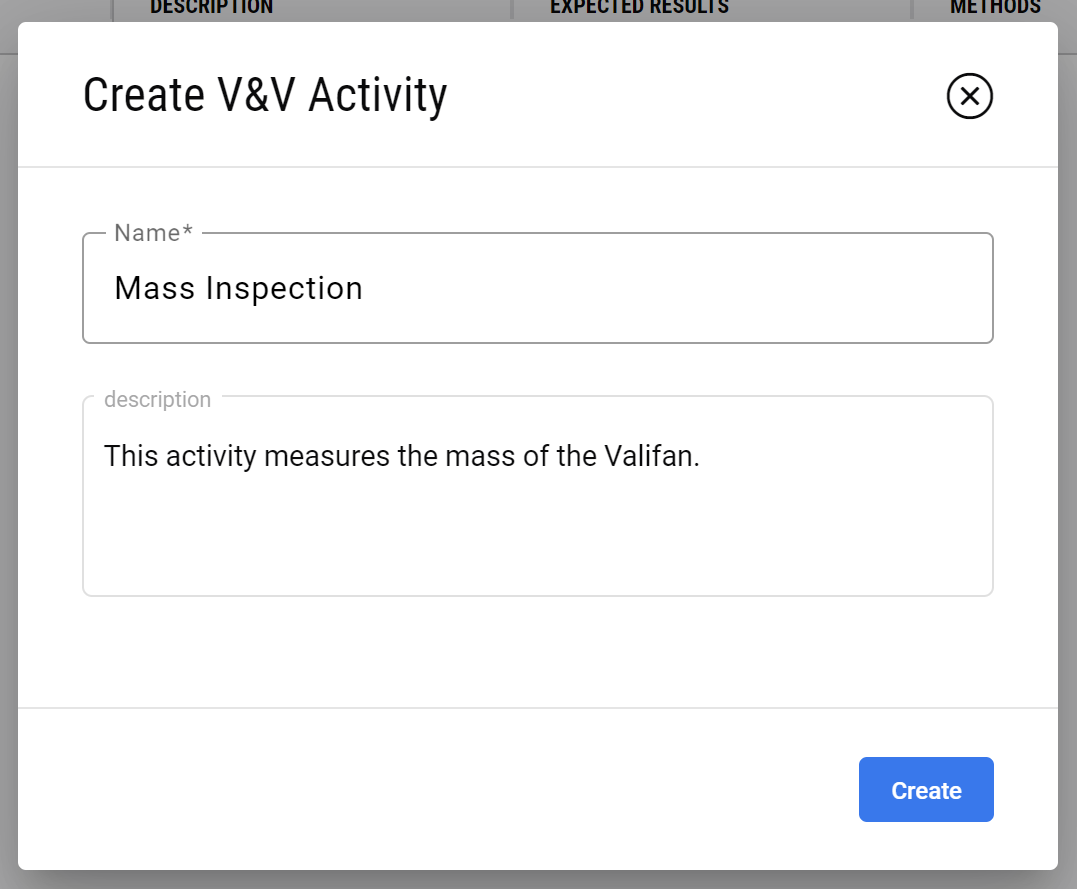
After this, in the pop-up box that opens, let’s define a simple Mass Inspection Activity.
After clicking on “Create“, the Activity is created. Now, we are going to link this Mass Inspection Activity to one of our Requirements from the Requirements Module:
Click on the name of the activity “
Mass Inspection” in the “Name” column.Select the “
Requirements Statuses“ tab on the top.Click on the button entitled “
Link Requirement“.In the pop-up box, expand the Requirement list and search for “R-Fan-001” and select it.
Additionally, expand the Block's list and associate the “Fan“ system.
Finish the linking of those elements by clicking “Add“.
The Requirement will appear as an entry in the table.
Let’s assume you carried out the Mass Inspection as per the instructions of the Activity and now we want to set the Verification Status to “Verified“.
For this go into the “Status“ column and double-click on “Not Set“, and select “Verified“ in the dropdown.
Please check out the video below to get an overview of these steps.
It is also possible to upload Evidence like Reports and other Documents when going into the specific Activity in the V&V Module and access the Runs.
With this, we have successfully created a manual verification Activity. Let us now look at how to have automatic Verifications on our Requirements that check System Design Valis against Requirement Valis.
(3) Automatic Verification Method through Rules
Most technical developments are designed against strict requirements, e.g., mass, power consumption, budget, etc. The Requirements and Systems Portal maintains a complete overview of whether your design fulfils all of these technical parameters.
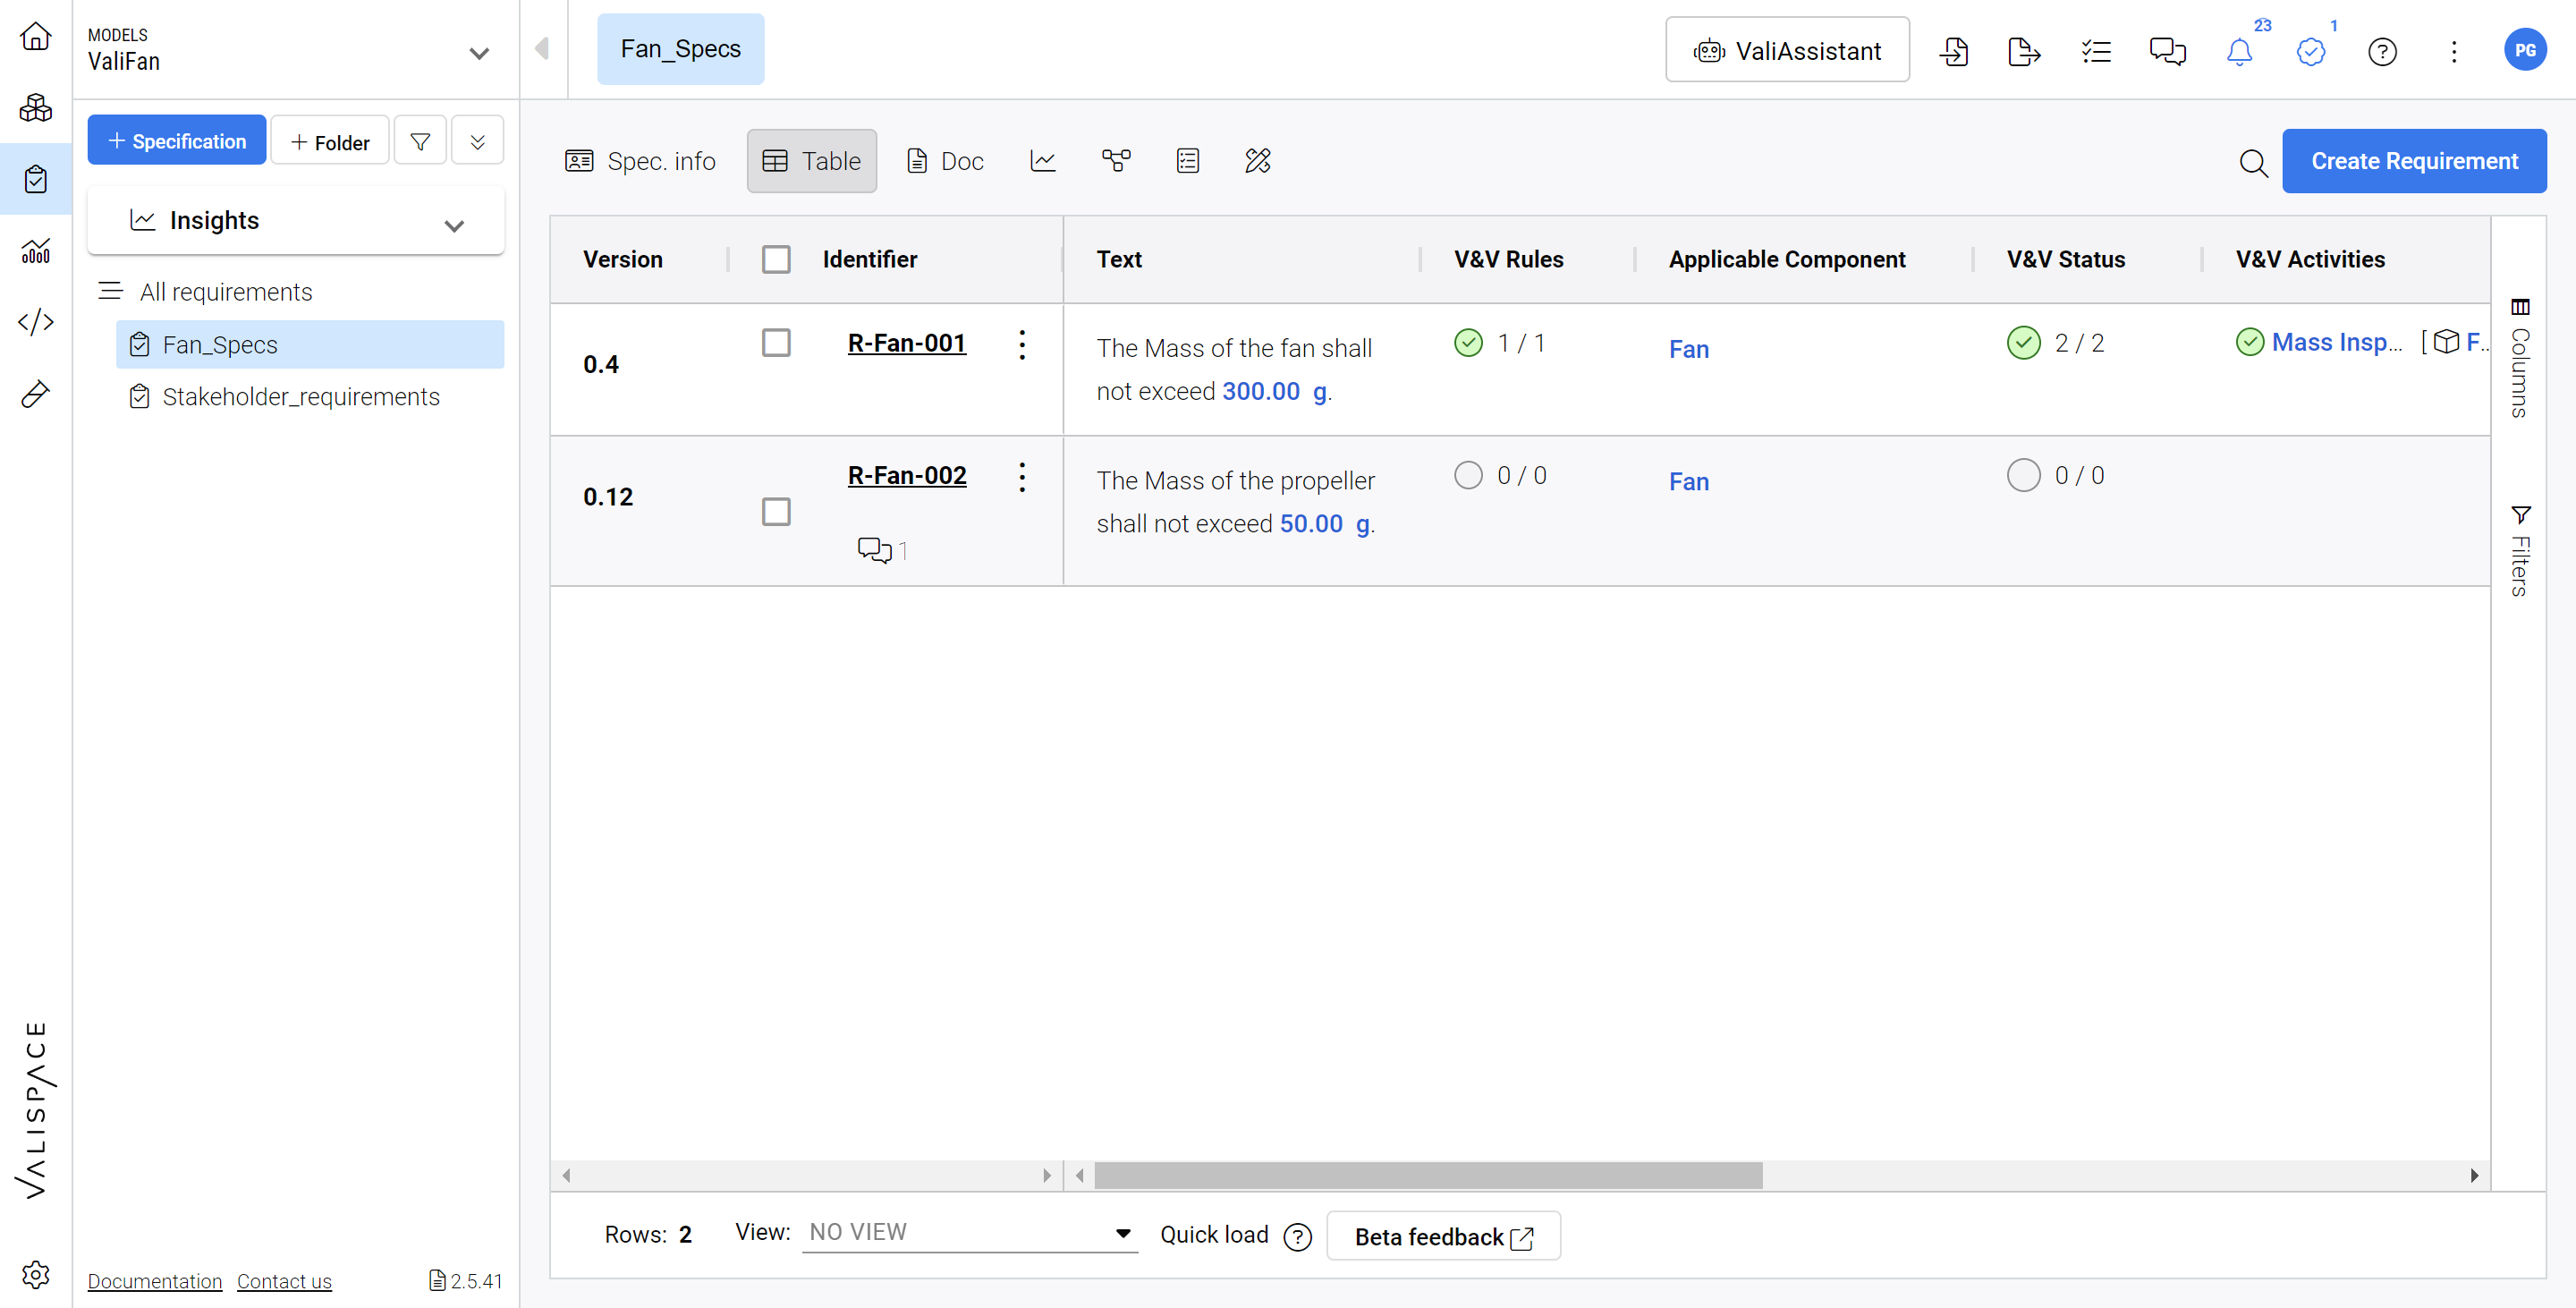
In this part, we are going to focus on the “V&V Rules” column. Please arrange your columns in the Requirements Module so they look like the following Figure.
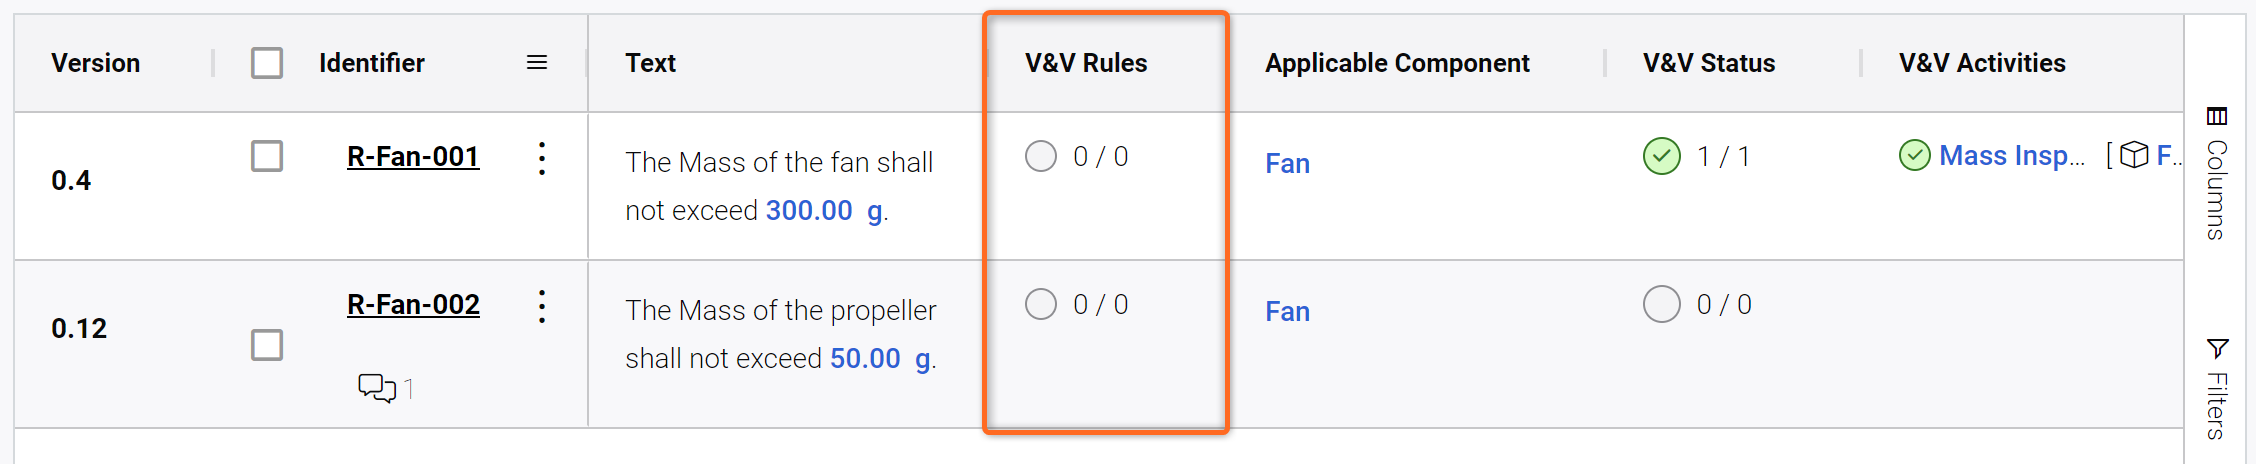
The V&V Rules Column - To set up the rules to compare Requirement Valis with System Design Valis.
Before defining the rule, please check the name of the 300 g Vali in your Requirement R-Fan-001 by hovering over the Vali like this:
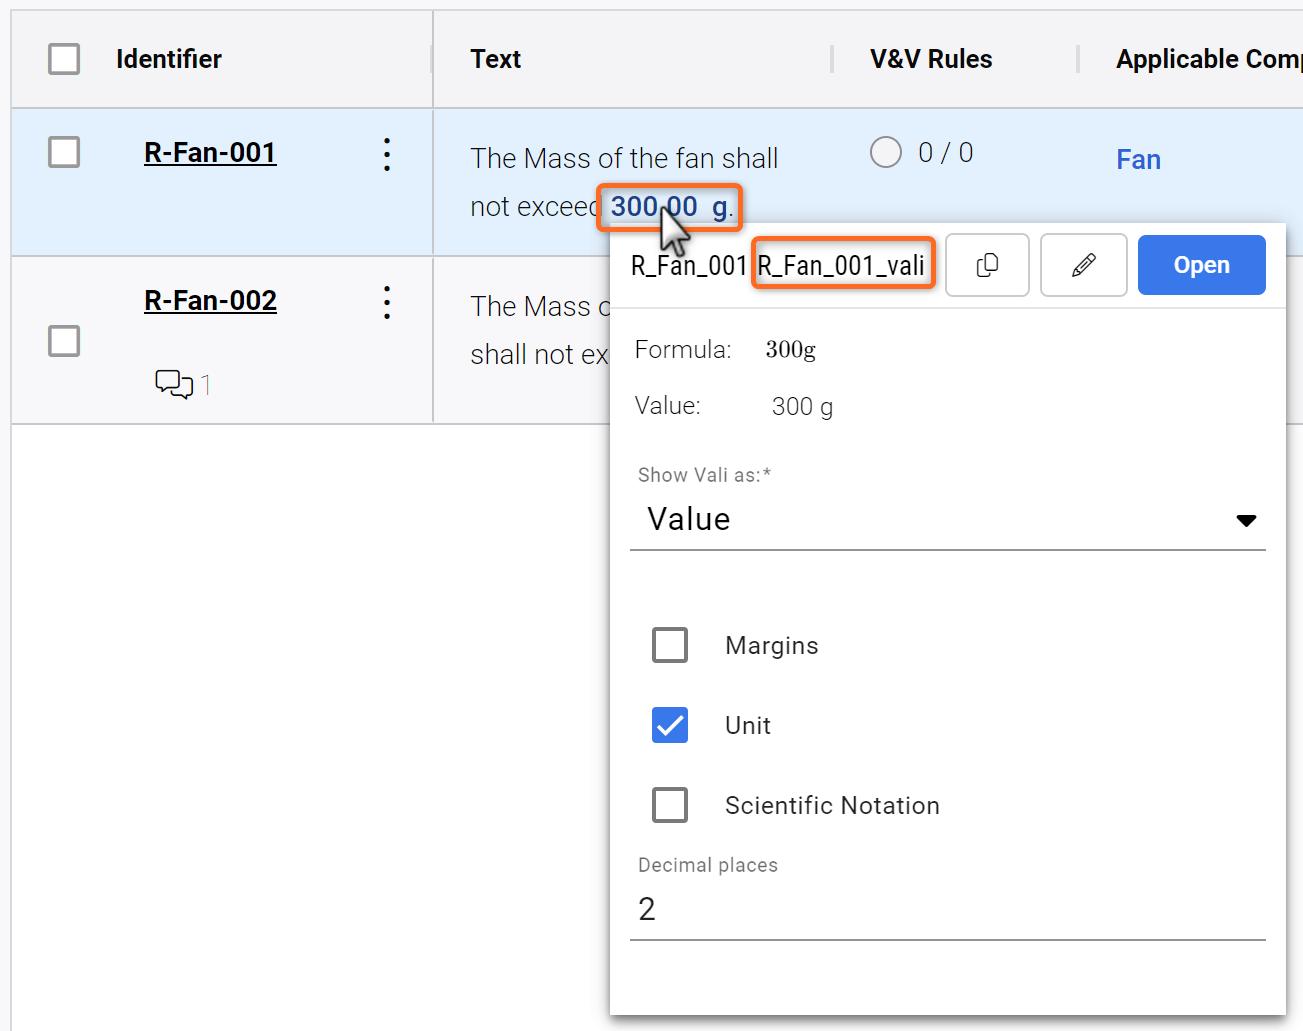
Obtaining information on a Vali in a Requirement.
Valis on Requirements can be edited by clicking on the pencil icon. You can adjust parameters such as name, decimal places to be displayed, margins etc..
Please note that in the next step we are going to compare this Vali with a Vali from the System Design Module.
Now, double click into the “V&V Rules” cell of the Requirement R-Fan-001. This will open up a pop-up window where you can define the Rules.
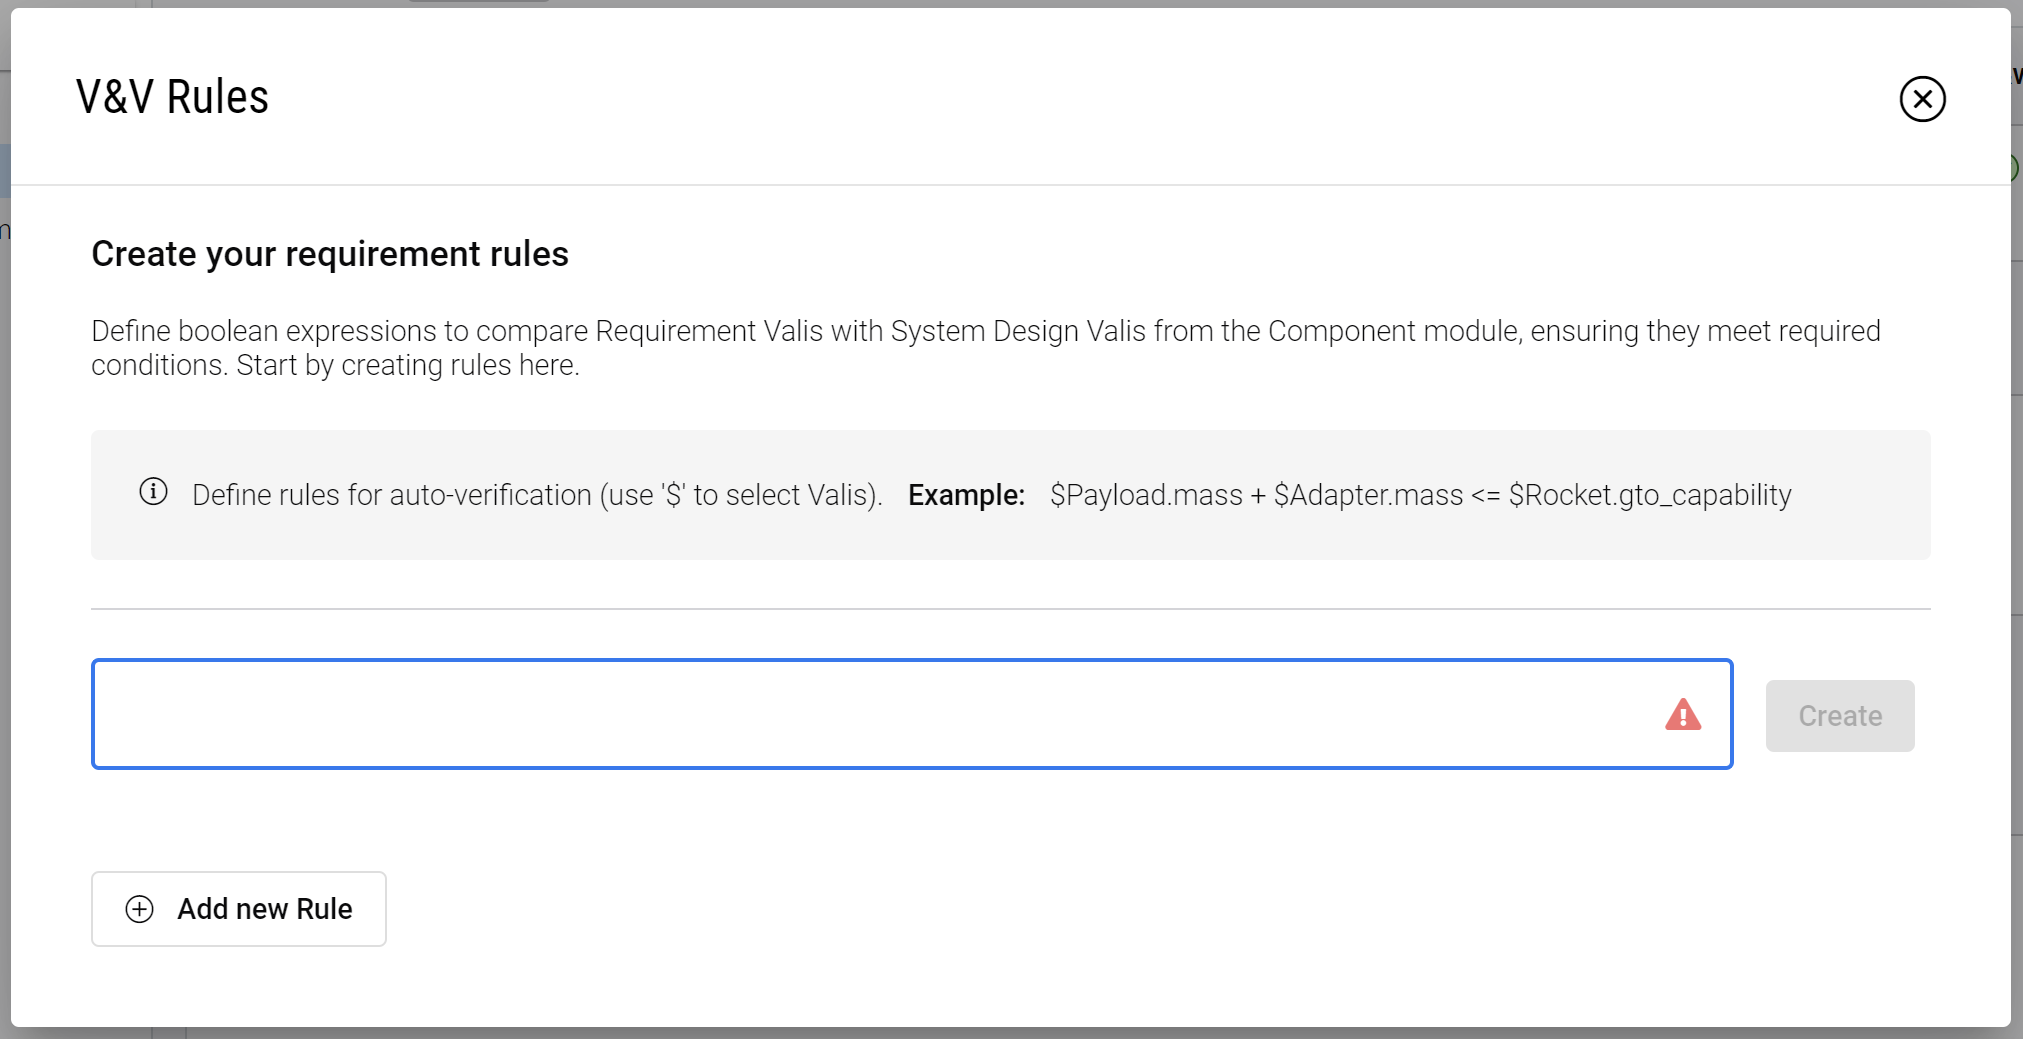
Here, we can define a rule to compare our Requirement Valifan Mass of 300 g with the Mass Vali of the Fan System from the System Design Module. Use the dollar sign ($) to reference the Valis. In the box that opens, you can search for Valis by typing their names. We are setting up the following relationship:
$Fan.Mass < $R-Fan_001.R_Fan_001_vali
This Rule compares the System Design Mass with the Vali from our Requirement.

Note how the Requirements and Systems Portal already fetches the real associated values below the Rule box.
After clicking “Create“, then “Save“, and then close the window. You will see that we now have one Rule (which is verified) associated with the Requirement and a total of 2/2 V&V Status (since the Mass Inspection Activity has also been verified previously).
Note that the Rule will continuously check on the Valis and will indicate whether the Rule is still verified or not. If either the Requirement Vali or the System Design Vali changes and the Rule is not verified anymore the Requirements and Systems Portal will indicate automatically that the Rule passed to Not Verified.
Try to change a mass Vali on the System Design Module so that the total Fan Mass is above 300 g and then check the Status of the V&V Rules.
Next Steps?
Congratulations, you now know your way around the Requirements and Systems Portal!
You can continue improving your Desktop Fan project. Here are some ideas:
Add Compliance to your requirements
Add a few parent/children relationships between requirements, check the Connections Graph, and notice the colour codes on the requirement.
Right-click on the Requirement Table and explore the “Views“ options as well as the Export options.